Quick Formatting and Printing in Excel
Quick Formatting and Printing in Excel. Formatting and printing tables and reports using Excel is a common task in office work, but it often takes a lot of time. Why? Because we usually check the product after pressing the print command, and then have to fix formatting errors many times afterward. UniTrain shares 3 basic steps to help you format and print effectively as follows:
STEP 1: Select the data range to print and adjust the header to be repeated quick Formatting
Select Print Titles in [Ribbon] Page Layout\Print Titles

Quick Formatting and Printing in Excel
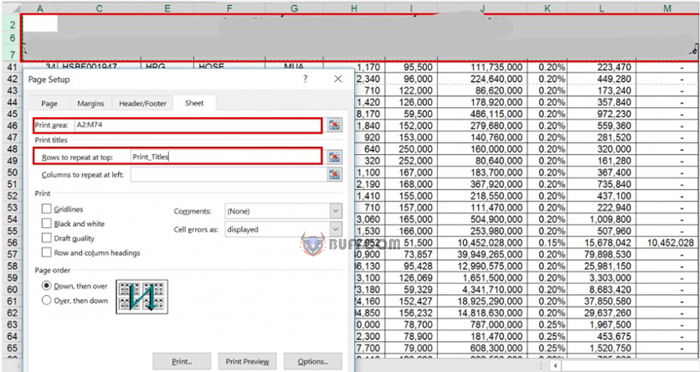
In the Sheet tab:
Select the area to print in the Print Area section. For example, in the image, it is A2:M74.
Select the header range to repeat in the Rows to repeat at top section. For example, in the image, it is $2:$7.
Additionally, you can also select columns to repeat when printing a spreadsheet with a wide horizontal dimension similarly.
Quick Formatting and Printing in Excel
STEP 2: Adjust the paper size
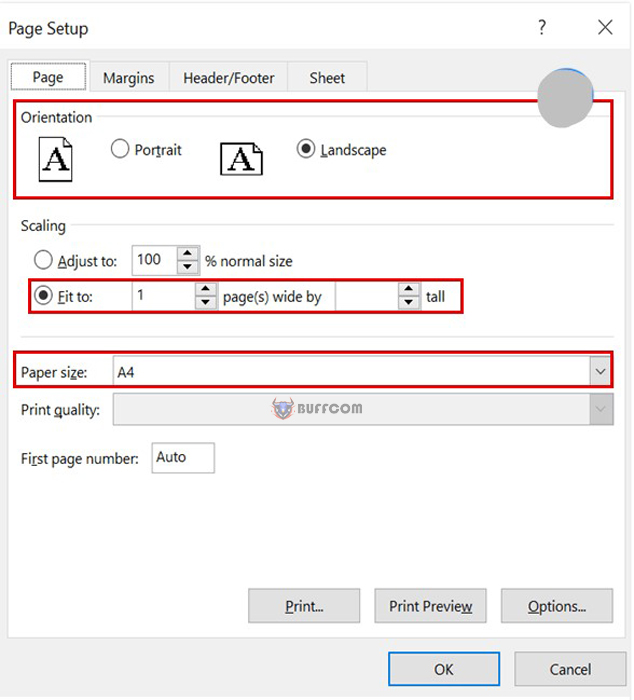
In the Page tab: Adjust the size and dimensions of the paper according to the following common parameters:
– Select the paper size in the Paper Size section: A4
– Choose the paper dimension in the Orientation section: Portrait or Landscape
– Adjust to fit the paper size in the Scaling section: Fit to 1 page(s) so that the columns/information fields are compact and fit the horizontal dimension of the printing paper.
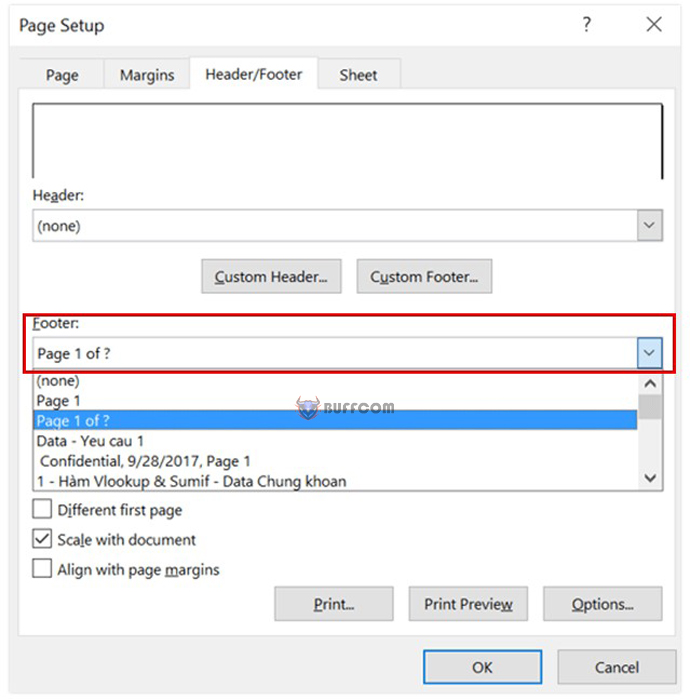
 STEP 3: Number the pages to make it easy for readers to understand the information
In the Header/Footer tab: Select the page number in the Header/Footer section.
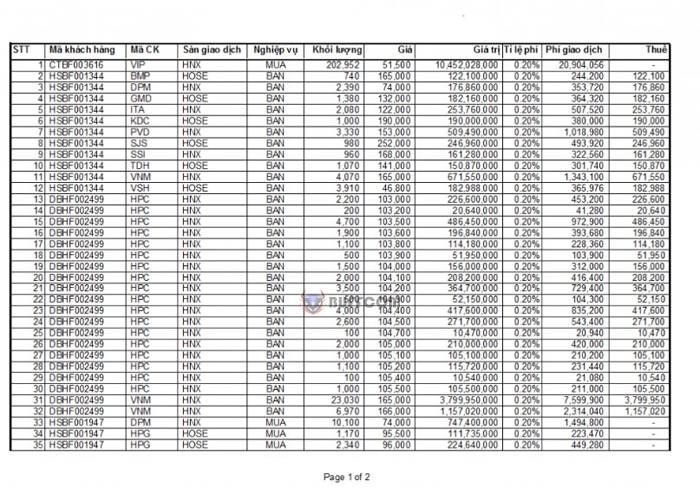
 The result is a printed table with a repeated header, page numbering, and appropriate alignment on one sheet of paper to make it easy for readers to understand the information.
