How To Blur Images In PowerPoint Quickly And Effectively

PowerPoint presentation software has become familiar and essential for many people, especially for presentations and reports. However, there is another feature of PowerPoint that many may not be aware of, which is how to blur images in PowerPoint. Today, Buffcom.net will show you how to blur images in PowerPoint.
How to Blur Images in PowerPoint
When you blur an image in PowerPoint, you can achieve different purposes, with the most common being blurring the background to create emphasis for slides without distracting the content arrangement. Here are the steps to blur the background image in PowerPoint, which can also be applied to blur any other image in slide layouts.
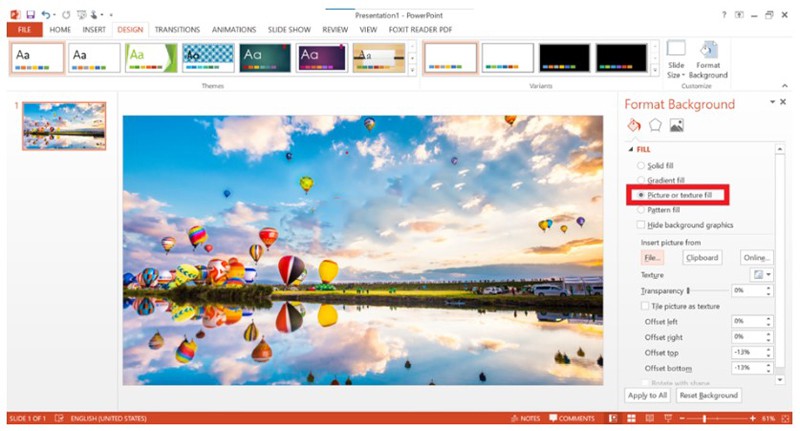
Step 1: Open PowerPoint or create a blank slide in PowerPoint. Go to the Design menu and select Format Background.
 Step 2: In the Format Background interface, choose FILL, then select Picture or texture fill. Click File and choose an image to insert into the slide.
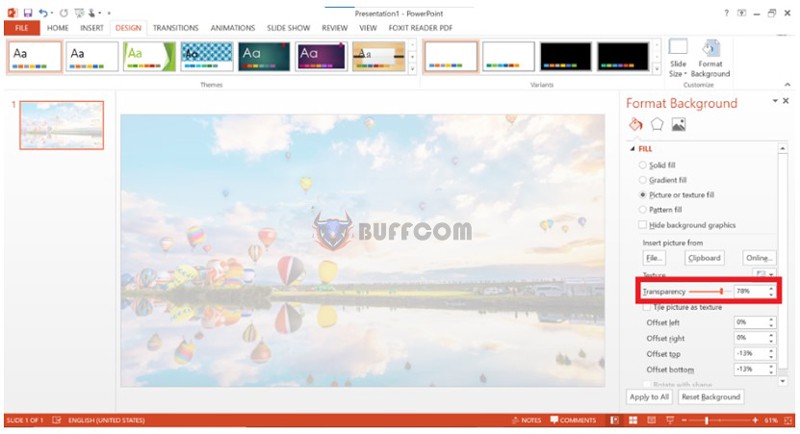
 Step 3: In the Format Background interface, find Transparency and adjust the horizontal slider to blur the image.
 How to Blur Background Images in PowerPoint – Image Background Removal
One interesting application of blurring images in PowerPoint is removing the background and creating an artistic image. Here are the detailed steps to achieve this:
Step 1: Open the slide where you want to blur the background image.
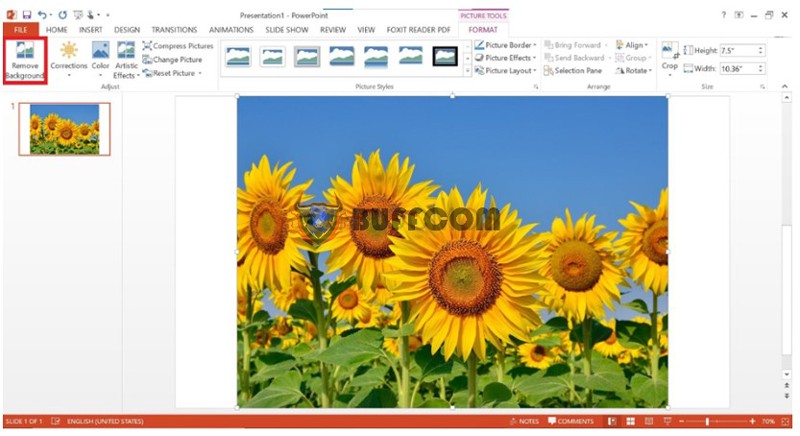
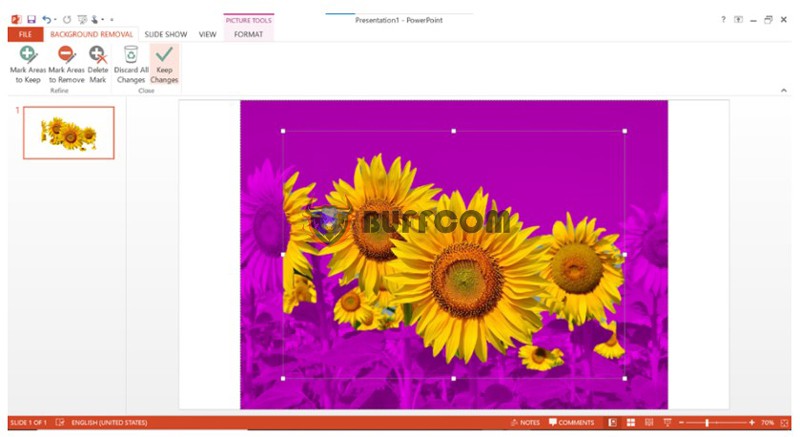
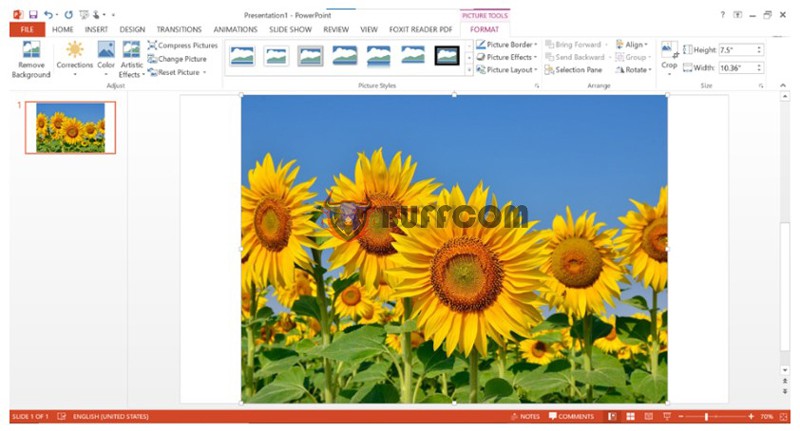 Step 2: Go to the Format menu and select Remove Background.
 Step 3: The PowerPoint Remove Background tool will automatically identify the object and the background. However, you can fine-tune the selected area by maximizing or minimizing it using the mouse pointer to precisely remove it from the background. You can also preview the result in the provided image preview on the left side. Once you are satisfied with the image, click “Keep changes.” This way, you can remove the background from the image in PowerPoint.
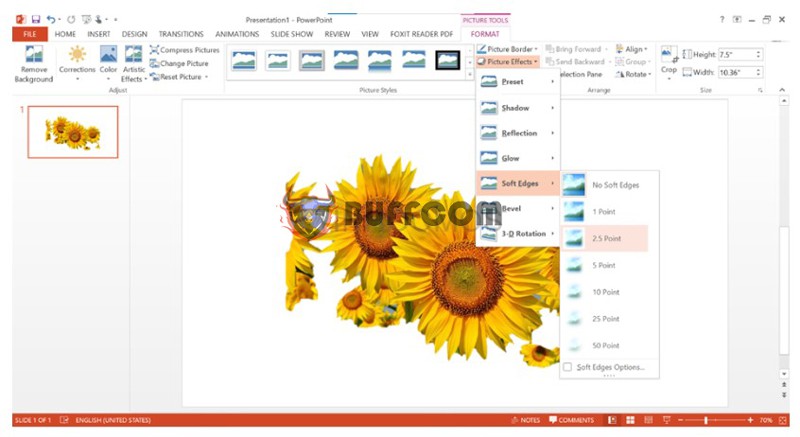
 Step 4: Click on the image, go to Format, select Picture Effect, and use Soft Edges to soften the image’s edges.
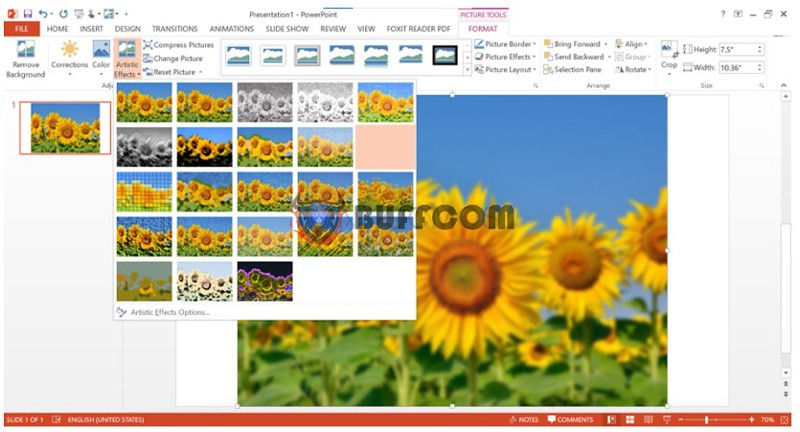
 Step 5: Insert the original image again along with the edited image. Then, use the Blur effect option in the Format menu, go to Artistic Effects, and apply the Blur effect to the original image.
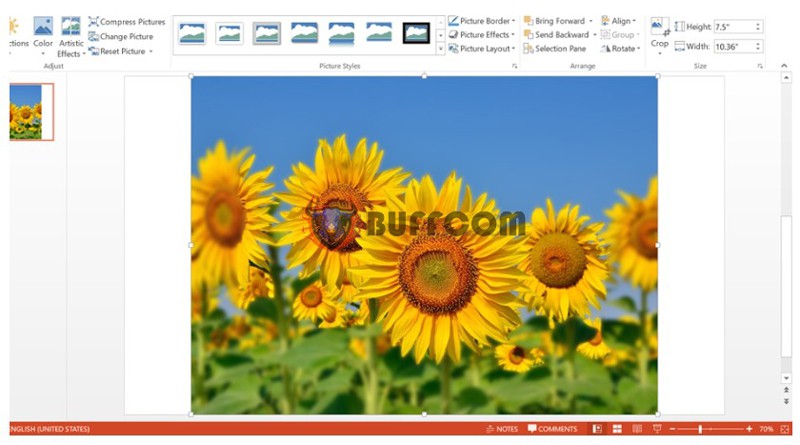
 Step 6: Select the blurred image, right-click, and choose “Send to Back” to bring the initially separated background image to the top.
 Step 7: Use the mouse to precisely position the main subject over the blurred image. Now the background is completely blurred while the subject of the image remains in focus.
 Conclusion
Those were the detailed steps for blurring images or image backgrounds in PowerPoint. We hope this article helps you with image-related tasks in PowerPoint or adds a quick and efficient image editing tool to your skillset. Proficiency and improvement in office computer skills, including mastering all the necessary tools, are crucial in today’s society. To have access to all the features, make sure you use the latest licensed version of Microsoft Office. Contact Buffcom.net to purchase the genuine Office software and receive support.


