How To Disable Firewall On Windows 10
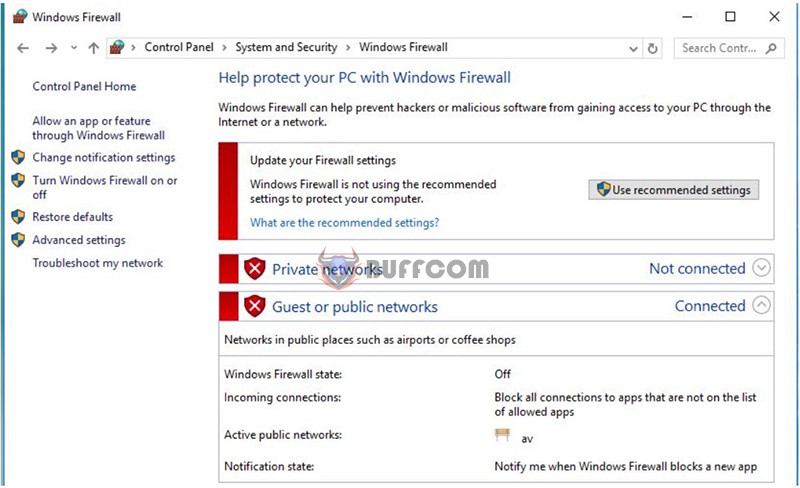
If you want to work or access the network more freely, you may consider disabling the firewall on Windows 10. Firewalls are computer protection systems that block potentially dangerous connections, which can sometimes be inconvenient.
Firewalls are built-in computer protection systems available on all Windows versions. They help prevent harmful attacks on your computer. However, if you don’t need this feature, you can disable the firewall on Windows 10 to avoid any inconvenience.
Here’s how to disable the firewall on Windows 10
To access the Firewall interface, follow these steps:
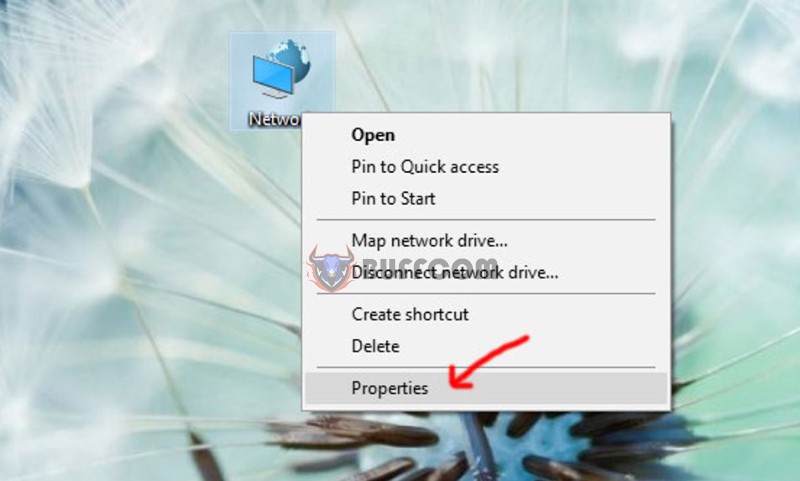
Step 1: Right-click on the Network icon and select Properties.
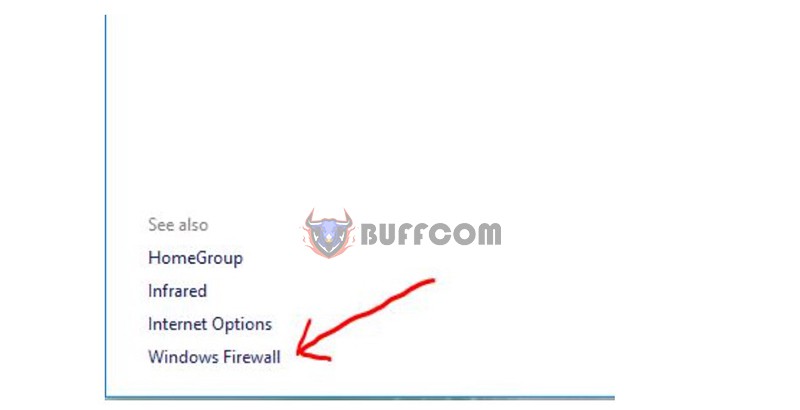
Step 2: Look at the bottom left corner of the interface and choose Windows Firewall.
Step 3: Now, you have accessed the Windows Firewall settings interface.
To turn the firewall on or off, select “Turn Windows Firewall on or off.”
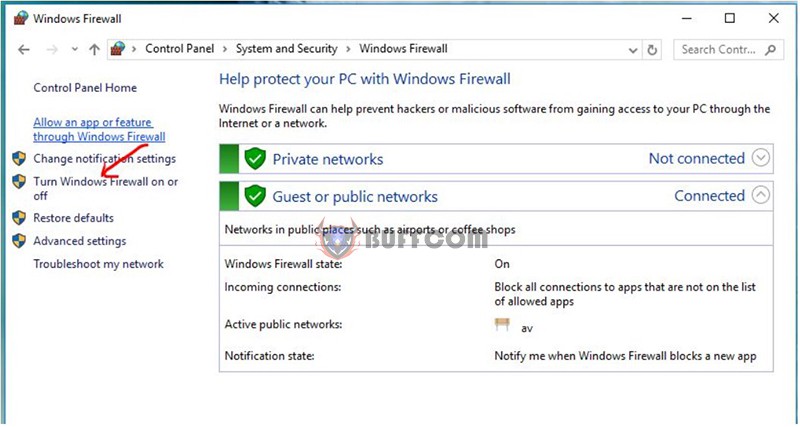 Step 4: In this interface, you will see that the firewall is currently enabled for both Private network settings and Public network settings.
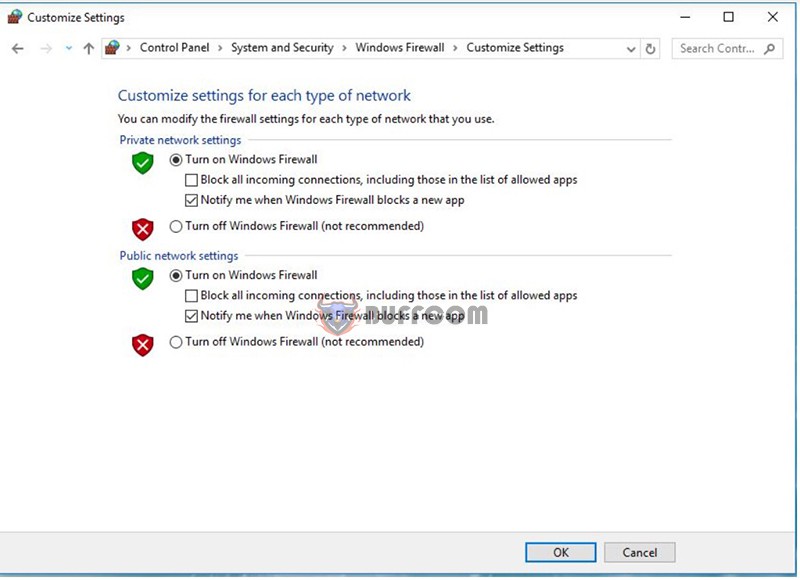
If you want to disable the firewall, simply select “Turn off Windows Firewall” for both sections.
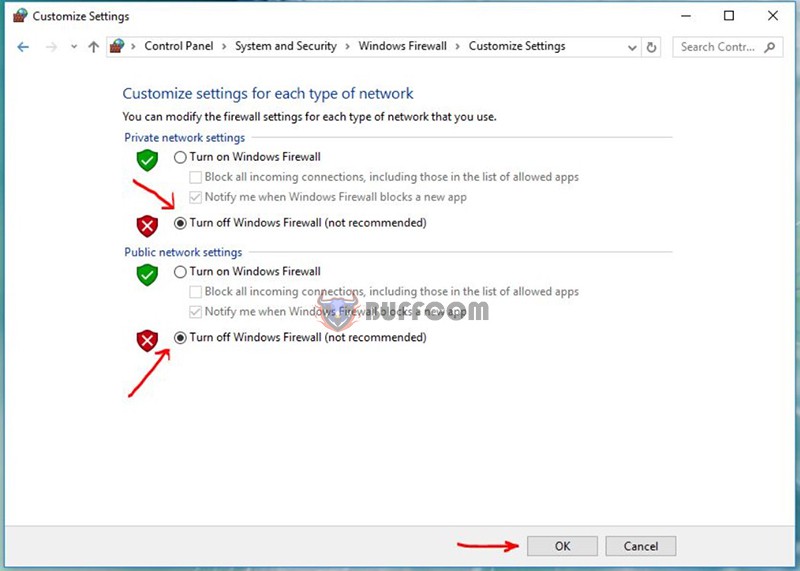 Click OK after making the changes.
You will see that the firewall on Windows 10 has been disabled, as shown in the image below.
 Additionally, to access the firewall settings on Windows 10, you can follow these steps:
Click on the Start button and type “Firewall.” You will see Windows Firewall in the search results. Click on it.
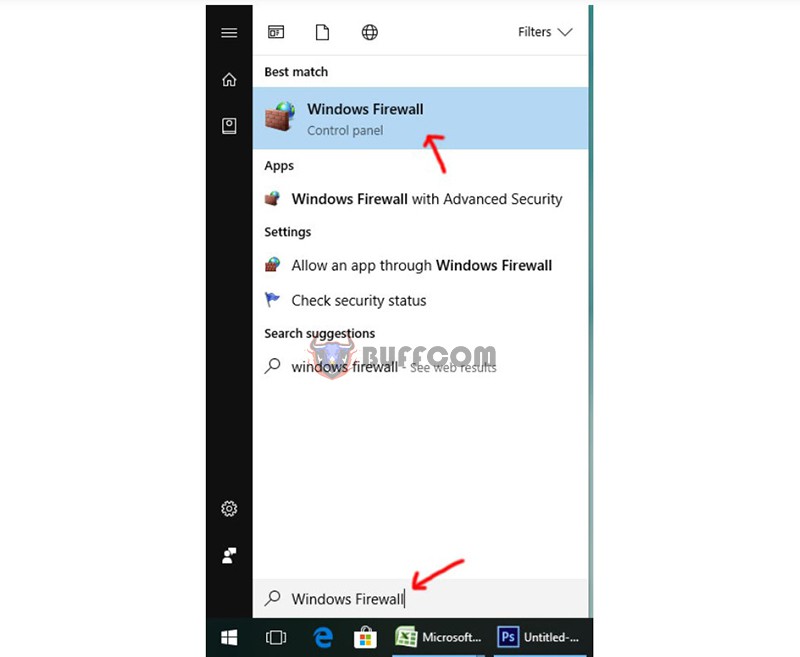
This will lead you to the interface for configuring firewall settings on Windows 10.
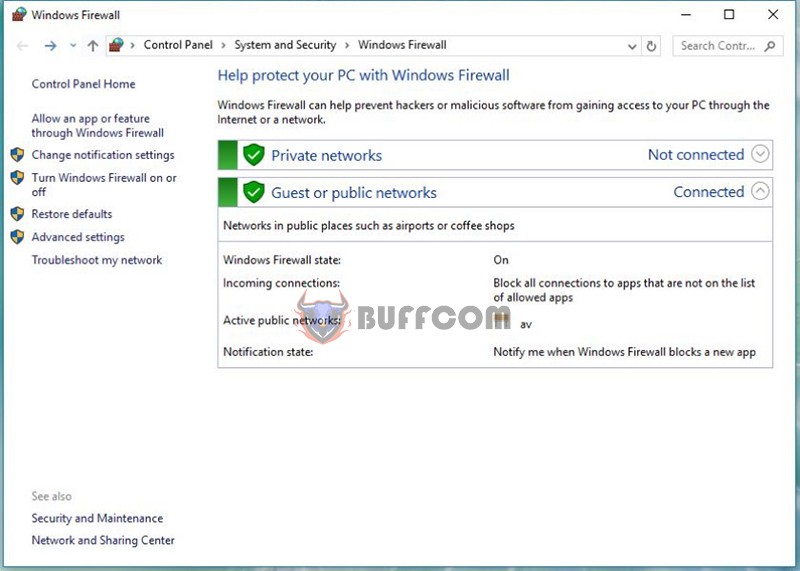 With just a few simple steps, you can enable or disable the firewall on Windows 10. Now you can confidently access the network or share data without being bothered by the firewall.
Please note that disabling the firewall can make your computer more vulnerable to malware. Therefore, it’s recommended to install antivirus software on your computer for additional protection. If you are interested in Windows 10 Pro keys or other products, please contact Buffcom.net!

