Upgrading Microsoft Windows Server 2012 with AWS Application Migration Service
This blog post serves as the fourth part of the Windows Server End-of-Support Migration series. In this final blog post, we will discuss how to upgrade Windows Server on-premises using the AWS Application Migration Service (AWS MGN). Let’s dive in!
Upgrading Windows Server On-Premises with AWS MGN
If your Windows 2012 or Windows 2012 R2 servers are still running on-premises, you can migrate those servers to AWS using AWS MGN. You can configure AWS MGN to upgrade the servers to a new Windows version when the migration process concludes. Read on for the steps to configure AWS MGN. You can refer to this blog post for understanding the steps to migrate with AWS MGN.
Prerequisites
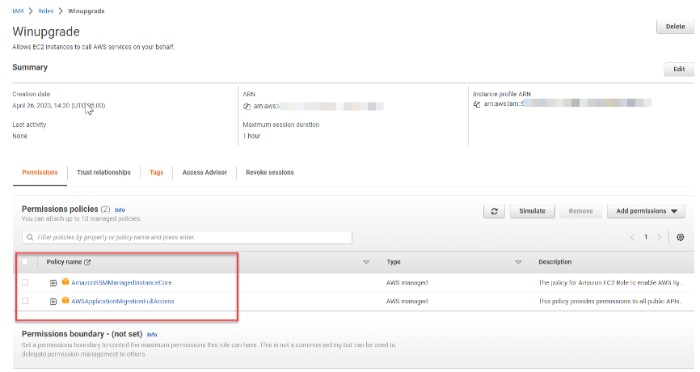
- IAM Roles Access: Before preparing the migration blueprint in AWS MGN to perform a Windows Server upgrade, create an IAM role (as shown in Figure 1) with the following policies:
- AmazonSSM ManagedInstanceCore
- AWSApplicationMigrationFullAccess
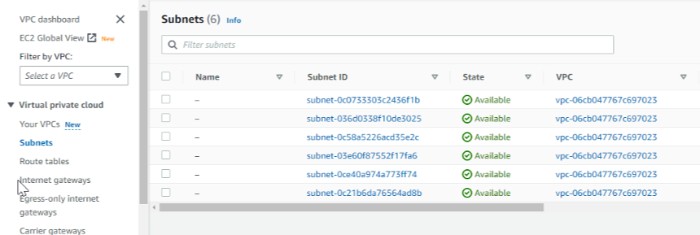
- Subnet ID: Note the Subnet ID where you want to run the migrated version. You can find the Subnet ID in the Subnets under the Amazon Virtual Private Cloud (Amazon VPC) service (as shown in Figure 2) on the AWS Management Console.
Configuring AWS MGN
AWS MGN allows you to perform various actions after successfully launching a predefined version on your Amazon Elastic Compute Cloud (Amazon EC2) instances. We will use one of the post-launch integrated templates to perform an on-premises Windows Server upgrade.
Assuming you have already completed the installation of the AWS MGN agent on the source server, and it appears in the MGN console:
Note: This guide assumes you are upgrading Windows Server 2008 R2. To upgrade your Windows Server 2008 R2 to Windows Server 2016, 2019, or 2022, the on-premises upgrade process is executed twice—first from Windows Server 2008 R2 to Windows Server 2012 R2, then from Windows Server 2012 R2 to Windows Server 2016, 2019, or 2022.
Directly upgrading Windows Server 2008 R2 to Windows Server 2016, 2019, or 2022 is not supported.
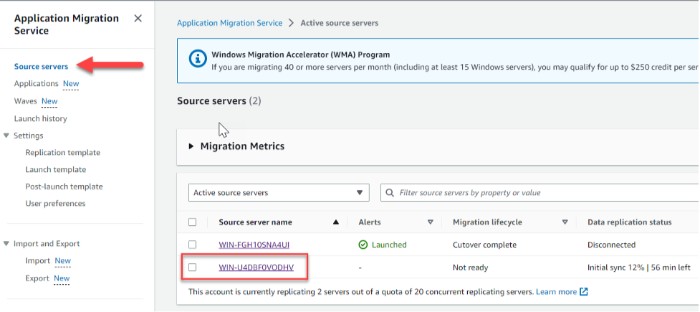
- In AWS MGN, go to Source Servers (as shown in Figure 3). Click on the server you want to upgrade.
- Choose Setup after launch (as shown in Figure 4).
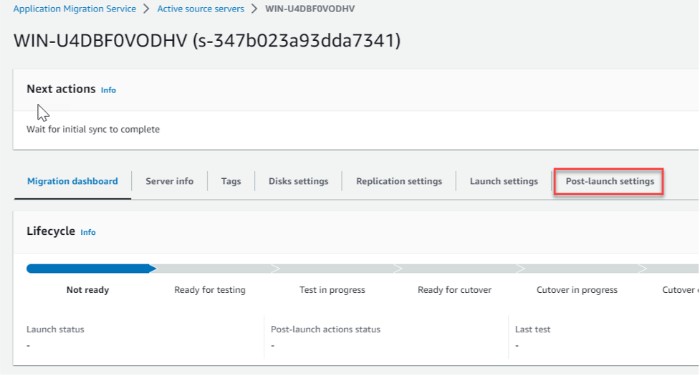
- Ensure the Active post-launch actions are set to Yes. If not, click Edit.

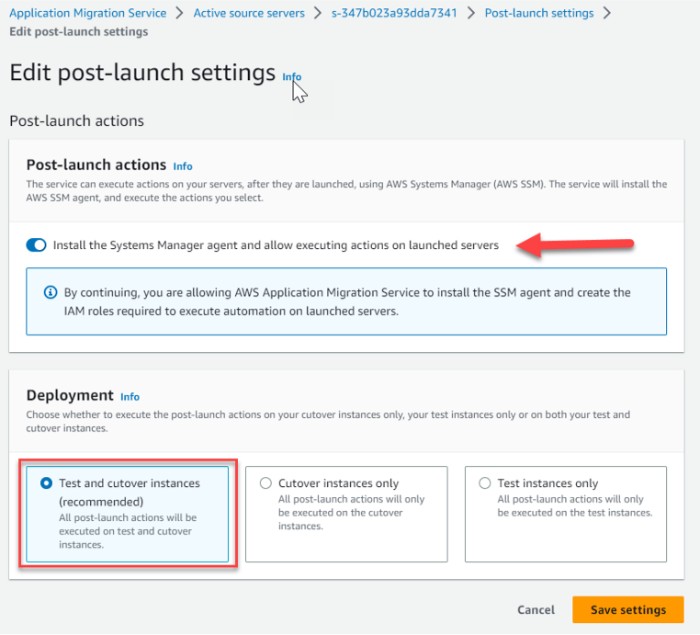
- In Edit after-launch settings (as shown in Figure 5), enable the Systems Manager agent settings and allow execution of actions on launched instances.

- Select Version check and conversion (recommended) and then select Save settings (as shown in Figure 6).
- Choose Upgrade Windows and click Edit (as shown in Figure 7).
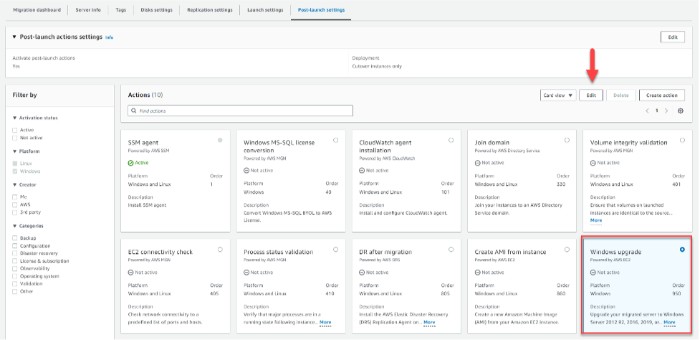 In Edit action, select Activate this action (as shown in Figure 8).
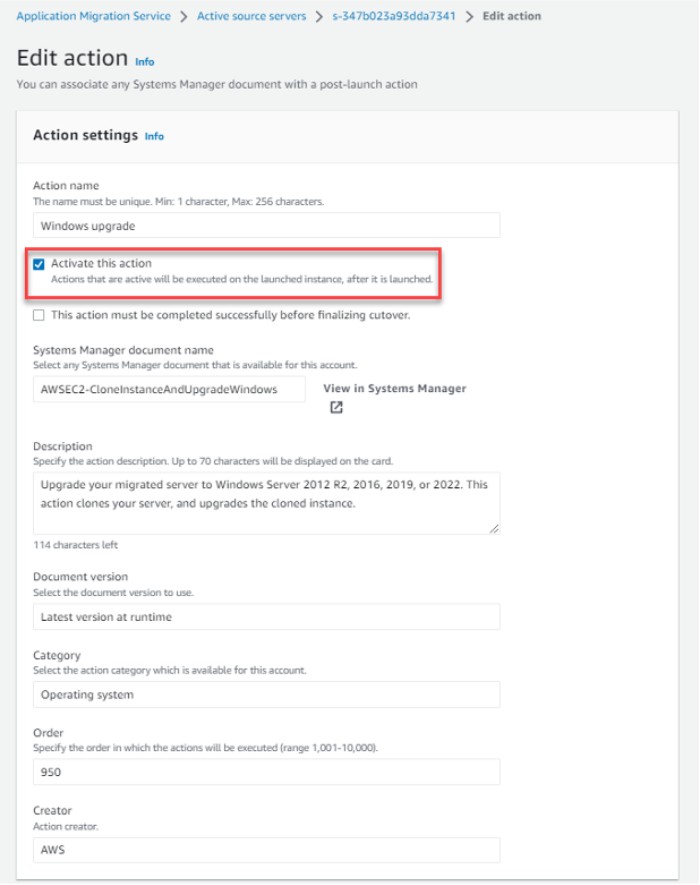
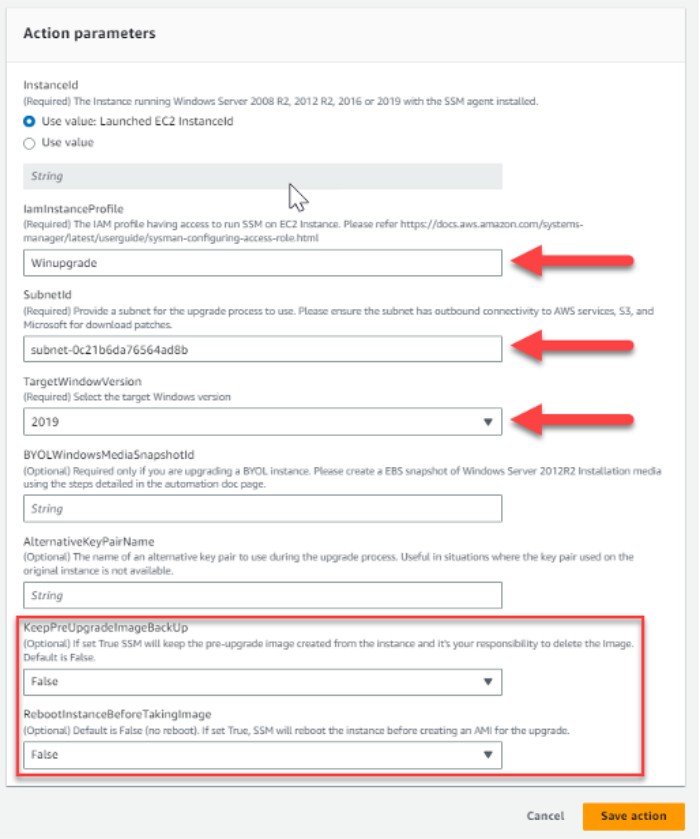
- Provide the following information (as shown in Figure 9):
- IAM Role Profile: The profile you created in the prerequisite step 1.
- SubnetID: Where you want to deploy the server. Refer to step 2 in the prerequisites.
- TargetWindowVersion: Select the Windows version you want to upgrade to.
- KeepPreUpgradeImageBackup: I use False, but it depends on your preference.
- RebootInstnaceBeforeTakingImages: I use False, but it depends on your preference. Then, you can save the action.
- Finally, you will see two actions, “SSM Agent” and “Windows Upgrade,” in the After Launch settings (as shown in Figure 10).
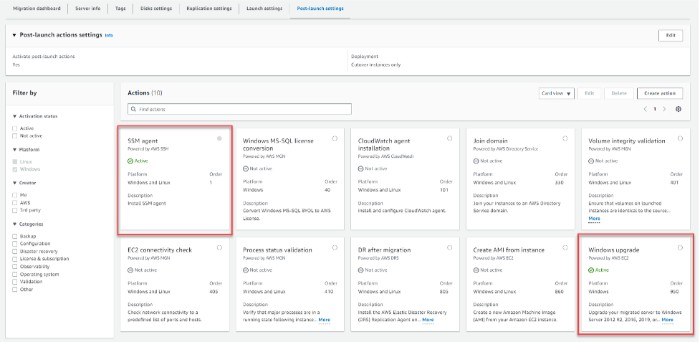
- When you perform the cutover in AWS MGN, the two post-launch actions you configured in step 9 will install the SSM Agent and perform the on-premises upgrade to a newer Windows OS version (as shown in Figure 11).
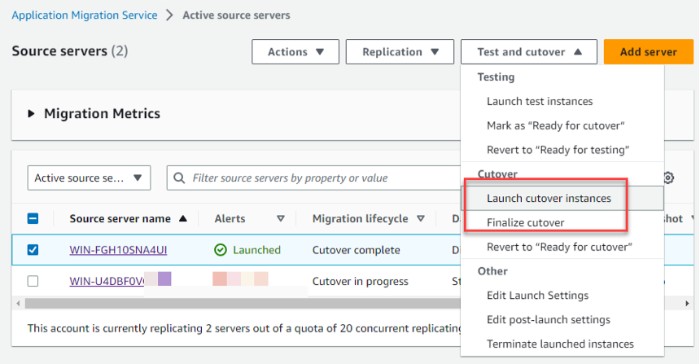
- You can monitor the post-launch actions in the Migration Actions on the Migration dashboard (as shown in Figure 12).

-
Upgrading Microsoft Windows Server 2012 with AWS Application Migration Service
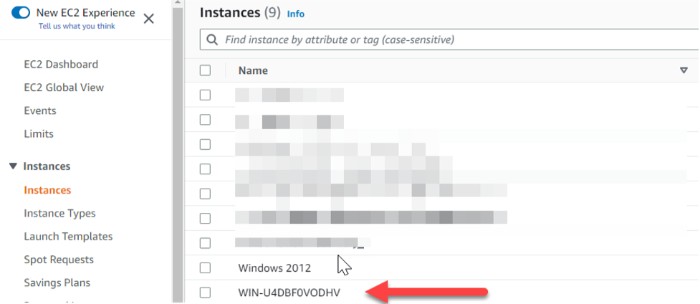
Upon successful completion of the conversion process, you will see the new Windows Server 2019 in the Amazon EC2 dashboard (as shown in Figure 13).
Clean Up
As this blog serves as a guide on how to perform, there is no need to go through cleanup steps. The step-by-step approach described is only to guide you on how to proceed with the upgrade.
Conclusion
In this blog post, we introduced the method of upgrading Windows Server using the AWS Application Migration Service.
Please note that this four-part blog series has discussed and presented many options for handling EOS and how AWS can help you address these issues using technology, tools, and experts.


