4 Basic and Simple Ways to Delete Blank Pages in Word
4 Basic and Simple Ways to Delete Blank Pages in Word. Sometimes due to various objective and subjective reasons, blank pages appear in our documents, which makes us very uncomfortable. This article will guide you on how to delete blank pages in Word in the simplest and fastest way.
1. Delete Blank Pages in Word using Backspace key
Go to the unwanted blank page in your Word document, click near the end of the page and press the Backspace key until the unwanted blank page is deleted.
2. Delete Blank Pages in Word using Navigation
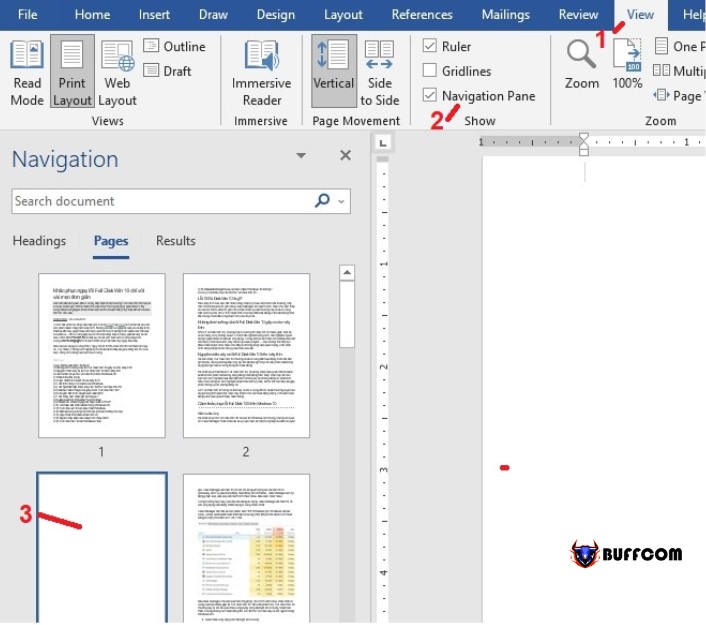
Click on the “View” tab and check the “Navigation Pane” option in the “Show” section. The Navigation Pane tab will appear from the left side, click on “Pages” and select the thumbnail of the blank page. Then, press the Delete key to delete the unwanted blank page.
3. Delete Blank Pages in Word using Page Setup
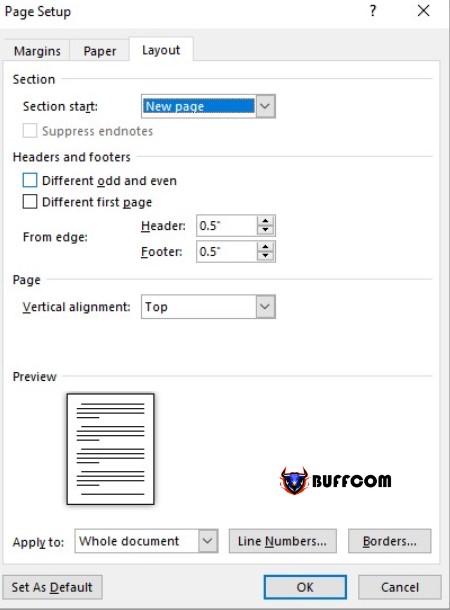
If the above methods are not effective, check your Sections: Click on the “Layout” tab and select “Margins” on the far left of the “Layout” tab, and choose “Custom Margins…” from the dropdown menu at the bottom. Next, select the “Layout” tab. In the dropdown menu of the “Section start” option, then select “New page” from the dropdown menu. Click OK.
Delete Blank Pages in Word
4. Delete Blank Pages in Word using the Paragraph button
If the above methods still cannot delete the blank page, try turning on the Paragraph button on the toolbar to view the location of all line breaks in your Word document. Here’s how to do it: On the right side of the Home tab, simply click on the ¶ button or use the shortcut key: Ctrl + Shift + 8.
Delete Blank Pages in Word
Step 1:
Look at the toolbar and you will see the Paragraph symbol, which we will use to mark all the white spaces in Word.
Select the P symbol to mark white spaces.
Step 2:
Highlight all the white spaces that appear due to Paragraphs and press Delete to remove them in Word.
Highlight all the white spaces that appear due to Paragraphs and press Delete to remove them in Word.
Step 3:
After deleting, you will see that all the white spaces have been completely removed.
Step 4:
Remove the Paragraph to return the text to normal after deleting white spaces in Word 2016, 2013, 2010, and 2007.
Select the P symbol to return the text to normal.
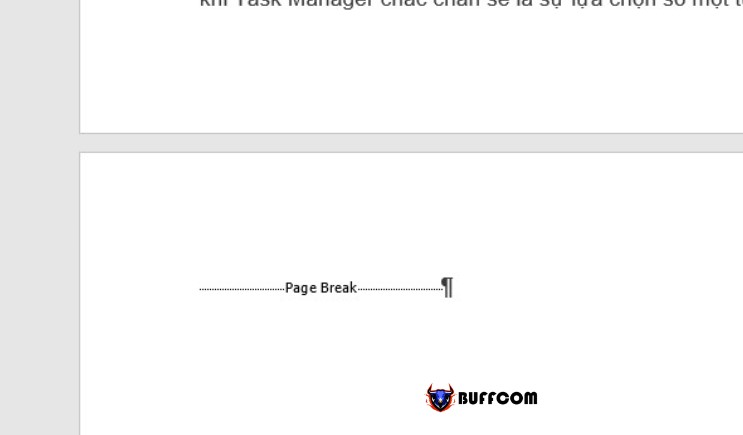
Note: White spaces in Word cannot be removed using the above 4 methods if they are caused by Next Page, Odd Page, and Even Page, which can create a new page in Word. If your blank page appears at the end of the document and you have a section break there, you can place the cursor directly in front of the section break and press Delete to remove the blank page.
(If you have trouble viewing your section breaks, try switching to the View tab and changing to Draft mode. This way, you will have a clear picture of the position of the page breaks, as they will be represented by a dotted line.)
Important note: If a section break creates a blank page in the middle of the document, deleting the section break may result in formatting errors. If you do not want to change the formatting of the following page to a different format, keep the section break. However, you can change the section break to a Continuous section break, which will not change the formatting but will not insert a blank page.
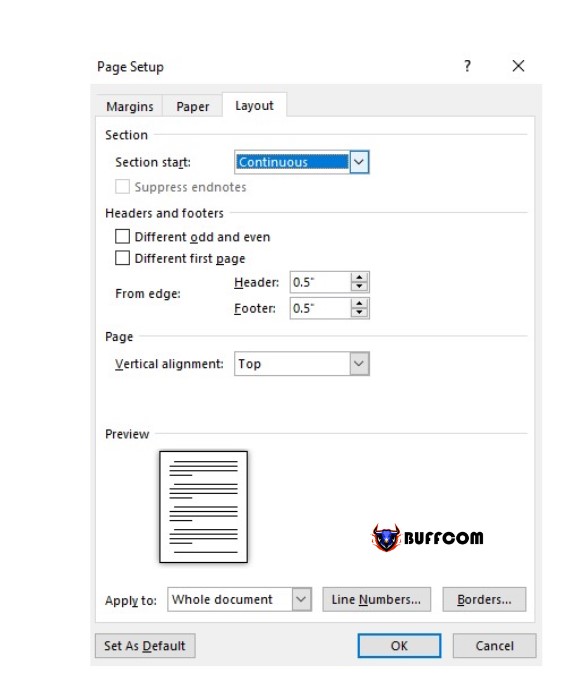
To change a section break to a Continuous section break:
1 Place the cursor after the section break you want to change.
2. Go to the Layout tab.
3. Click on the launcher button for the Page Setup dialog box.
4. On the Layout tab of the Page Setup dialog box, click on the Section start menu and select Continuous.
Delete Blank Pages in Word
This will remove your blank page without affecting your formatting.
Those are some easy ways to remove blank pages in Word. Thank you for reading this article, and I hope that some of the steps above have helped you remove unwanted blank pages in your Word document. Please leave a comment below if you have any questions about the article so that Buffcom.net can help you.

