Instructions on How to Create and Remove Watermarks in Word A to Z

How to Create and Remove Watermarks in Word is a common issue that people often use to share their documents while avoiding the risk of being copied by others. The challenge here is how to mark the text to prevent copying and protect the copyright and intellectual property of an individual. An effective solution for users is to create and remove Watermark in Word on each page of the document. Let’s explore this efficient and widely used method together on Buffcom.net.
What is a Watermark in Word?
A Watermark in Word is a hidden text or image embedded in the background of the document. Creating a Watermark in Word helps prevent copying and copyright infringement while also adding a personal touch.
How to Create a Watermark in Word
Step 1: Open the Watermark Panel
In the document where you want to perform the action, select the Design tab -> Watermark.
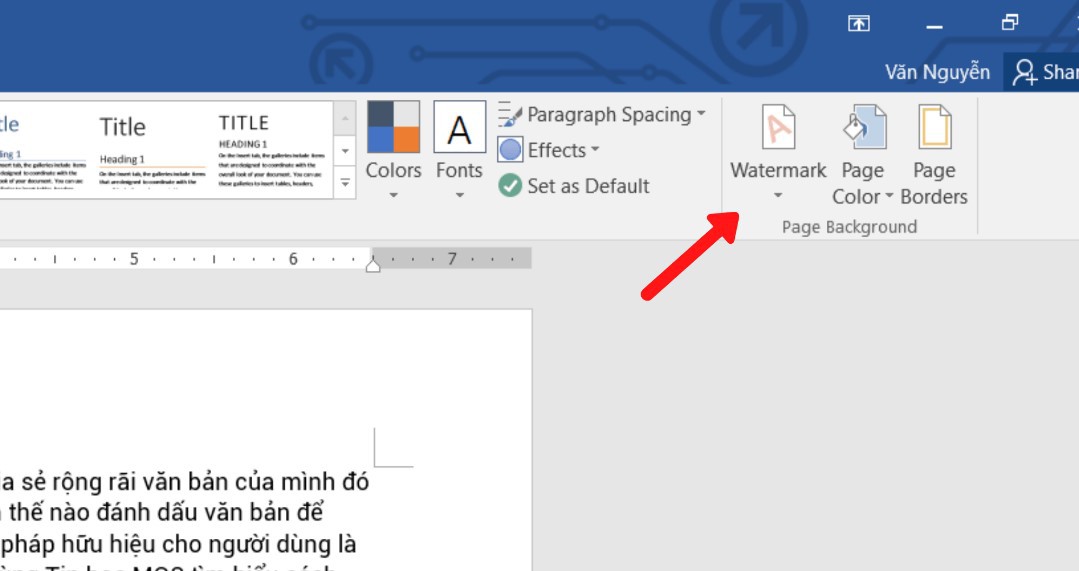
Create and Delete Watermark in Word
Step 2: Choose the Appropriate Display Style.
In this article, Buffcom.net selects the Confidential 1 style – italicized text from left to right.
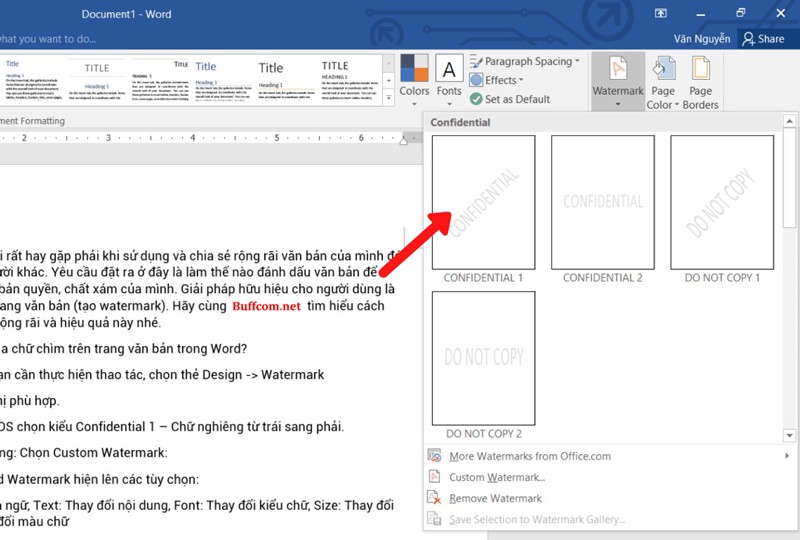
How to Create and Remove Watermarks in Word
Step 3: Modify the Hidden Text Format
Select Custom Watermark:
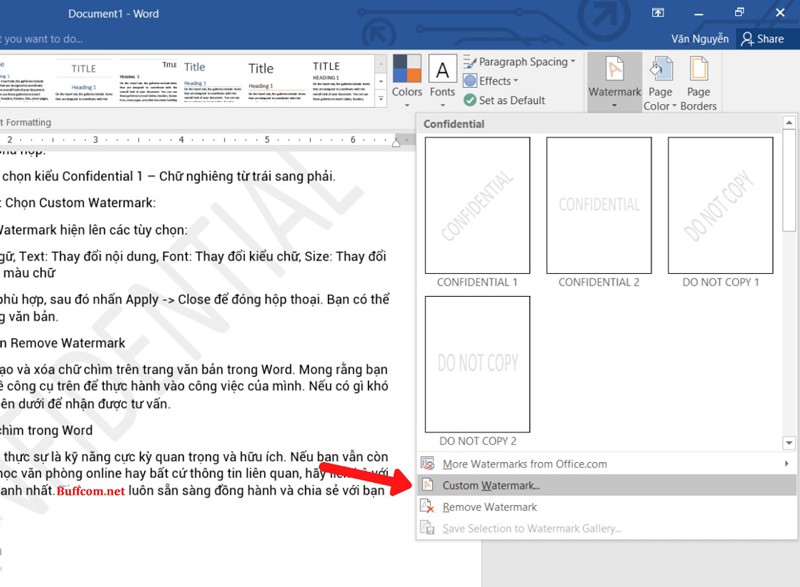
How to Create and Remove Watermarks in Word
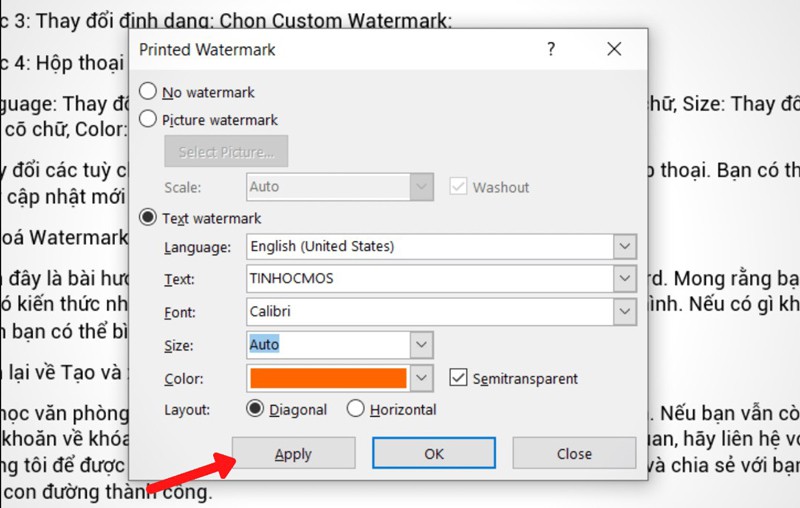
Step 4: Customize the Hidden Text
The Printed Watermark dialog box displays the following options:
- Language: Change language
- Text: Modify content
- Font: Change font style
- Size: Adjust font size
- Color: Change font color
Customize these options as needed, then click Apply -> Close to close the dialog box.
How to Create and Remove Watermarks in Word
You can see the updated Watermark on the document page.
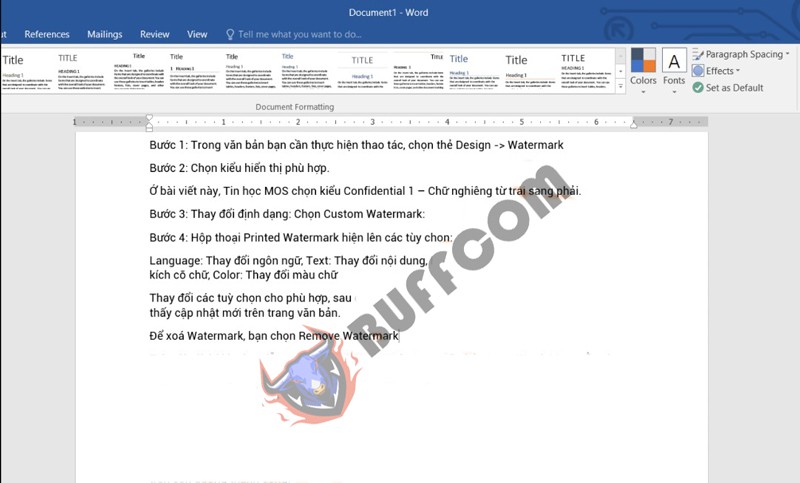
How to Create and Remove Watermarks in Word
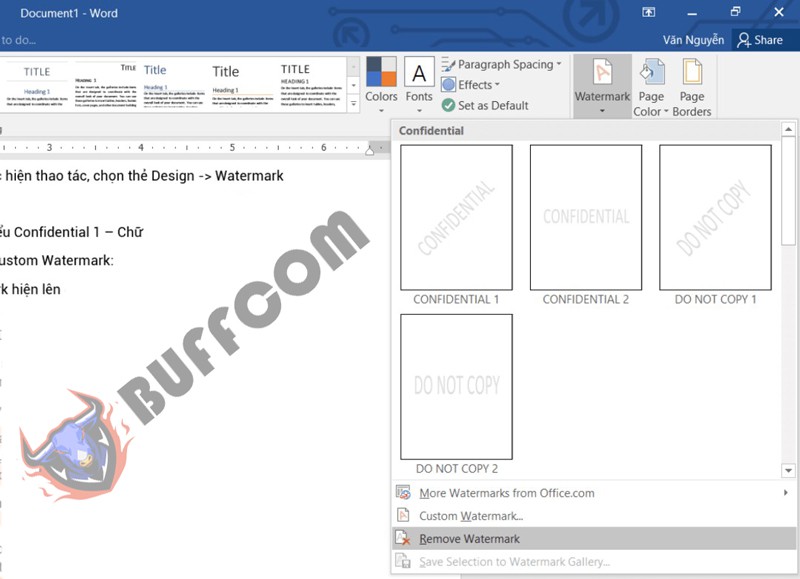
How to Remove a Watermark in Word
To remove a Watermark, select Remove Watermark:
How to Create and Remove Watermarks in Word
That concludes the tutorial on creating and removing Watermarks on Word documents. We hope you have gained valuable knowledge on this tool and can apply it in your work. If you have any difficulties, please comment below for further advice.
Summary of Creating and Removing Watermarks in Word
The steps to create a Watermark in Word include:
Step 1: Open the Watermark Panel
Step 2: Choose the appropriate display style
Step 3: Modify the hidden text format
Step 4: Customize the hidden text
To remove a Watermark in Word, select Remove Watermark.
Office computer skills are essential and valuable today, accompanied by office software to support your work. Contact Buffcom.net to consult and find the appropriate software product for your needs!


