How to combine all Excel files in a folder automatically

How to combine all Excel files in a folder automatically. Do you want to combine multiple Excel files into one complete and simple file but don’t know how? In this article, I will guide you through a simple and super trick to combine all Excel files in a folder into one complete and very fast and convenient file. Let’s explore the article together!
Download the practice file here.
After downloading the file to your computer, you will unzip it and practice with me!
Steps to combine multiple Excel files in a folder
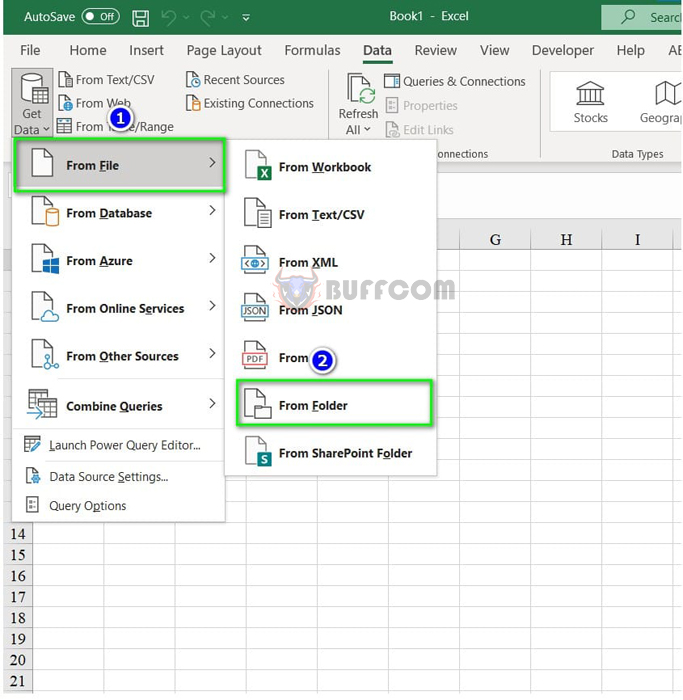
Step 1: You open a new Excel file => In the newly opened file, you go to the Data tab => Select Get data
 Step 2: Next, select From File => click on From Folder
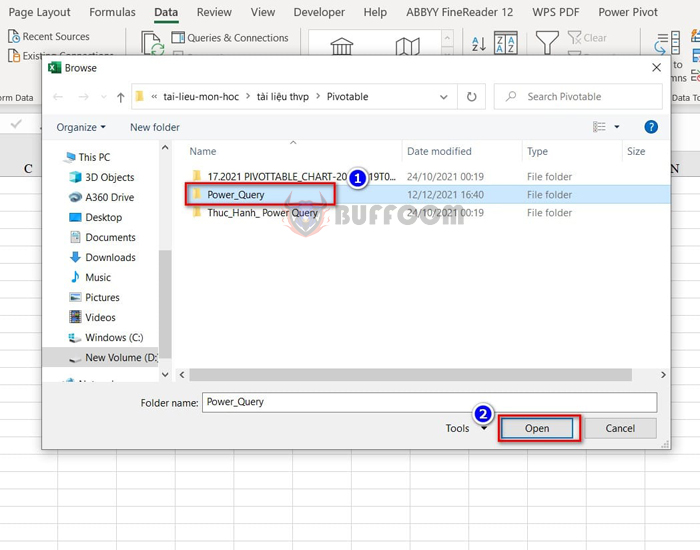
 Step 3: The folder file on your computer will appear, and you will move to the folder containing the files to be combined.
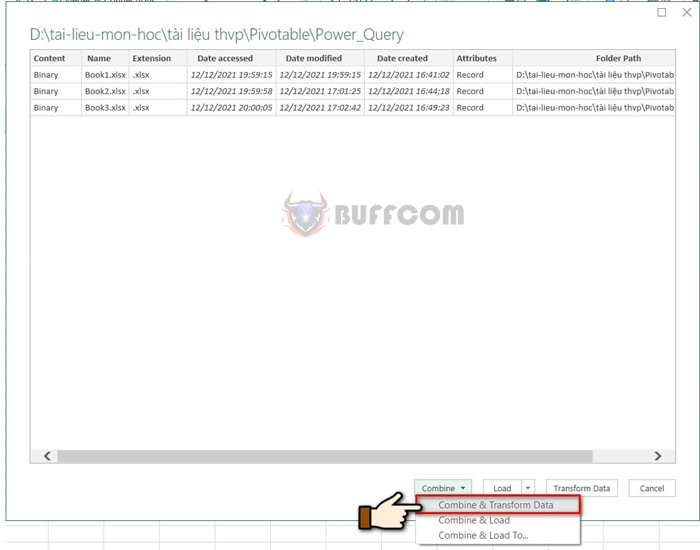
 Step 4: A dialog box containing the files you want to combine will appear, and you will select Combine => Combine Transform Data.
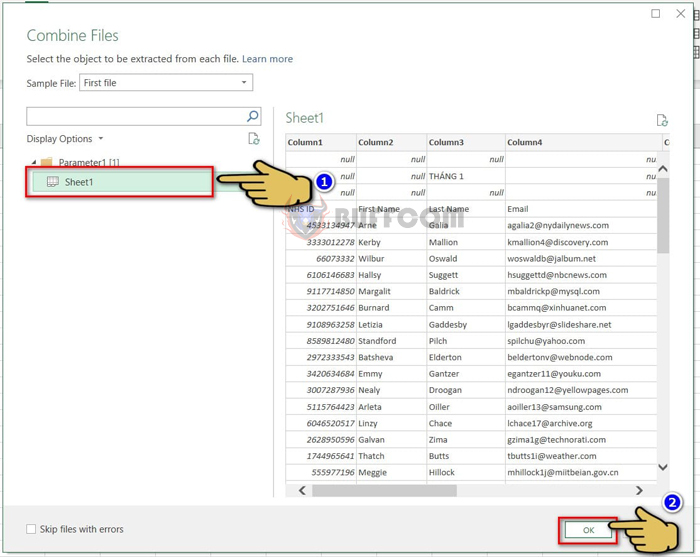
 Step 5: The Combine Files dialog box appears => you click on sheet1 as shown below => Ok
 Step 6: The Power Query interface appears, where all the files in the folder you selected have been combined.
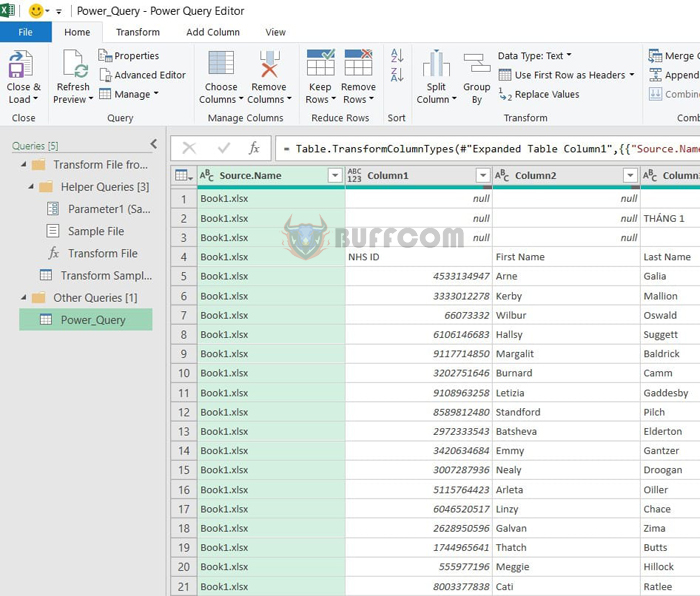 However, there are some lines that are not reasonable, you will edit them as follows:
To remove the Null rows in the data table: You will select any column that contains Null rows and select the filter next to the column header, uncheck Null, and press OK to complete.
 The data table after removing the null rows:
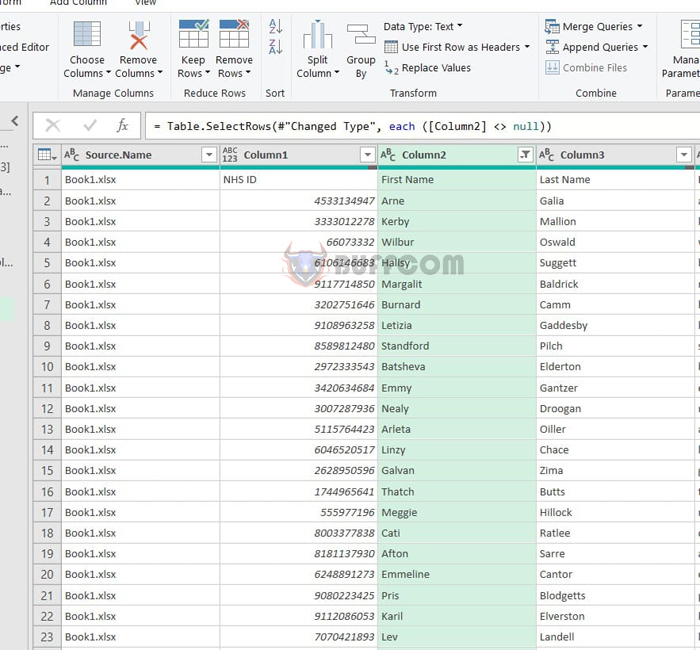 Adjust the header in the data table: When combining data files into the Power Query interface, your header jumps to the next line as shown below:
 To fix this, you select Home => select Use First Row as Headers
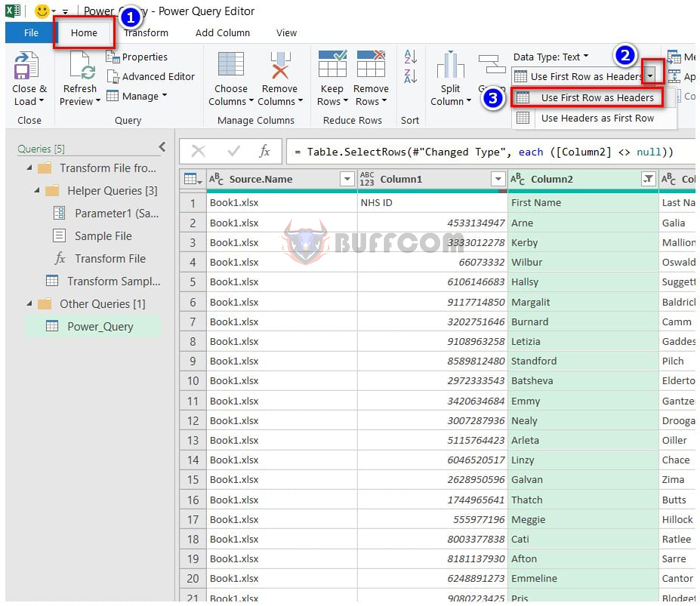 Note: Because when combining multiple files, there are many header lines below, the easiest way to fix this is to select any column that displays the header of other files, then click on the filter and uncheck that header.
To remove unnecessary columns in the data table: First, you select the column to be removed, right-click, and select Remove.
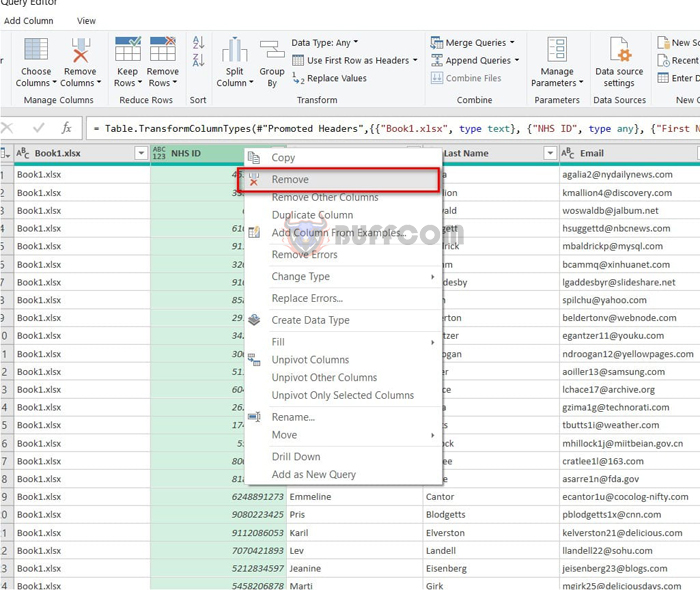 To change the data type in each header field
First, you select the column you want to change the data type, then right-click => select Change Type and select the appropriate data type in the column.
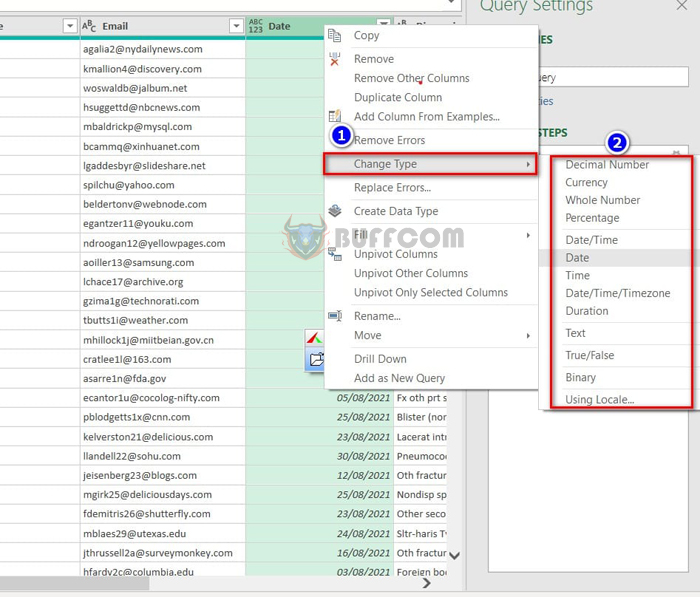 To change the attribute name: You will change it in the Name box under the Properties section.
Step 7: Exit the Power Query interface and download the complete combined file to Excel
By selecting Close & load on the toolbar.
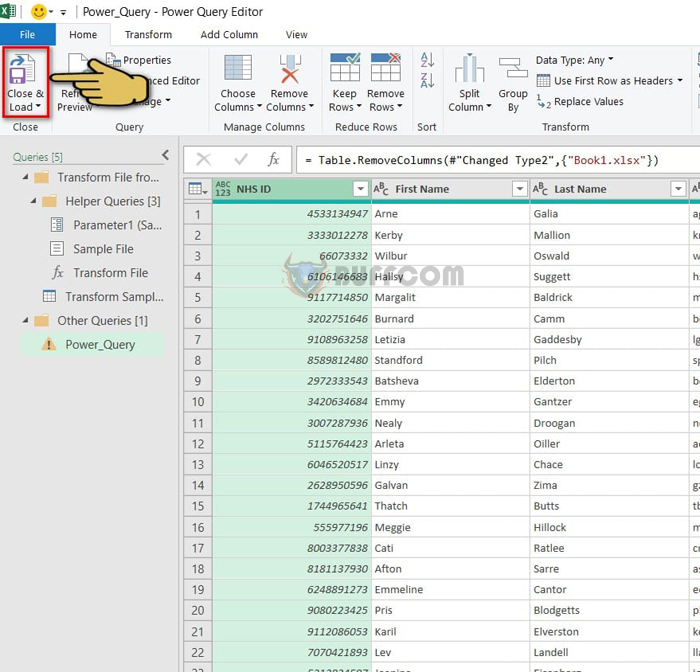 File after completion.
 In addition, you have a new data file in the folder, to update, you select any position in the file that has completed the combination => right-click and select Refresh.
So I have finished guiding you on a simple and simple trick, with the help of Buffcom, to combine multiple files into one complete file. I wish you success and don’t forget to rate the article below…


