How to Cut Images in Word: Extremely Simple and Detailed Instructions
How to Cut Images in Word: Illustrations in Word documents are essential when it comes to writing a thesis or document. Therefore, knowing how to cut images in Word is crucial, as sometimes the initial image may not be proportional and requires editing, cropping, and merging to ensure aesthetic and document-appropriate visuals. Buffcom.net will guide you through the simple and quick process of cutting images in Word.
Cases Requiring Image Cutting in Word
Cutting images in Word is necessary for presenting document pages to prevent images from overlapping characters. Cutting and editing images in Word also enhances the aesthetic appearance of the document page.
The main benefits of cutting images in Word include:
- Producing beautiful and suitable images
- Editing various styles and frames of images
- Changing the size of images
3 Most Popular Ways to Cut Images in Word
Buffcom.net will introduce you to the 3 most popular ways to cut images in Word to add variety and diversity to your image presentation.
Method 1: Ordinary Image Cutting
This is the most basic way to cut images where the cut image will have 4 square corners and the ratio can be adjusted according to your preference.
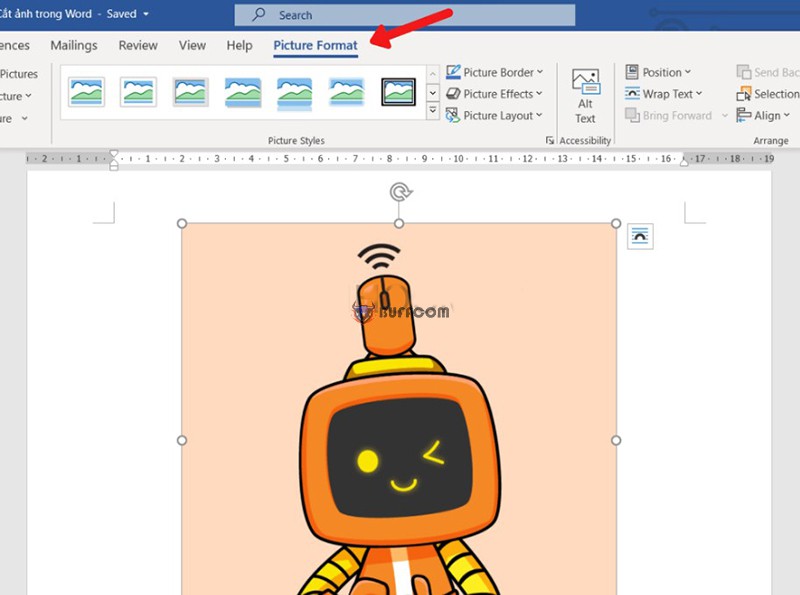
Step 1: Select the image to cut and open the Picture Format tab on the Ribbon.
How to Cut Images in Word
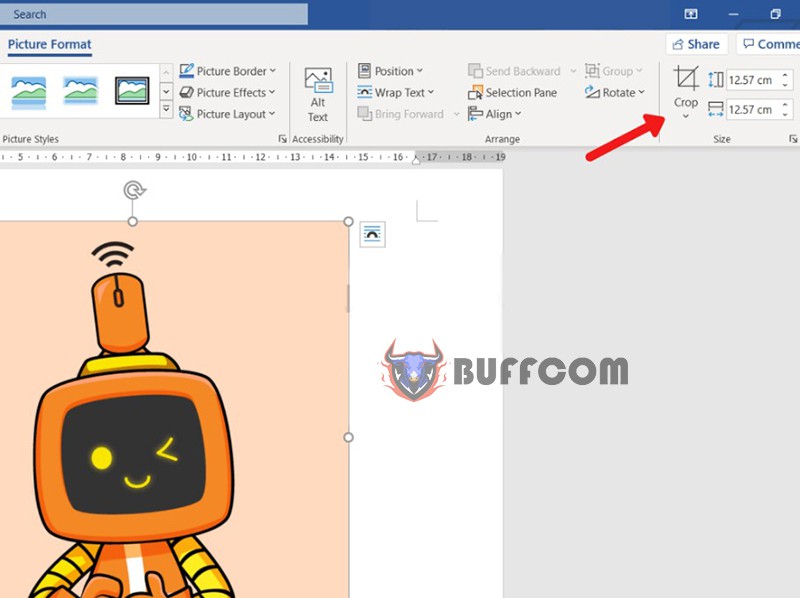
Step 2: In the Size tab, select Crop to cut the image in Word.
How to Cut Images in Word
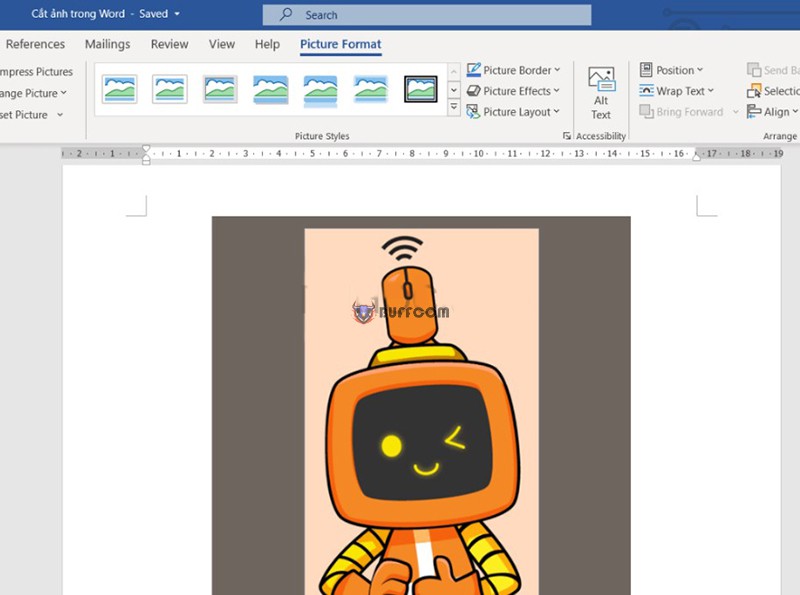
Step 3: Drag the mouse in the image corner to cut the image as you wish in Word.
How to Cut Images in Word
Note: Holding down the Ctrl key while performing this action will help you align the image evenly in all 4 corners and produce a better ratio.
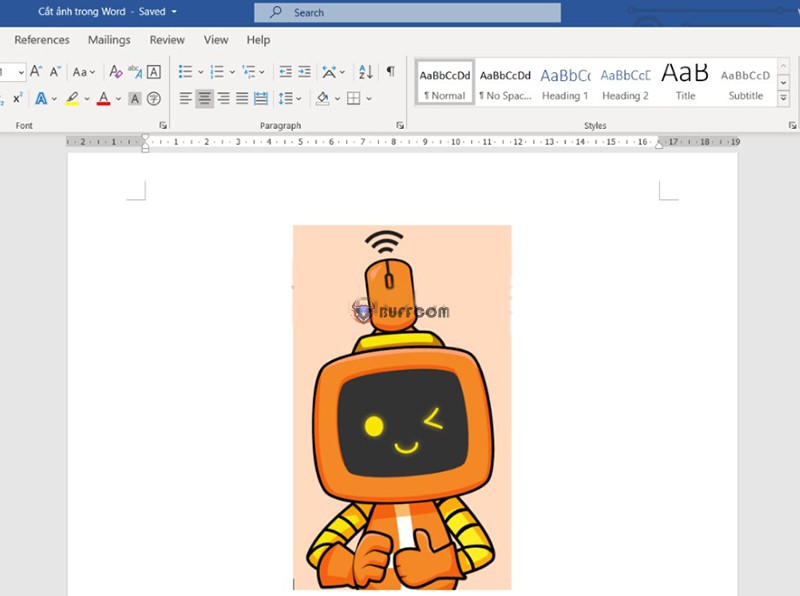
Step 4: Finally, press Enter to complete. The result will look like the image below in Word.
How to Cut Images in Word
Method 2: Cutting Images with Various Frames
In addition to the default square frame, Word allows you to choose from a variety of diverse frame styles for images.
Step 1: Select the image you want to crop and open the Picture Format tab on the Ribbon.
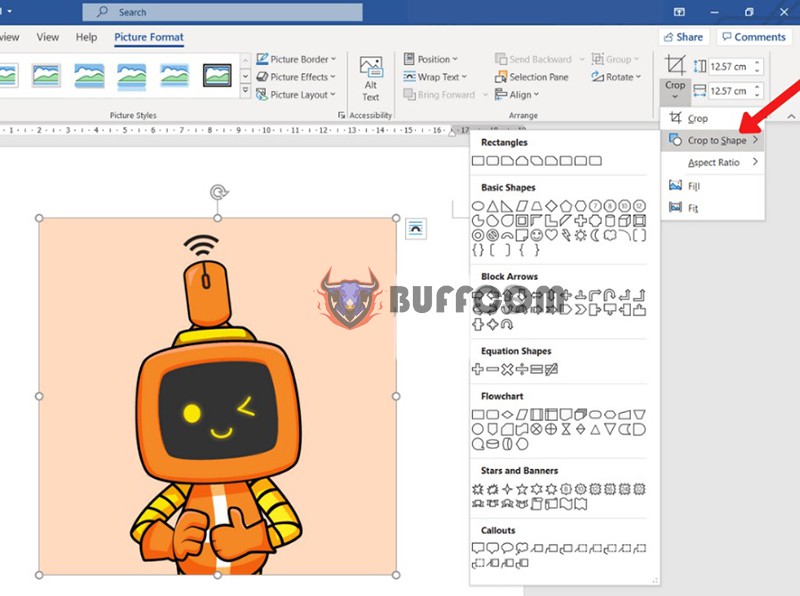
Step 2: In the Size tab, click the down arrow under the Crop section and select Crop to shape.
Step 3: Choose the frame shape you want to use for cropping the image in Word.
How to Cut Images in Word
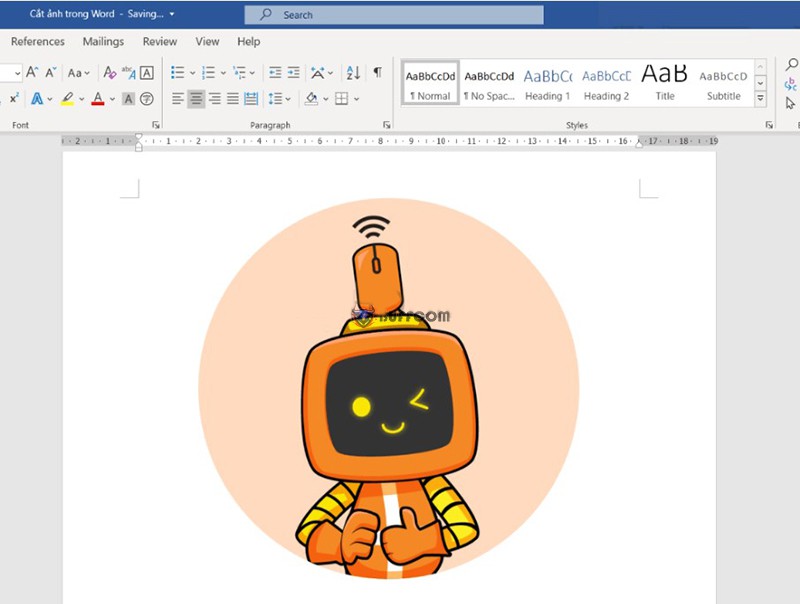
After the process, Word will automatically crop the image according to the selected frame.
How to Cut Images in Word
Note: If you want to further adjust the frame, click Crop and make the desired changes.
Step 4: Press Enter to complete.
Method 3: Crop Image to a Specific Aspect Ratio
Step 1: Select the image you want to crop and open the Picture Format tab on the Ribbon.
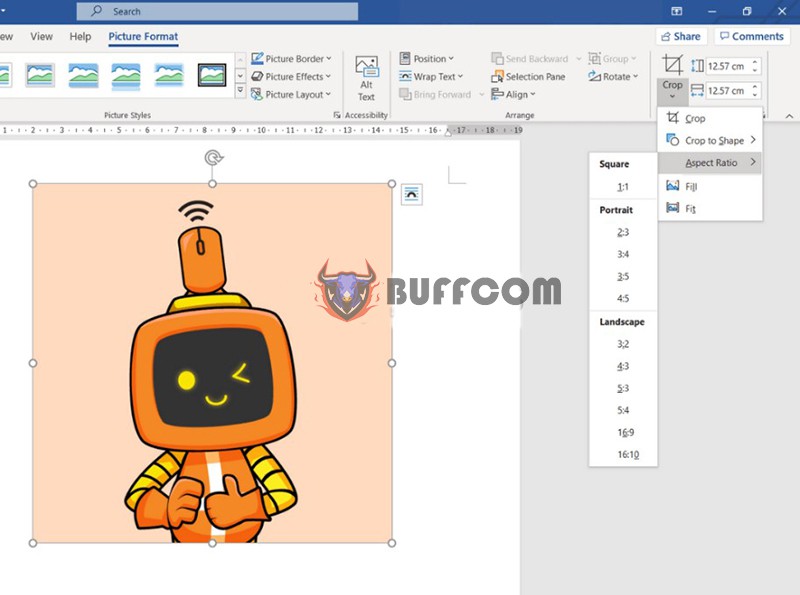
Step 2: In the Size tab, click the down arrow under the Crop section and select Aspect Ratio.
Step 3: Choose the desired image size to adjust and drag the mouse to make adjustments.
The options include:
- Square: Square image
- Portrait: Vertical image
- Landscape: Horizontal image
How to Cut Images in Word
Step 4: Press Enter to complete.
Edit Color and Border for Cropped Image
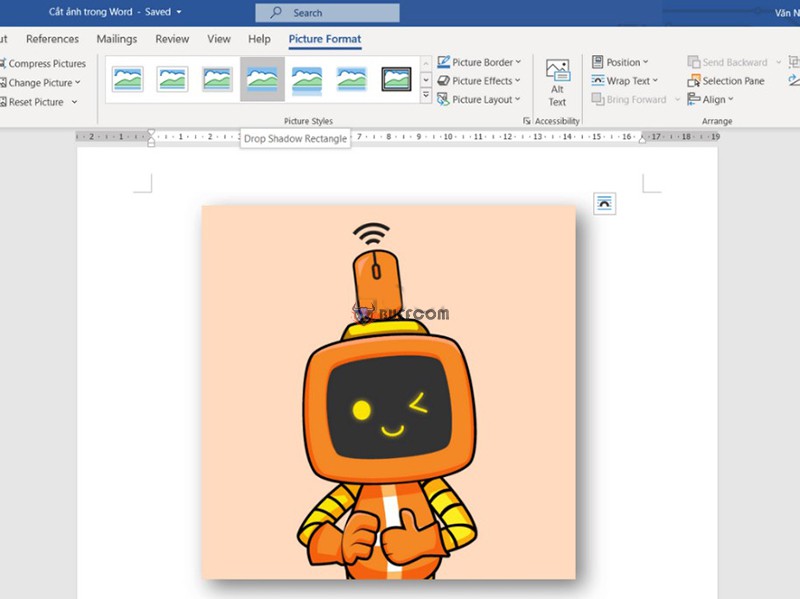
Step 1: Select the image you want to edit and open the Picture Format tab on the Ribbon.
Step 2: In the Picture Style tab, Word displays three options for you to edit the image, including:
- Picture Border: Edit the image border
- Picture Effects: Edit image effects
- Picture Layouts: Edit image layout
Step 3: Choose the effect you want to edit and press Enter to complete.
How to Cut Images in Word
Thus, in this article, Buffcom.net has introduced you to the simple and quick way to crop images in Word, which is very useful for students or those who have to write essays.
Moreover, if you are interested in essential office computer skills, follow Buffcom.net. If you are interested in office software such as Word, Excel, PowerPoint,contact Buffcom.net to find the necessary software.


