2 Ways to Create Automatic Table of Contents in Word 2016, 2013, 2010 – Standard and Fast
Creating an automatic table of contents is essential when writing a book, essay, dissertation, etc., as there will be many headings and titles. Creating an automatic table of contents will help you track and summarize the content of the book or document, while automatically updating page numbers if there are any changes.
In this article, Buffcom.net will guide you through 2 simple ways to create an automatic table of contents quickly and standardly according to Microsoft.
Method 1: Create a Table of Contents by Adding a Header
To add an automatic table of contents, we have 2 ways to do it: Add a header by applying Header Styles or adding Levels. Tinhocmos recommends that you use Header Styles because this way will be more convenient for formatting updates.
Step 1: Mark the Table of Contents
At the Home tab, in the Styles section, select the appropriate Heading to create a table of contents for the selected content.
- Select the largest item (book title, heading title, etc.) and set it to Heading 1
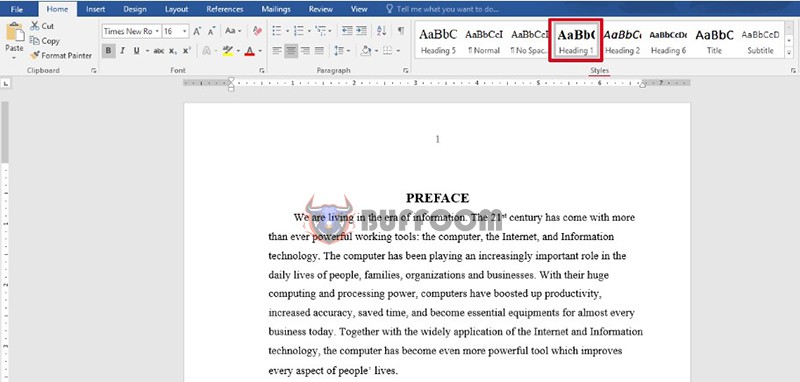
- Similarly, for smaller items, select lower headings: Heading 2, Heading 3, etc.
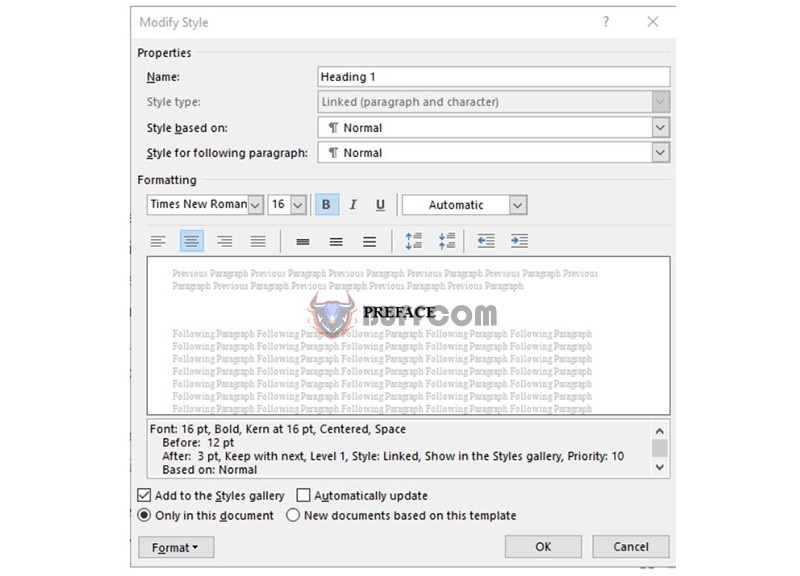
Note: You can customize the Heading text by right-clicking on the Heading → select Modify, complete the edits and click OK.
 Step 2: Add Page Numbers
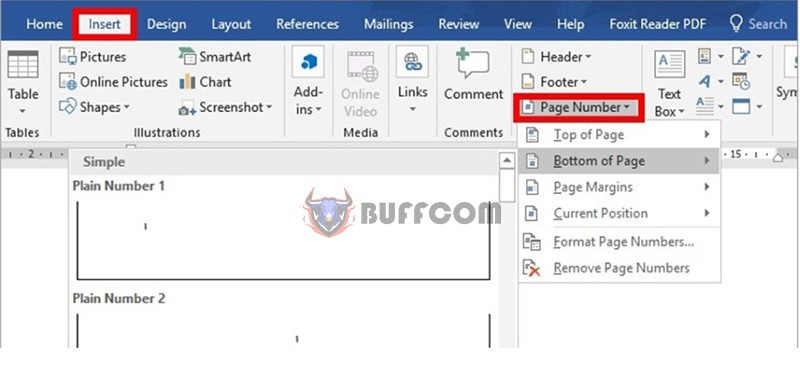
To easily find pages based on the table of contents, simply select Insert ⇒ Page Number ⇒ select the page numbering format.
 Step 3: Create an Automatic Table of Contents
First, you need to insert a page break to create a position for the table of contents (usually at the beginning or end of the document)
- Place the cursor at the desired position for the break
- Select the Layout tab → Breaks → Next page
- Then, select References → Tables of Content.
You can create a table of contents in 2 ways
- Select the table of contents available in Word
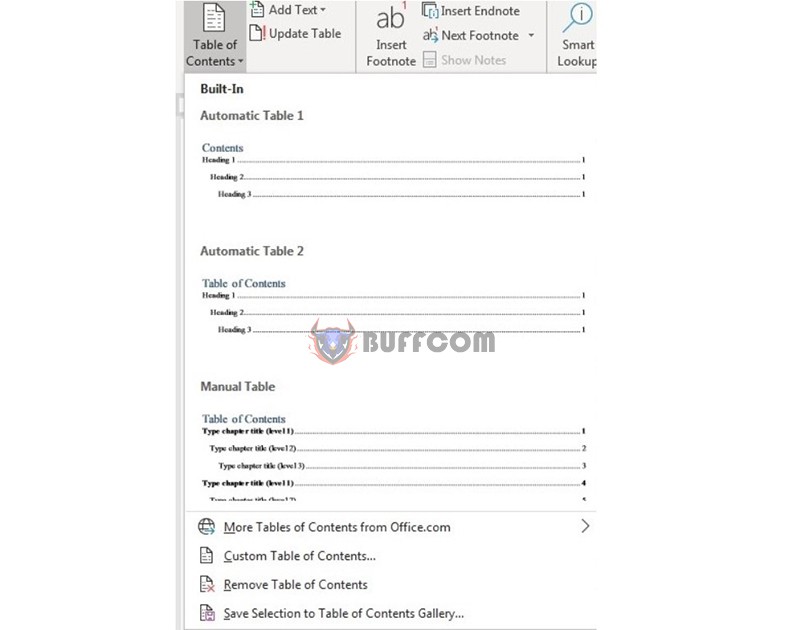 Create a table of contents manually by clicking Insert Table of contents… automatic table of contents
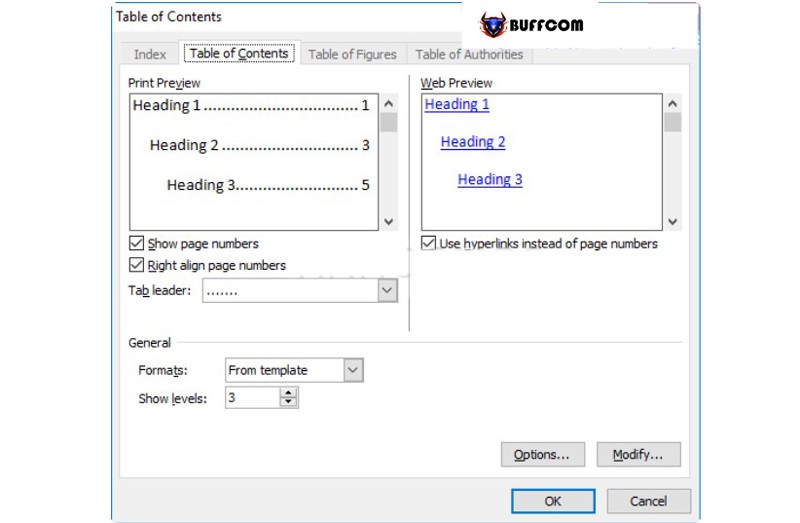
In the pop-up dialog box, select the desired edits and click OK to complete the process of creating a table of contents in Word.
In the newly created automatic table of contents, you can link to the content of the table of contents by pressing Ctrl+ click on the table of contents.
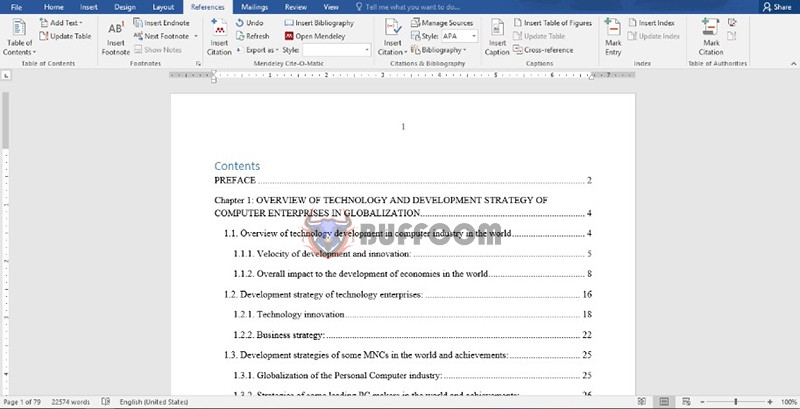
So you have completed your table of contents. Let’s see the result:
Method 2: Create an Automatic Table of Contents by Adding Levels
Step 1: Set the Level for Each Heading
For example, when you are writing a thesis, a dissertation, or a report, you can set level 1 for major headings such as Chapter, Section, and Part, and level 2 for subheadings such as I, II, III, and so on.
If you want to create more than 3 levels, you can follow these steps: select References ⇒ Table of Contents ⇒ Custom Table of Contents.
 Step 2: Assign the Headings to Each Level
To assign headings to each level, place the cursor on each heading, select References ⇒ Add Text ⇒ select the level.
For example, place the cursor on the line Chapter I, then select References ⇒ Add Text ⇒ level 1.
Step 3: Add Page Numbers and Insert an Automatic Table of Contents
This step is the same as Method 1.
Editing, Updating, and Deleting the Table of Contents
You can edit the table of contents as you like, such as formatting (font, size, color, borders, etc.) on the Home tab, or editing the content of the table of contents.
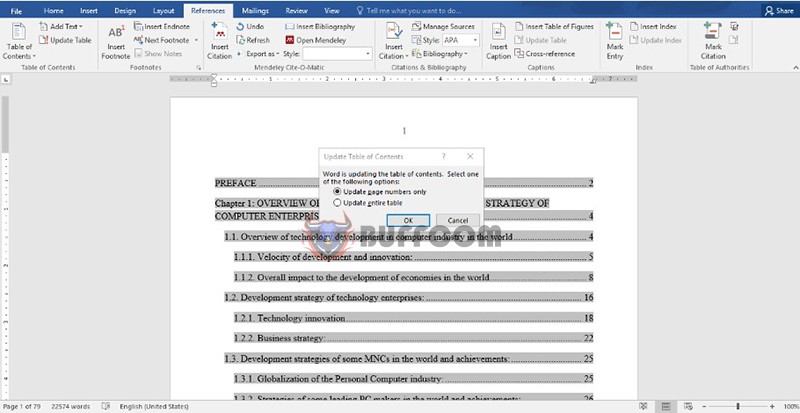
If the content of the table of contents changes or you add text that causes the page numbers of the headings to change, you can update the table of contents by selecting Update Table. After the Update Table of Contents dialog box appears:
- Tick the Update page numbers only option if you only want to update the differences in page numbers.
- Tick the Update Entire Table option when you want to update the entire table of contents.
 Removing the Automatic Table of Contents
To remove the automatic table of contents, select Reference -> Table of Contents -> Remove Table of Contents.
Above is the article on how to create an automatic table of contents in Word. We hope this article has helped you learn more about useful tricks when using Word. If you still have questions related to Microsoft Office software, please contact Buffcom.net!


