How to Disable and Delete Add ins in Excel
How to Disable and Delete Add ins in Excel: Add-ins are useful additional tools in some cases in Excel. However, if you no longer need that feature, you can disable or delete Add-ins in Excel using the following steps.
1. Disable Add-in
Step 1: To disable an Add-in, first, open any Excel file and select the File tab on the toolbar. Next, select the Options menu in the bottom left corner of the screen.

How to Disable and Delete Add ins in Excel
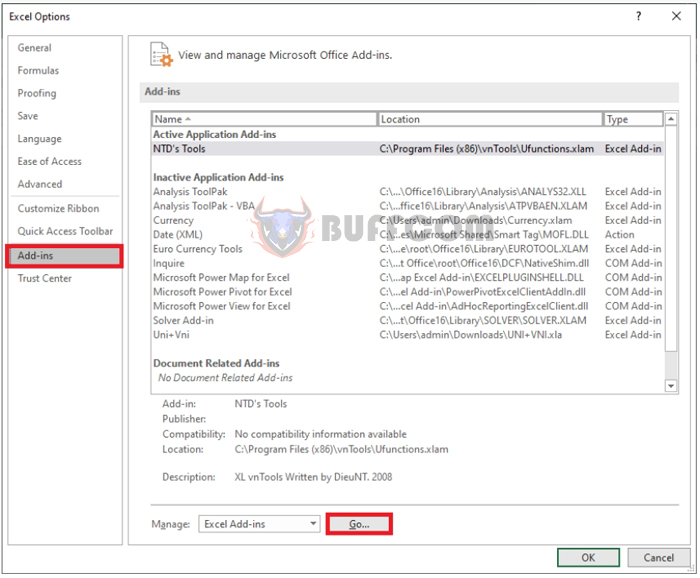
Step 2: At this point, the Excel Options window appears. Select Add-ins on the left-hand menu. Then, select Go at the Manage Excel Add-ins section.
How to Disable and Delete Add ins in Excel
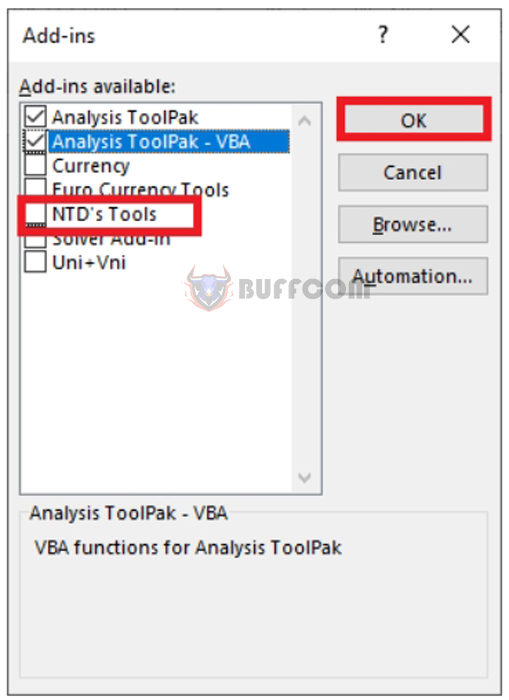
Step 3: At this point, the Add-ins window appears. Uncheck the Add-in you want to disable. Then press OK to complete the process. That’s all it takes to disable that Add-in. The next time you open Excel, that Add-in will no longer work.
How to Disable and Delete Add ins in Excel
2. Delete Add-in
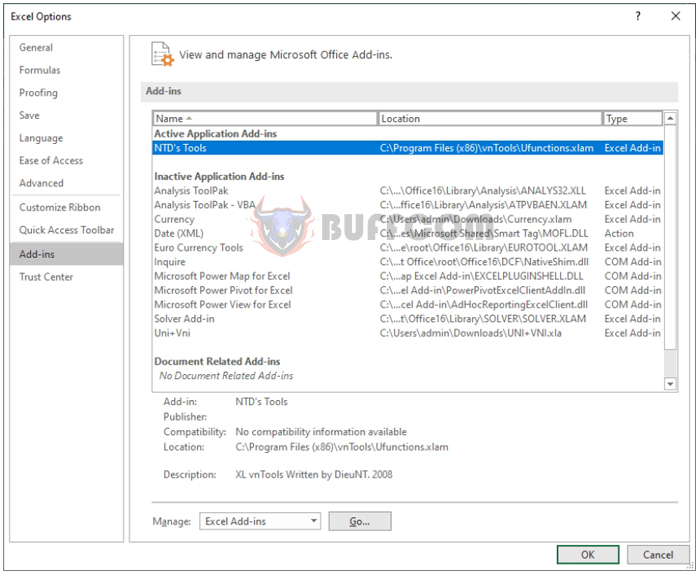
Step 1: You can also perform similar steps 1 and 2 as above, open any Excel file and select the File tab. Then select the Options menu and navigate to the Add-ins tab.
Step 2: Now, you can identify where the Add-in is stored on the computer in the Location column.
How to Disable and Delete Add ins in Excel
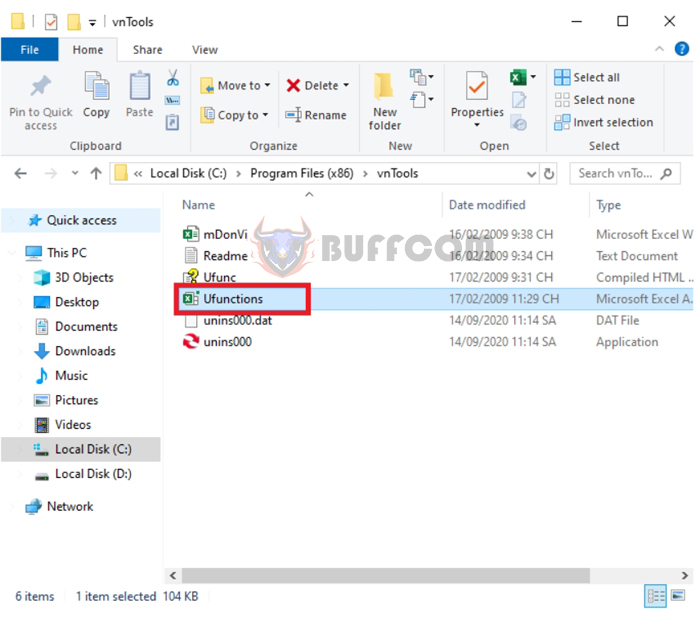
Step 3: Next, close Excel and go to the location where the Add-in is stored on the computer and delete it.
How to Disable and Delete Add ins in Excel
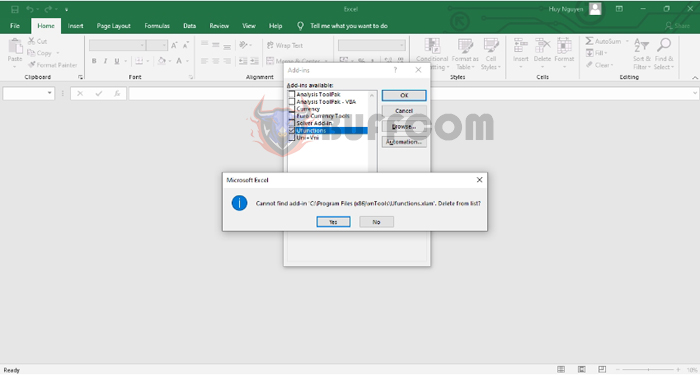
Step 4: Now, reopen Excel and select the File tab => Options => Add-ins => Go. At this point, the message “Excel cannot find the Add-in we just deleted” will appear. Press Yes to remove that Add-in from the list.
How to Disable and Delete Add ins in Excel
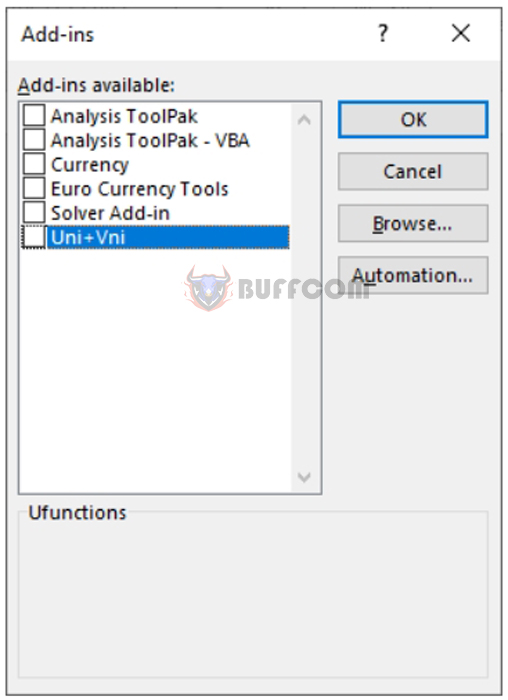
When completed, if the Add-in we just deleted is no longer on the Add-in list, it means that the process has been successful. At this point, you just need to press OK and return to working with Excel normally.
How to Disable and Delete Add ins in Excel
Therefore, this article has provided instructions on how to disable and delete Add-ins in Excel. Hopefully, this article will be useful to you in your work. Wish you success!


