How to Make Headers and Footers in Excel: Step-by-Step

If you want to include basic information like page numbers, printed date, workbook name, and more when printing your Excel spreadsheet data, you can use the Header and Footer feature in Excel. You have the option to either use Excel’s pre-defined Headers and Footers or customize them according to your needs.
How to Make Headers in Excel
Steps to Insert a Header in Excel:
- Go to the “Insert” tab.
- Click on the “Text” group.

- Click the “Header & Footer” option.
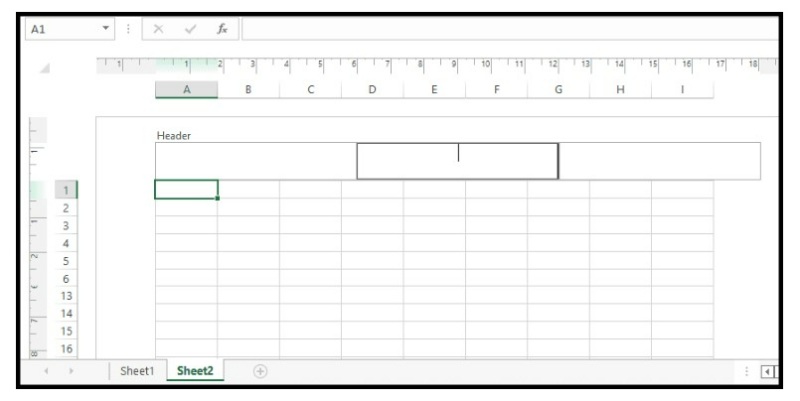
- Excel will display the header section for the current worksheet.
- Add the header elements you need.
- Once you are done with the header, click anywhere in the sheet to exit the header section.
- Your header becomes active.
Note: In the “Header and Footer” section, you will have three boxes (right, middle, and left) to enter text, values, images, etc. for your header and footer. Enter data in the appropriate box based on where you want to display your header and footer elements.
How to Make Footers in Excel
Steps to Insert a Footer in Excel:
- Go to the “Insert” tab.
- Click on the “Text” group.

- Click the “Header & Footer” option.

- You will see the “Go to Footer” icon on the navigation group on the ribbon.
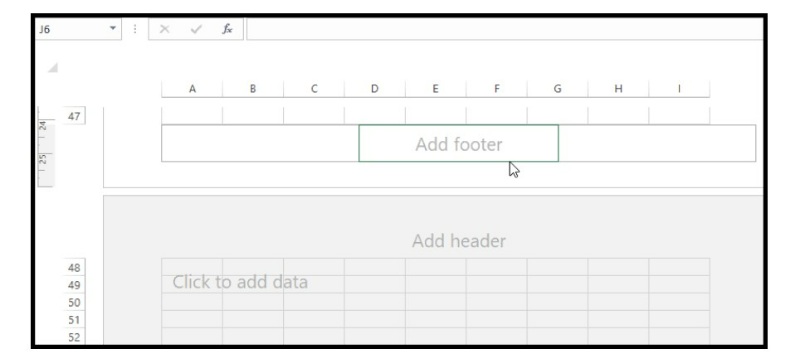
- Click on the “Go to Footer” icon.
- Excel will display the footer section for the current worksheet.
- Add the footer elements you need.
- Once you are done with the footer, click anywhere in the sheet to exit the footer section.
- Your footer becomes active.
Note: In the “Header and Footer” section, you will have three boxes (right, middle, and left) to enter text, values, images, etc. for your header and footer. Enter data in the appropriate box based on where you want to display your header and footer elements.
How to Insert Predefined Headers and Footers in Excel
Steps to Insert Predefined Headers and Footers in Excel:
- Go to the “Insert” tab.
- Click on the “Text” group.
- Click the “Header & Footer” option.

- Excel will display the “Header & Footer” tab with multiple predefined elements.
- Select any one of the predefined elements you want to use as your header or footer.

- For example, if you want to use the “Number of Pages” element, click on it and it will appear as a header within your worksheet.
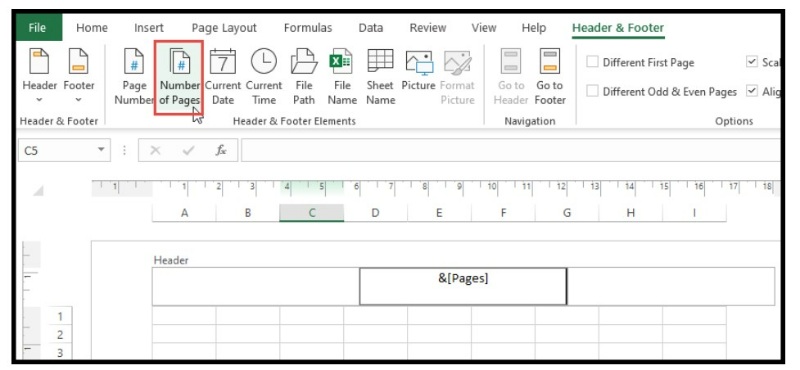
- You can also select predefined “Header and Footer” elements by clicking on the “Header” or “Footer” options.
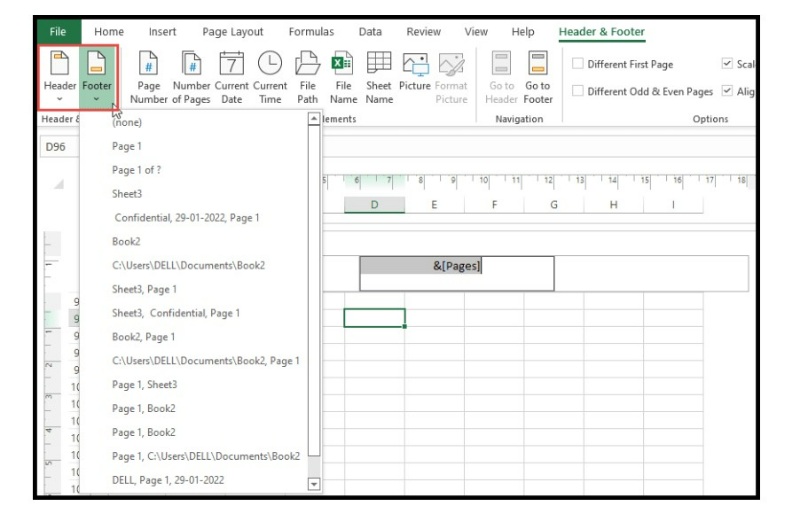
- The list of predefined elements to choose from will be displayed.
- To view what your header or footer selection looks like, simply click anywhere in the sheet.
- You will exit the header and footer section and can view the header or footer that you have selected.
Edit or Format the Header and Footer
Editing or Formatting the Header and Footer:
- Go to the “Page Layout” tab.

- Click on the page setup dialogue box icon.
- Click on the “Header/Footer” option to display the “Custom Header” and “Custom Footer” options.
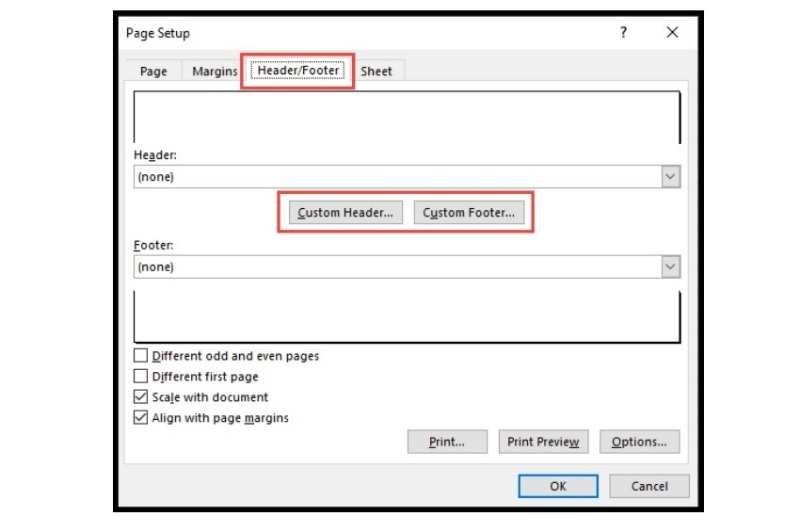
- Click on the “Custom Header” or “Custom Footer” option you want to edit or customize.

- Click on the font icon to open the pop-up menu.
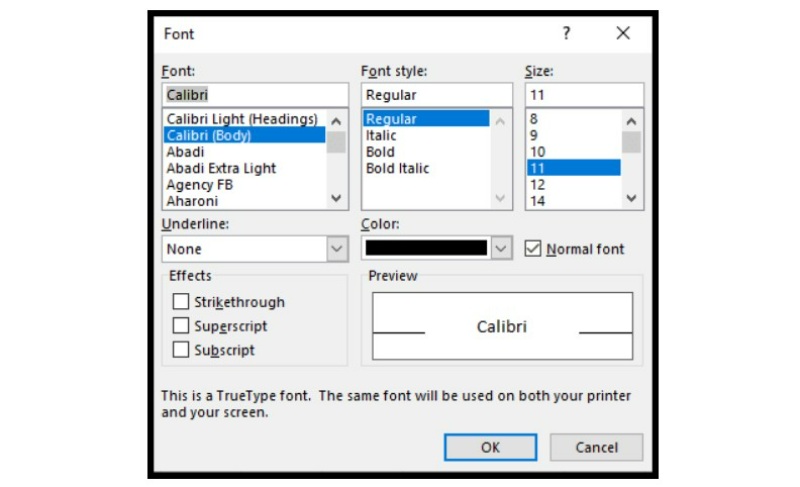
- Select the font size, color, style, and effects for your “Header & Footer”.
Removing the Header and Footer
Removing the Header and Footer in Excel:
- Go to the “View” tab.

- Click on the “Normal” icon to remove the existing “Header & Footer”.

Alternatively, you can also remove the “Header & Footer” by clicking on the “Normal” icon on the status bar.
In conclusion, Excel‘s “Header & Footer” feature is a useful tool for displaying important information on printed spreadsheets, such as page numbers, printed date, and workbook name. By following the simple steps outlined above, you can easily add, edit, format, and remove headers and footers in Excel to suit your needs. Whether you’re using predefined elements or creating custom ones, Excel offers a variety of options for making your headers and footers stand out. So, the next time you need to print your spreadsheet data, be sure to take advantage of this handy feature to make your documents more professional and informative.


