How to add a timestamp to an Excel record
There are various ways to add a timestamp to an Excel record. In this article, we will discuss three methods: the easy way, the bad way, and the automated way. It is important to choose the right method to ensure accuracy and consistency.
How to add a timestamp to an Excel record
A timestamp is used to identify the date and time when a particular event or record occurs. It can be the time when a record is entered or when a project is completed.
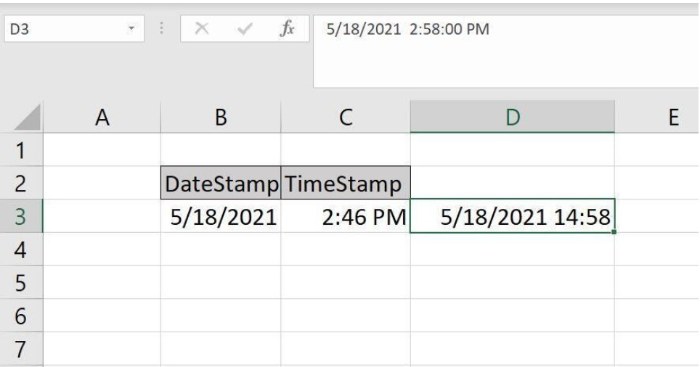
One simple way to add a timestamp is by using built-in shortcut keys in Excel. If you are familiar with Excel, you may already know the shortcuts for entering the current date and time. For the date, you can use Ctrl + ; and for the time, you can use Ctrl + Shift + ;. If you want both values in the same cell, you can enter the date first, followed by a space, and then the time shortcut. This will create a custom format that displays both the date and time. However, using shortcut keys requires manual input and may not be the best solution if you want to ensure consistency among users.
How to add a timestamp to an Excel record
Another common approach is to use the NOW() and TODAY() functions in Excel. However, these functions are volatile, which means they update every time the sheet calculates. Therefore, they are not ideal for creating accurate and static timestamps.
The most reliable way to add a timestamp is by using a macro or a user-defined function. You can create a simple macro that enters the current date and time in the desired format. You can then add this macro to the Quick Access Toolbar (QAT) for easy access. The user can simply select the cell and click the macro button on the QAT to add the timestamp.
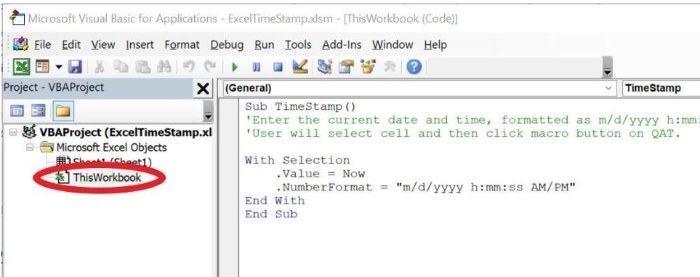
Here is an example of a macro code that enters the current date and time in the format “m/d/yyyy h:mm:ss AM/PM”:
Sub TimeStamp()
‘ Enter the current date and time, formatted as m/d/yyyy h:mm:ss AM/PM.
‘ User will select cell and then click macro button on QAT.
With Selection
.Value = Now
.NumberFormat = “m/d/yyyy h:mm:ss AM/PM”
End With
End Sub
To add the macro to the QAT, you need to follow these steps:
- Press Alt + F11 to open the Visual Basic Editor.
- In the Project Editor, select the ThisWorkbook module.
- Enter the code into the module.
- Return to Excel and save the workbook as a macro-enabled file.
How to add a timestamp to an Excel record
- Add the macro to the QAT by clicking the QAT dropdown, selecting “More Commands,” choosing “Macros” from the dropdown, selecting the macro, and clicking “Add.”
Once the macro is added to the QAT, you can select any cell and click the macro icon to enter a timestamp. 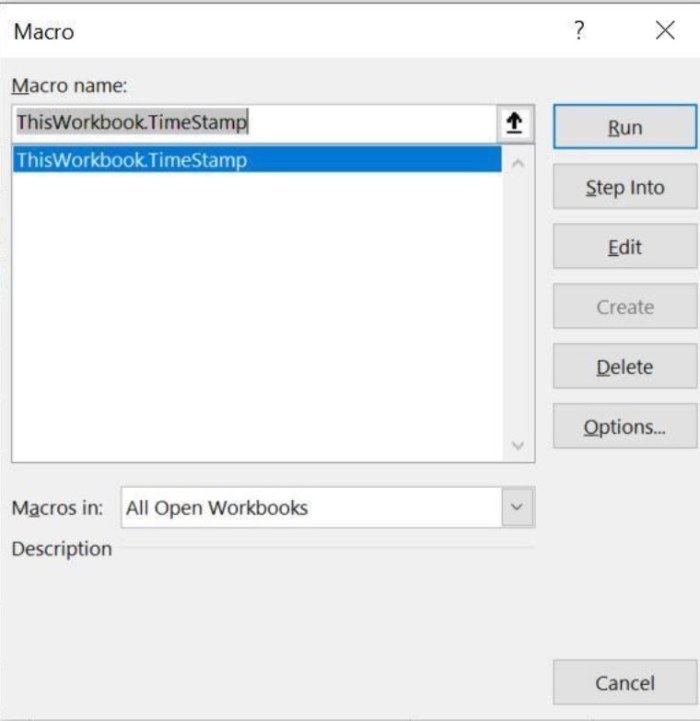 This automated approach eliminates the need to remember shortcut keys or manually enter the date and time.
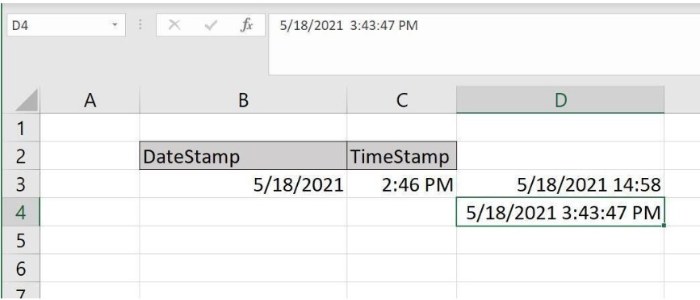
You can customize the macro code to fit your specific requirements, such as using TODAY() instead of NOW() or changing the date and time format. 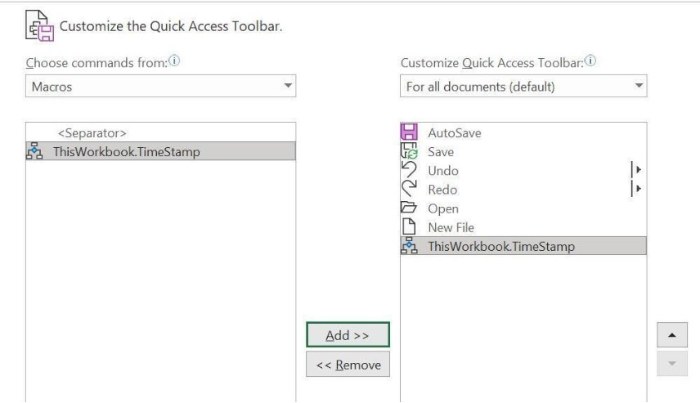 This solution provides users with a convenient and consistent way to add timestamps to Excel records.

