How to Disable the Windows Firewall in Windows
The Windows Firewall is designed to protect your computer from unauthorized access. However, there may be situations where you want to disable it, especially if you have another firewall program installed. Disabling the Windows Firewall is a simple process that usually takes less than 10 minutes. The steps below apply to Windows 10, 8, and 7, with screenshots specific to Windows 10.
How to Disable the Windows Firewall in Windows:
Please note that disabling the Windows Firewall can leave your computer vulnerable to security risks. Only proceed with disabling it if you have an alternative firewall solution or under specific circumstances where it is necessary.
Here’s how to disable the Windows Firewall:
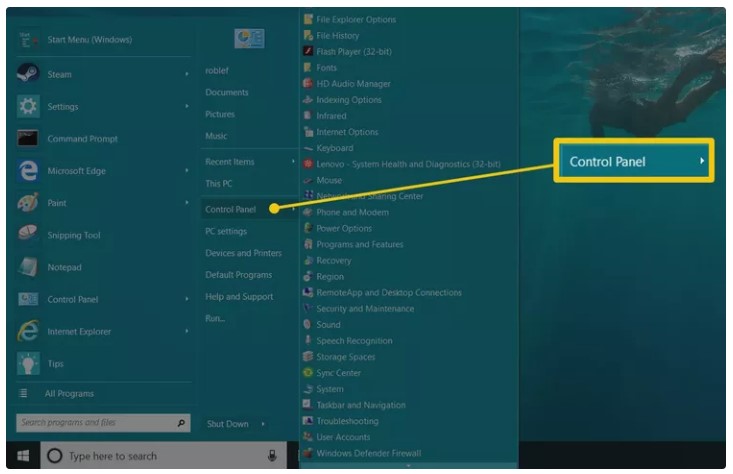
- Search for “Control Panel” in the Start menu and open it. (Alternatively, you can select the Control Panel from the Start menu in Windows 7.)
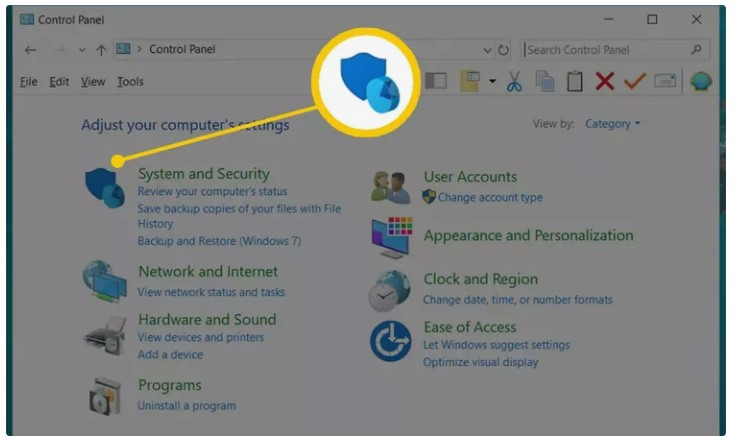
- In the Control Panel, select “System and Security.”
- Locate and click on “Windows Firewall” (or “Windows Defender Firewall” in some cases).
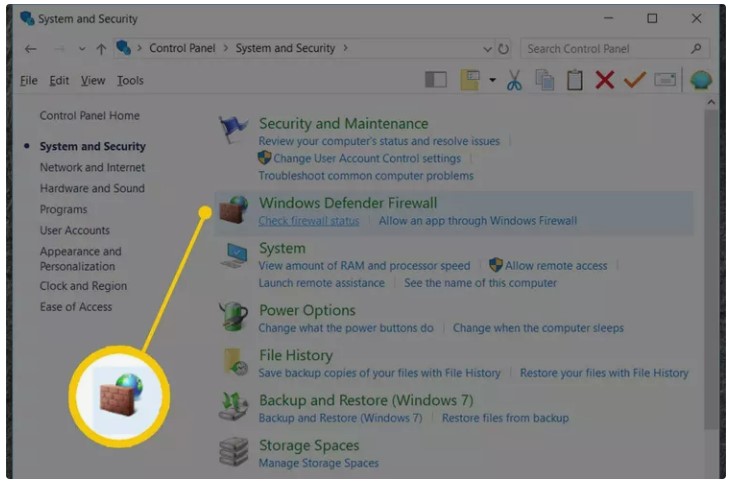
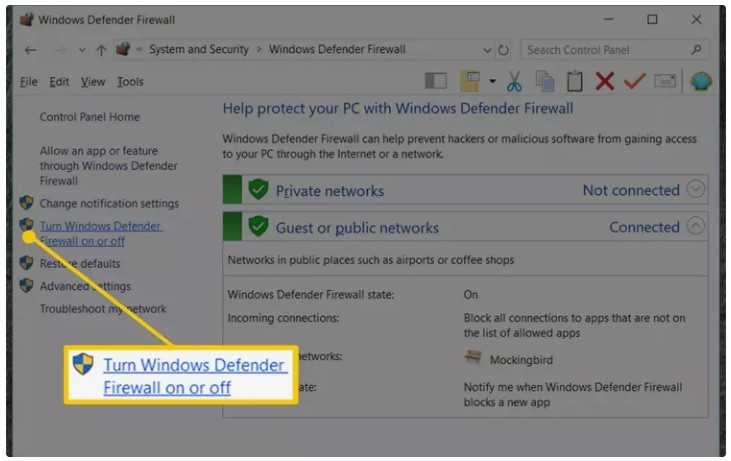
- On the left side of the screen, click on “Turn Windows Firewall on or off.”

- To completely disable the Windows Firewall, select the option “Turn off Windows Firewall (not recommended)” for both the private and public network settings.
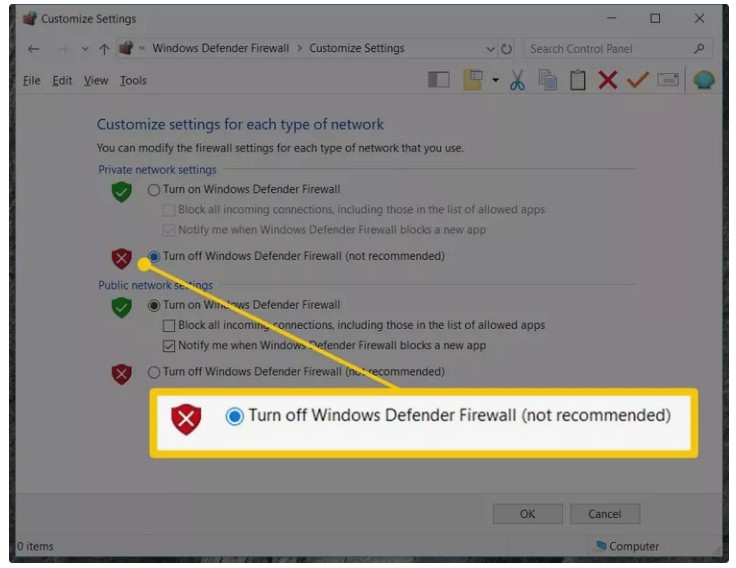
- Click “OK” to save the changes.
Please exercise caution when disabling the Windows Firewall, as it is an essential security component of your computer. Once disabled, perform the actions that initially caused the problem to determine if disabling the firewall resolved the issue.

