How To Enable Or Disable Sleep Mode In Windows 10

The Sleep feature has been present in Windows since its early versions. While some users find it very useful, others may find it bothersome. However, don’t worry, there’s always a solution! In Windows 10, you have the flexibility to enable or disable Sleep mode according to your needs. In this article, Buffcom.net will guide you on how to enable or disable Sleep mode in Windows 10.
Enable/Disable Sleep Mode via Windows 10 Settings
Step 1: Open the Start menu and select “Settings” (or directly press Windows key + I) to open the Settings window in Windows 10.
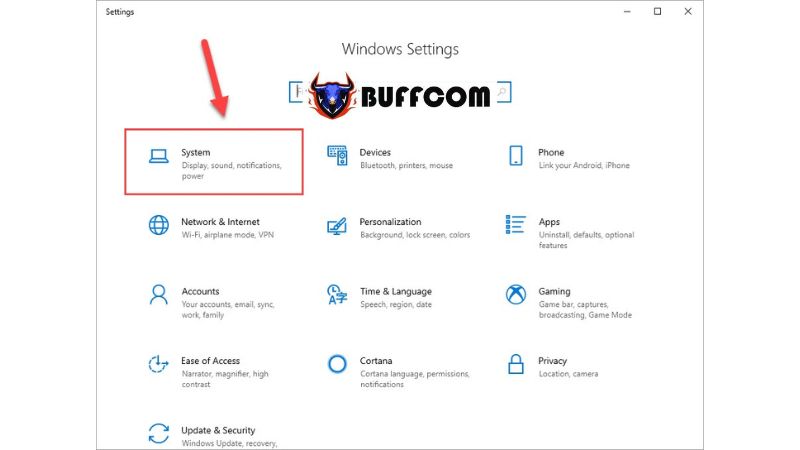
 Step 2: Next, choose “System” to access the general system settings in Windows 10.
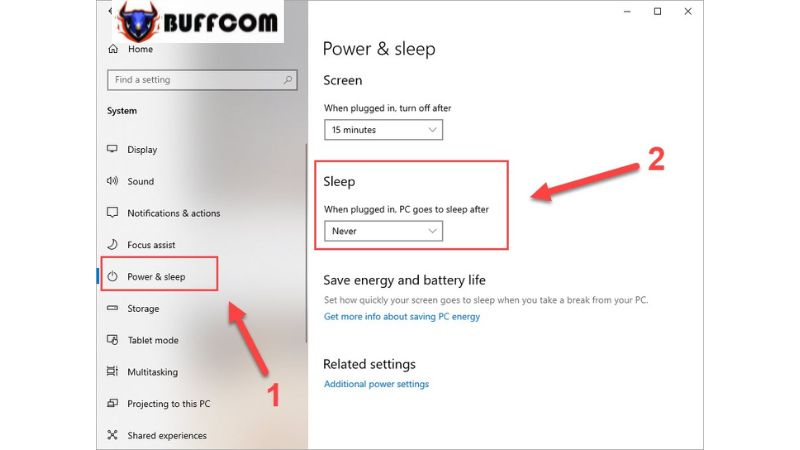
 Step 3: Select the “Power & Sleep” tab. Here, you will find the Sleep section. You can adjust the settings as follows:
Never: Disable Sleep mode.
Times: Enable Sleep mode.
When you choose a specific time, it means that after that duration of inactivity, your computer will automatically go to sleep to save power.
Once you have made your selection, close the Settings window, and the changes will be applied to your system.
 Enable/Disable Sleep Mode in Power Mode
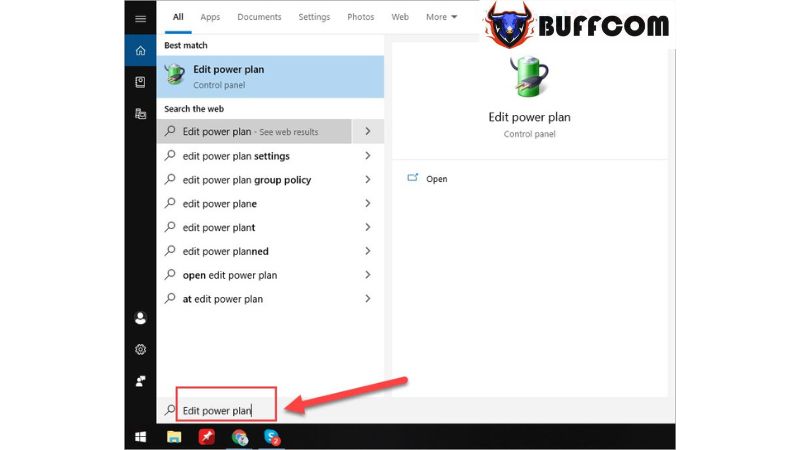
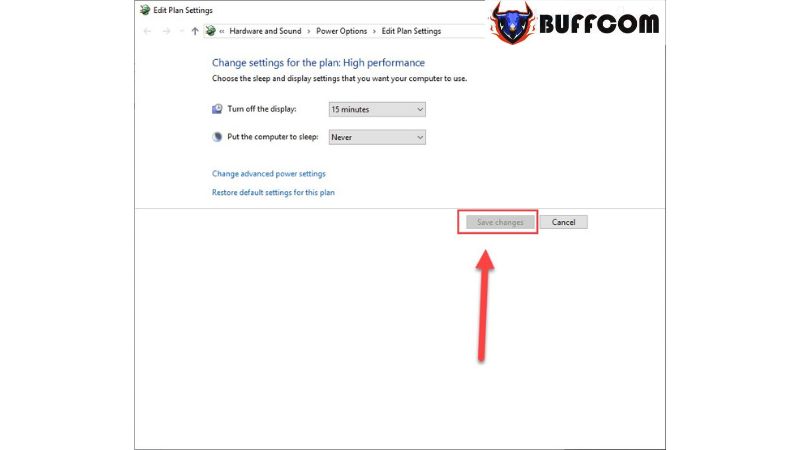
Step 1: Open the Start menu and select “Edit Power Plan” to modify the power usage plan.
 Step 2: In the power plan settings, adjust the parameters under “Put the computer to sleep.” Here, you won’t have an explicit Enable/Disable option, but you can set it as follows:
Never: Disable Sleep mode.
Times: Enable Sleep mode.
When you choose a specific time, it means that after that duration of inactivity, your computer will automatically go to sleep to save power.
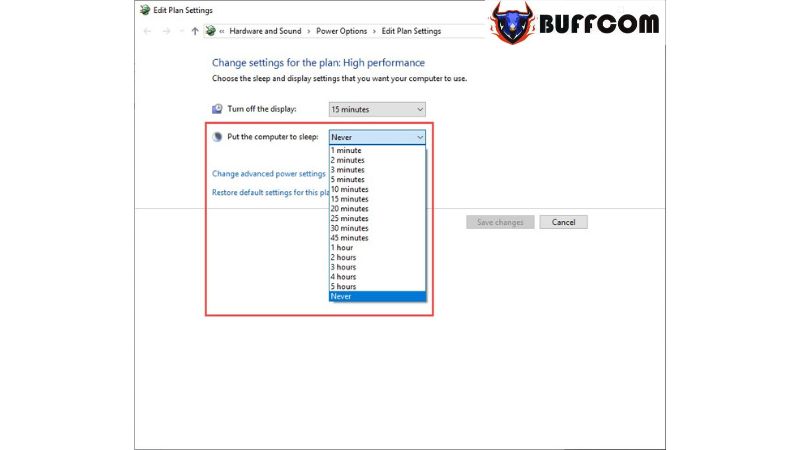 Step 3: Once you have finished configuring the settings, select “Save Changes” to apply the changes.
 In this article, Buffcom.net has provided instructions on how to enable or disable Sleep mode in Windows 10 using different methods. We wish you success! If you are interested in purchasing a genuine Windows key, please contact Buffcom.net for support!


