How To Change User Name And Login Name In Windows 10

You may have purchased a used computer or your company has provided you with a PC for work, but the previous user accidentally set the computer’s login name to their own name. So, how can you change the User Name and Login Name in Windows 10? Let’s find out in this article with Buffcom.net!
Method 1: Changing the Login Name with a Microsoft Account
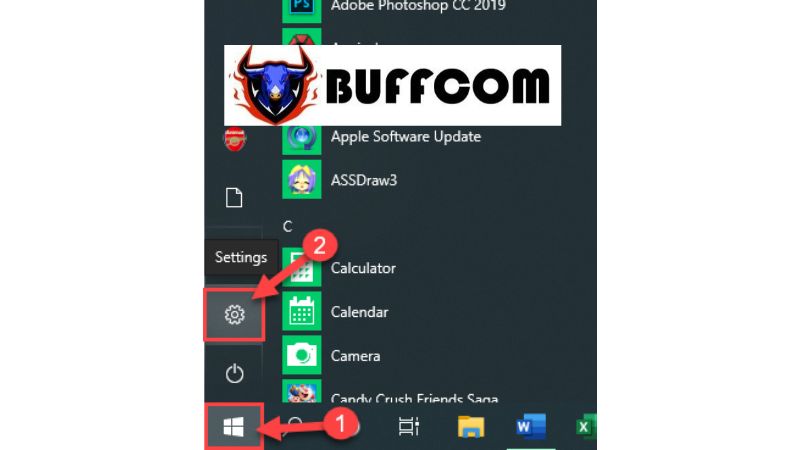
Step 1: Click on the Start Menu and select Settings.
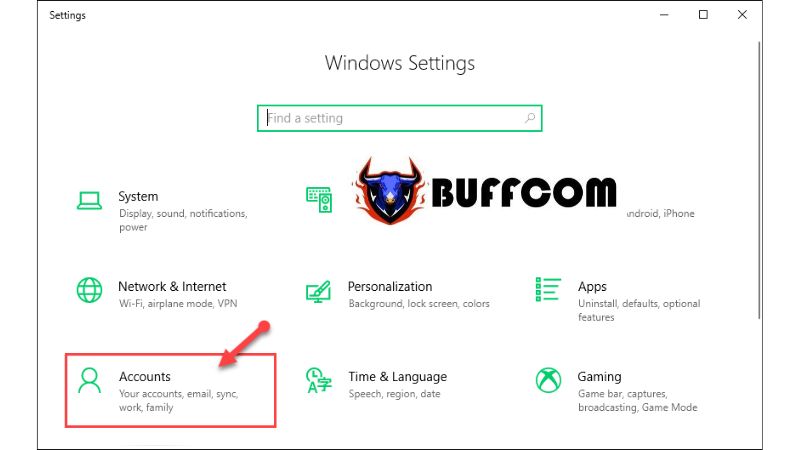
 Step 2: In the Settings window, choose the Accounts option.
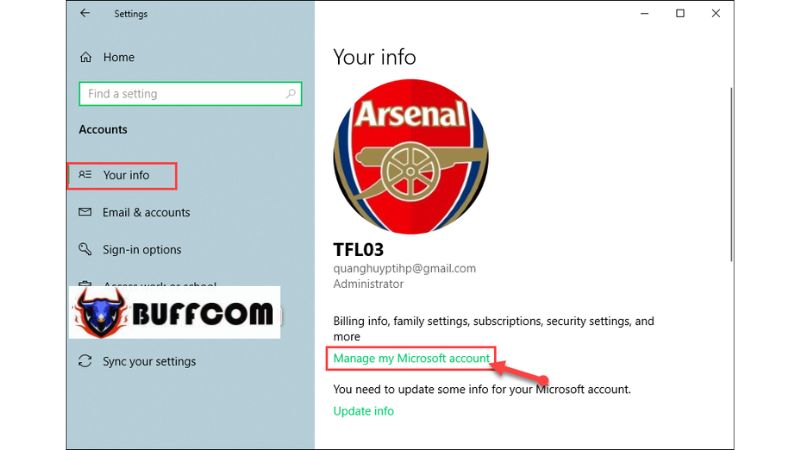
 Step 3: Go to the Your info tab and select Manage my Microsoft account.
 Step 4: A browser page will open, choose SIGN IN WITH MICROSOFT. Then, sign in to your Microsoft account.
Step 5: After signing in, select More actions (1) right below your account name, and then choose Edit profile (2).
Step 6: Here, click on Edit name.
Step 7: Enter the new name (1), input the verification code (2), and click Save (3) to complete the process.
Method 2: Changing the Login Name with a Local Account
For computers that only use a local account for login, changing the user name is much simpler. Follow these steps:
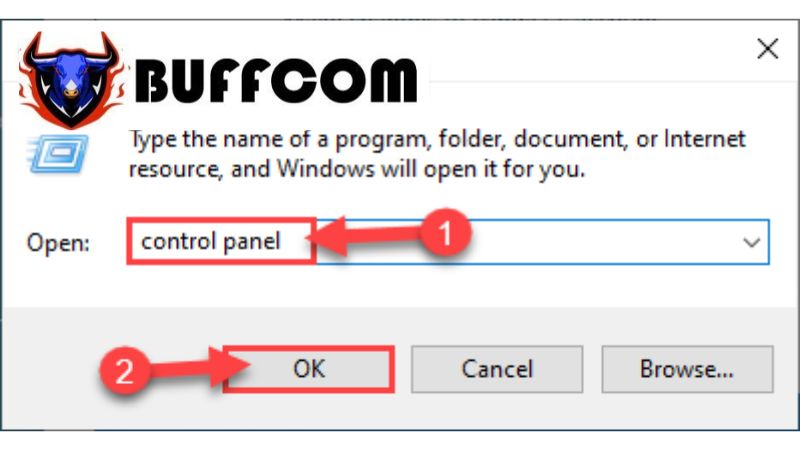
Step 1: Press the Windows + R keys to open the Run dialog box. Type “Control Panel” and click OK.
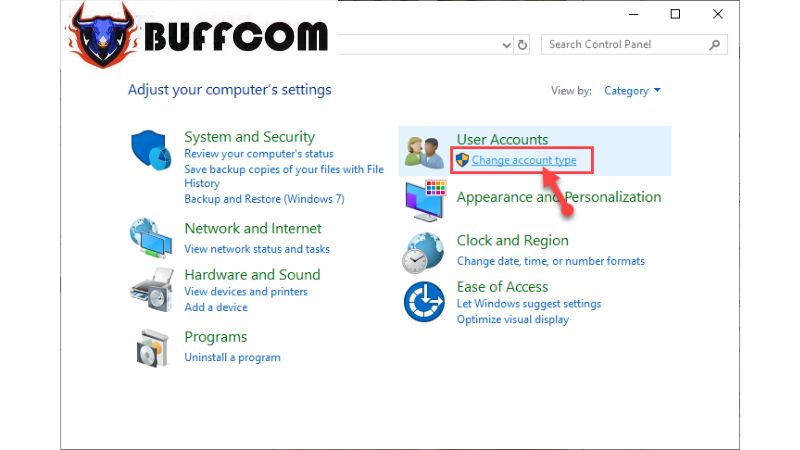
 Step 2: In the Control Panel, select Change account type in the User Accounts section.
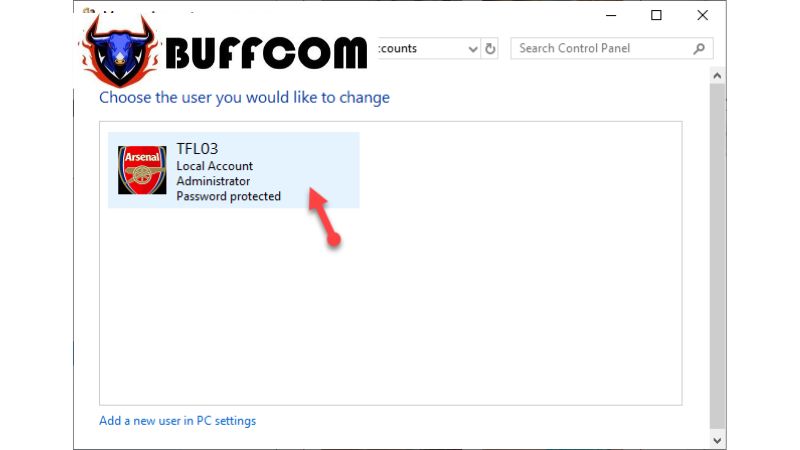
 Step 3: Click on your account on the computer.
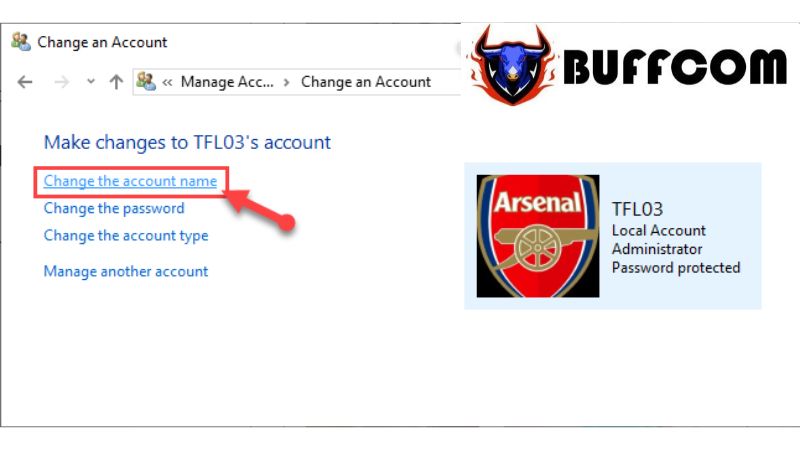
 Step 4: Then, choose Change the account name.
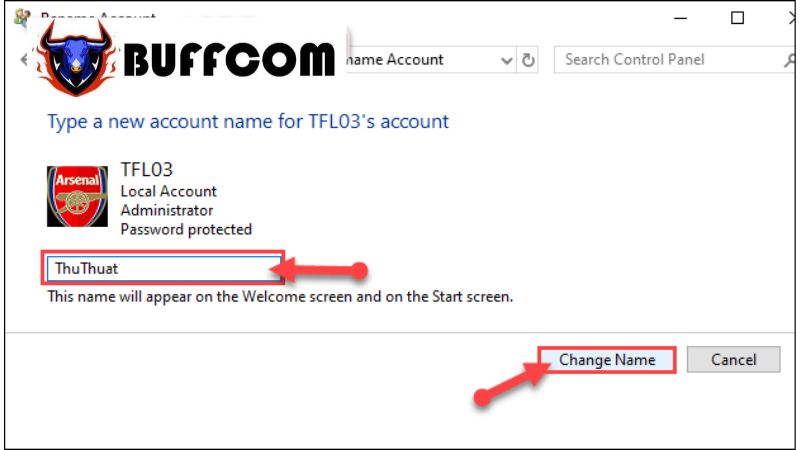
 Step 5: Enter the new user name (1) and click Change Name (2) to finish.
 These are the methods to change the User Name and Login Name in Windows 10 for both local and Microsoft accounts. We hope this article from Buffcom.net has helped you easily perform this change on your own. Thank you for reading, and if you are interested in genuine Windows product keys, please contact Buffcom.net for assistance!


