How To Quickly Share Data Over LAN In Windows 10

Local Area Network (LAN) is one of the most reliable and stable network connections, offering fast access speeds and high security. However, LAN is limited to small-scale environments like offices or small companies. Unlike the Internet, sharing files over LAN can be more complex. If you’re still unsure how to share files over LAN, let’s explore the methods in the following article by Buffcom.net.
Enable Network Discovery and Sharing for LAN
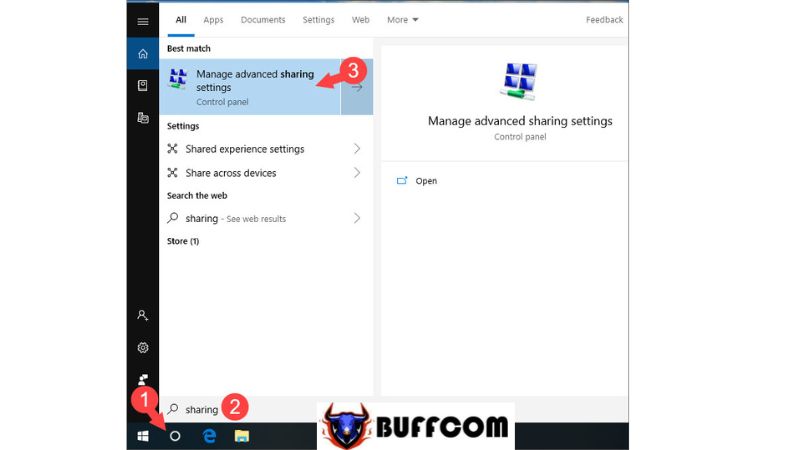
Step 1: Open the Windows 10 search tool (1) and search for “sharing” (2). Then, select the first result (3).
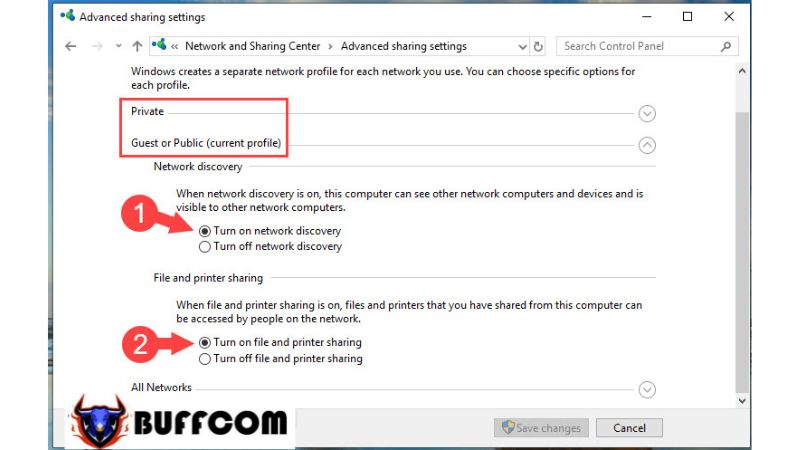
Step 2: Check the options for Turn on network discovery and Turn on file and printer sharing for both Private and Guests or Public networks. Then, click Save Changes to apply the settings.
 Share Drives or Folders over LAN
To share folders or data over LAN, follow these steps:
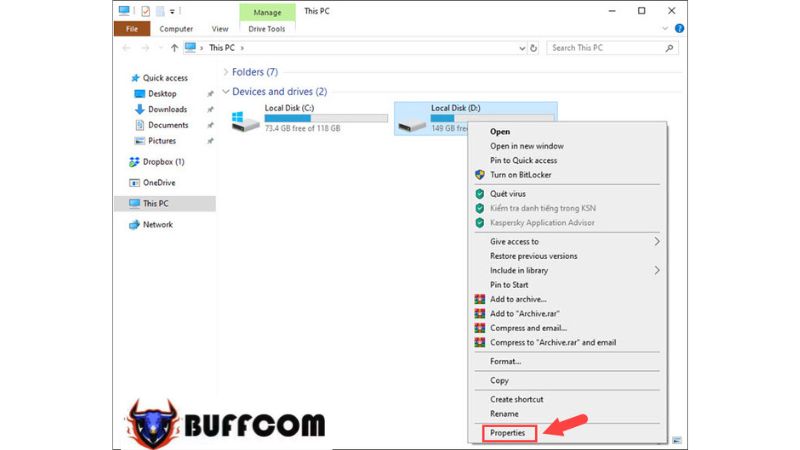
Step 1: Right-click on the drive or folder you want to share and select Properties.
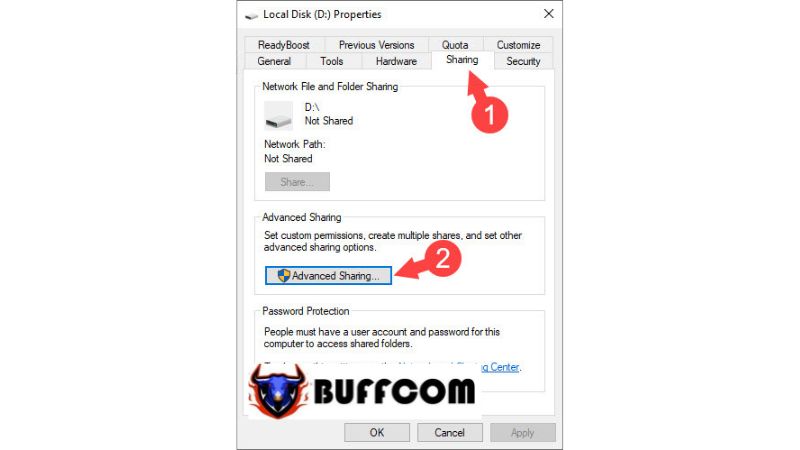
 Step 2: Choose the Sharing tab (1) => Advanced Sharing… (2).
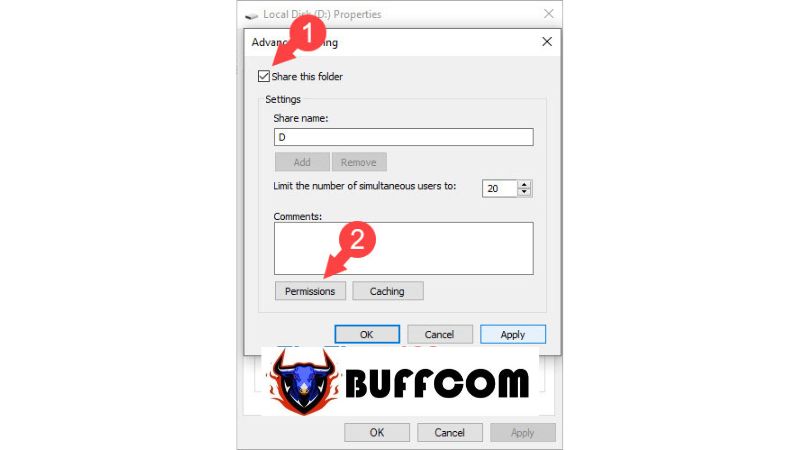
 Step 3: Check the box for Share this folder (1). Then, click on Permissions (2). Finally, click Apply and OK to save the changes.
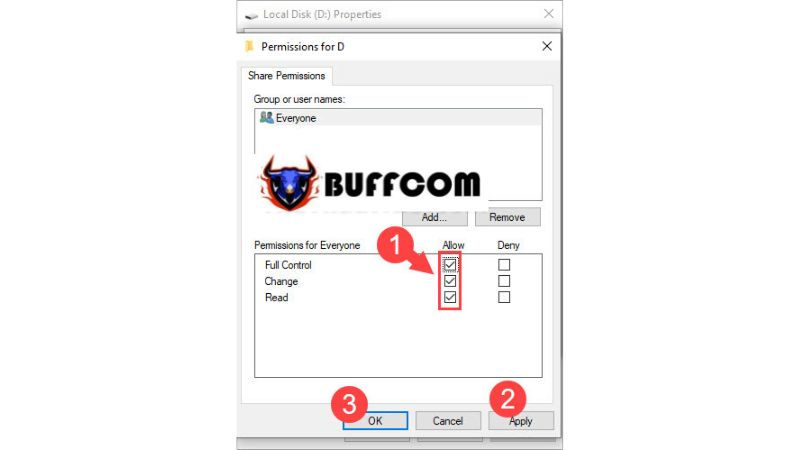
 Step 4: Check all the boxes under the Allow section (1), then click Apply (2) => OK (3) to save the settings.
In the Permissions section (1), there are three options: Full Control, Change, and Read. These represent different access rights within the LAN network:
- Full Control: Provides complete access rights, allowing you to read, write, and delete files within the shared folder.
- Change: Allows you to modify the contents of the shared folder, such as renaming files or moving them.
- Read: Only permits reading data from the shared folder, copying data externally, and prevents deleting, moving, or renaming folders and files within it.
Check LAN Connection and Shared Folders
To verify the shared folders or drives on another computer within the same LAN network, follow these steps:
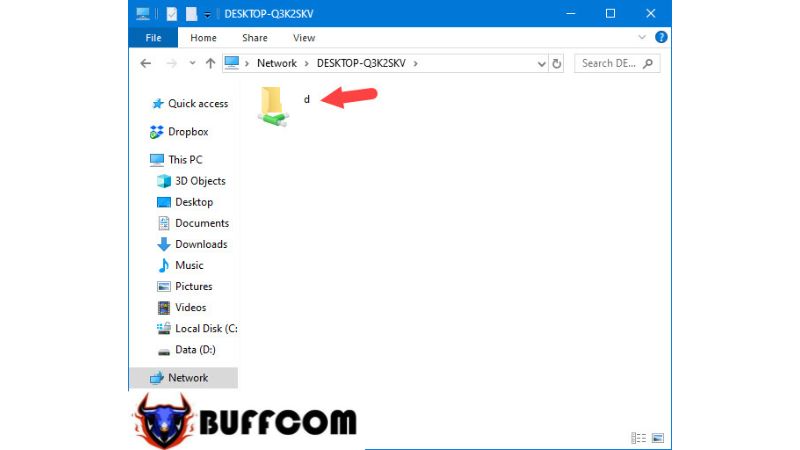
Step 1: Open This PC (My Computer) and select Network (1) => choose the name of the shared computer. To find your computer’s name, right-click on This PC (My Computer) and locate the Computer Name section. In this article, the shared computer’s name is DESKTOP-Q3K2SKV (2).
Step 2: You will see the shared drive as drive D. Click on it.
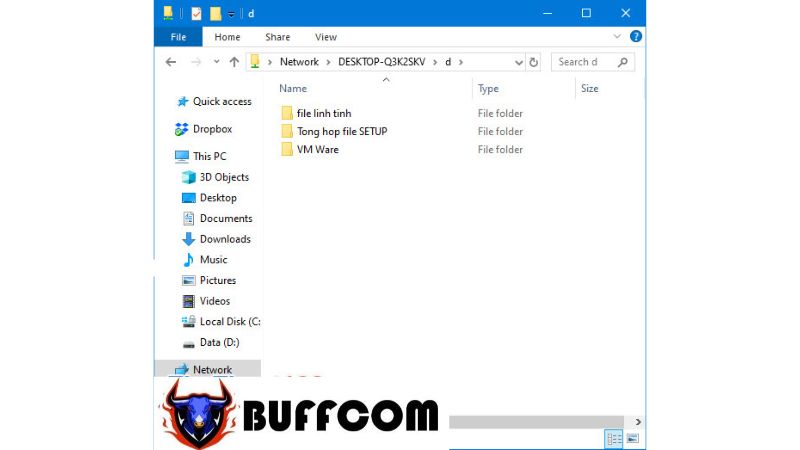
 Step 3: After opening the shared drive on the host computer, you will see all the files and folders appearing successfully. You can now proceed to copy or cut files and folders from the shared computer to your own.
 Alternative Ways to Access LAN
Apart from accessing computers on the LAN network using Network Place, you can also use the Run dialog box to access them.
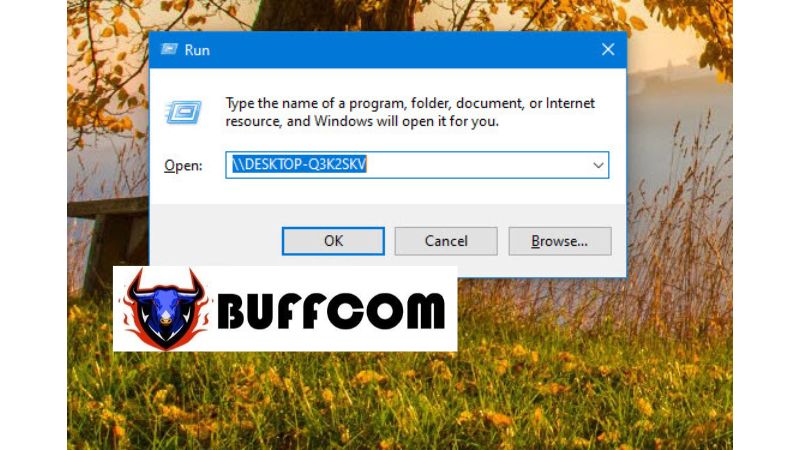
Method 1: Press the Windows + R keys to open the Run dialog box. Then, enter the command “\Computer_Name” (Computer_Name refers to the shared computer’s name). For example, if the computer’s name in this article is DESKTOP-Q3K2SKV, the command will be \\DESKTOP-Q3K2SKV. Press OK to access it.
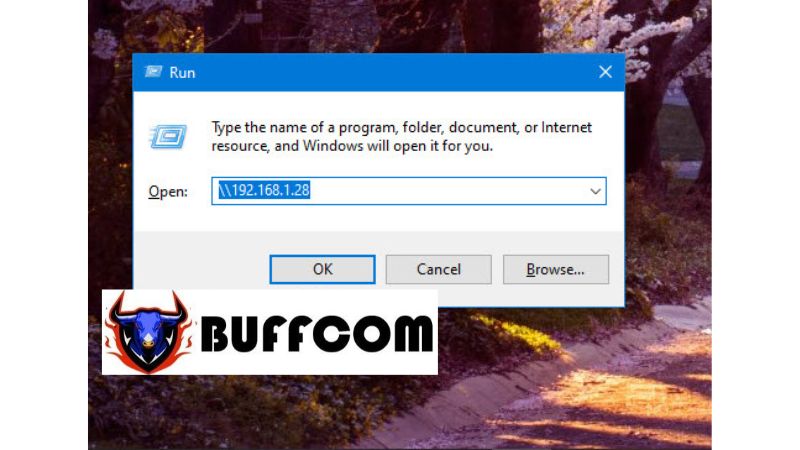
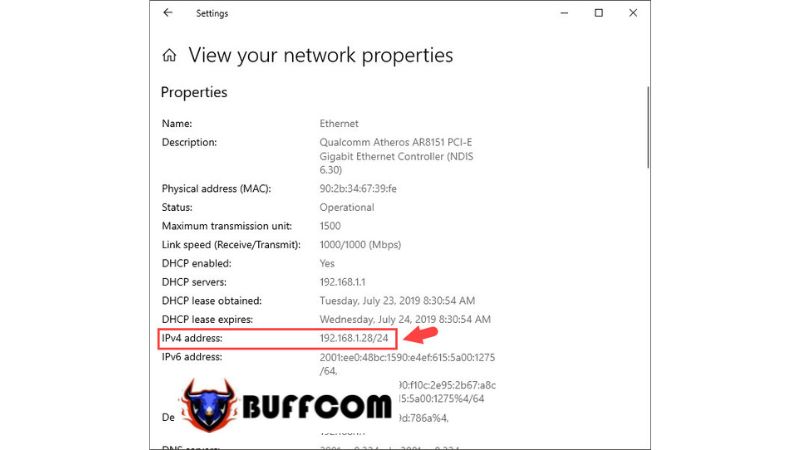
 Method 2: Press the Windows + R keys to open the Run dialog box and use the syntax “\\IP_Address” (IP_Address represents the IP address of the shared computer). For instance, if the shared computer’s IP address on the LAN network is 192.168.1.28, the command in Run would be \\192.168.1.28.
 *Note: If you don’t know the IP address of the shared computer, follow these instructions:
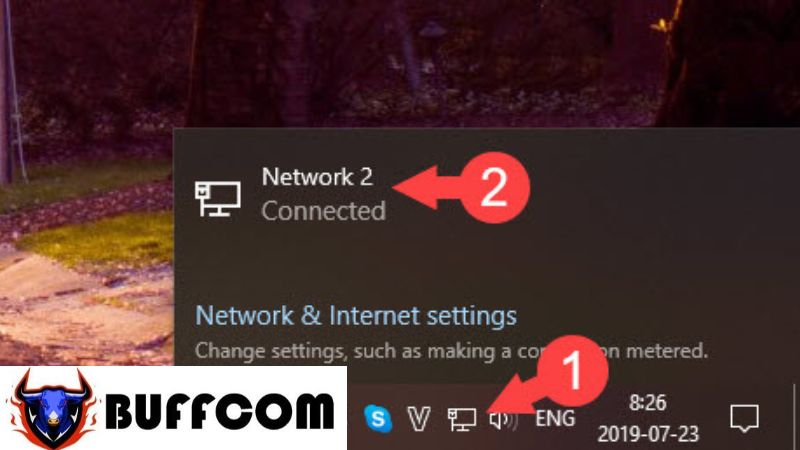
Step 1: Click on the Network icon (1) on the Taskbar and select Network (2).
 Step 2: Choose the Status tab (1) => View your network properties (2).
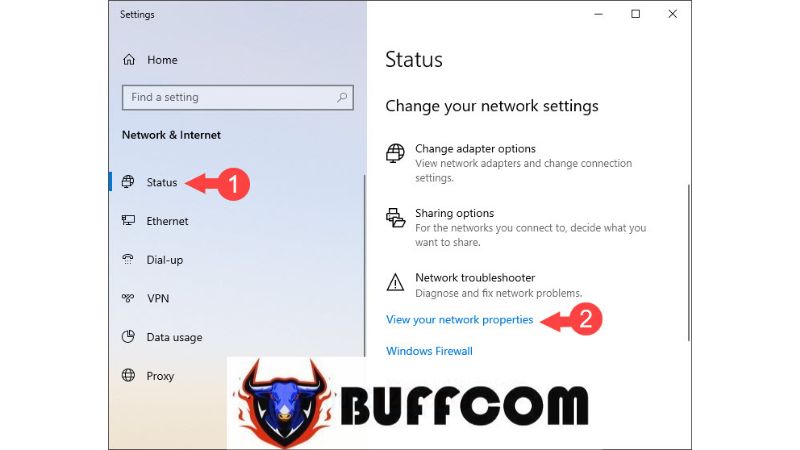 Step 3: In the View your network properties tab, you will find the IPv4 address, which is the IP address of the computer.
 LAN networks offer advantages such as fast and stable transmission speeds, as well as good security. With the knowledge shared in this article, Buffcom.net wishes you success! If you’re interested in genuine Windows keys, please contact Buffcom.net for assistance.


