What is Macro in Excel? How to create and run a Macro in Excel
Macros will record your actions and replay them as many times as you want, saving time with automated repetitive tasks. It is a programming code that runs in the Excel environment but you don’t have to be a programmer to program macros. This article from Buffcom.net will guide you on how to create and run Macros in Excel quickly and easily.
Macro, also known as VBA Macro (Visual Basic for Applications), is a small program that helps you automate repetitive actions in a data range in Excel. Instead of having to repeat these actions over and over again in a boring and time-consuming way, you can use Macros. Macros will perform those operations quickly and efficiently on your behalf.
1. How to enable the Developer tab in Excel
What is Macro in Excel How to create and run a Macro in Excel
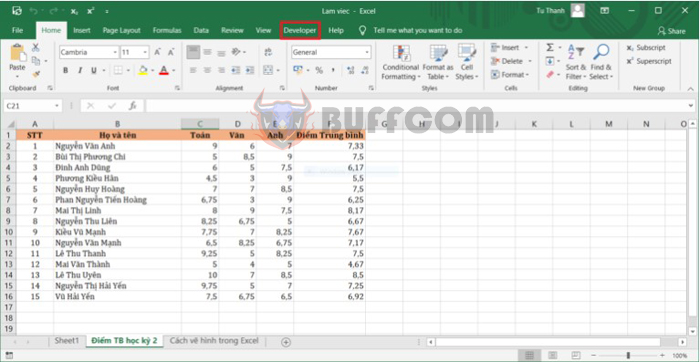
If you don’t see the Developer tab on your Ribbon like in the illustration above, don’t worry, just follow these steps to enable it.
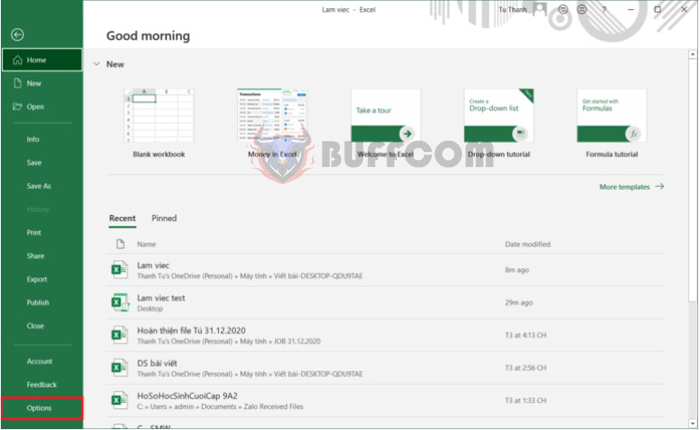
Step 1: On the Ribbon toolbar, go to the File tab. Then select Options.
What is Macro in Excel How to create and run a Macro in Excel
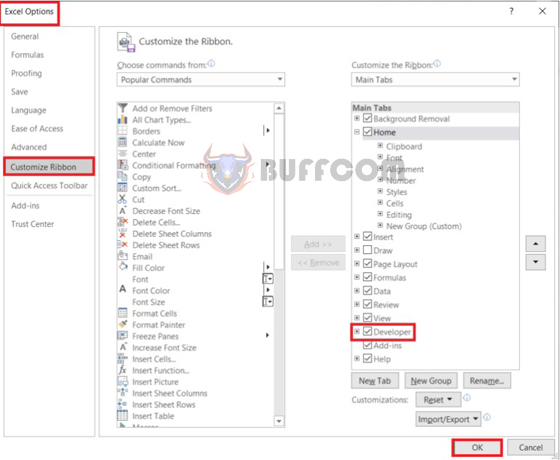
Step 2: The Excel Options screen will appear. Select Customize Ribbon. Then, in the Main Tabs section, tick Developer. Press OK.
What is Macro in Excel How to create and run a Macro in Excel
Then, return to the worksheet. The Developer tab has now been added to the Ribbon toolbar. You can now start using Macros for Excel.
2. How to create and record Macros in Excel
The process of creating and recording Macros in Excel is equivalent to recording the entire process of the actions you take. Therefore, we must ensure that in order to use Macros, there are no errors during the process of creating and running Macros.
The steps to create and record a Macro are as follows:
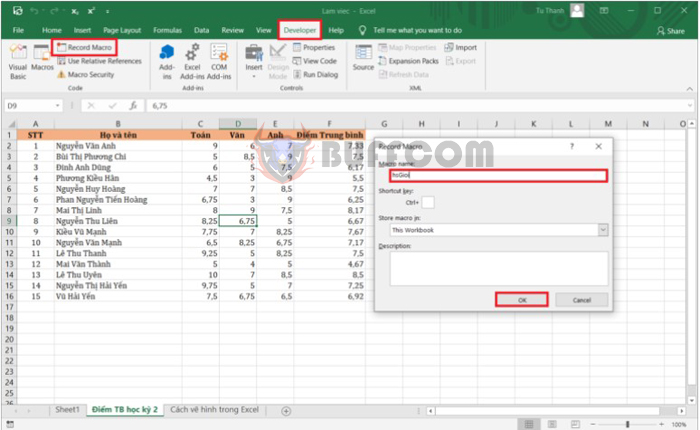
Step 1: On the Ribbon toolbar, select the Developer tab.
Then, click Record Macro. The Record Macro dialog box will appear. Enter a name for the Macro you are performing in the Macro name section to make it easier to work with. In addition, you can also create shortcuts or descriptions for each Macro. Finally, click OK.
What is Macro in Excel How to create and run a Macro in Excel
Step 2: Perform the actions you want to record on Excel.
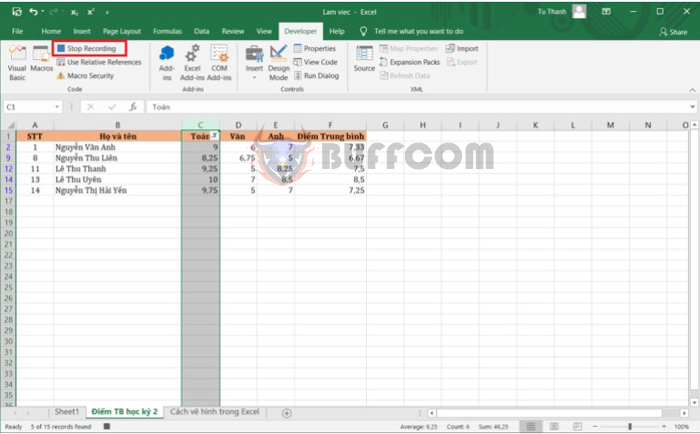
Step 3: When you have performed the actions you want to record on Excel. Stop recording the Macro by selecting Stop Recording on the Developer tab.
What is Macro in Excel How to create and run a Macro in Excel
3. How to run the recorded Macro in Excel
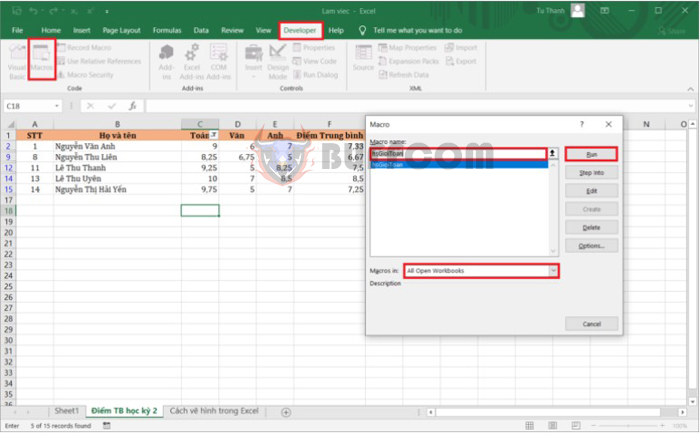
Step 1: First, to open the Macro dialog box, select the Developer tab on the Ribbon toolbar. In the Code section, select Macros. In addition, you can use the Alt + F8 shortcut key combination.
What is Macro in Excel How to create and run a Macro in Excel
Step 2: Select the Macro command in the Macro name section. Select the area to apply the Macro command.
All Open Workbooks: Apply to all open windows.
This Workbooks: Apply to the window you are selecting.
Step 3: Click Run to run the Macro.
4. How to save Macro files
To save the entire Excel file and Macro, you cannot save it under the usual Excel file format (.xlsx). Therefore, follow these steps:
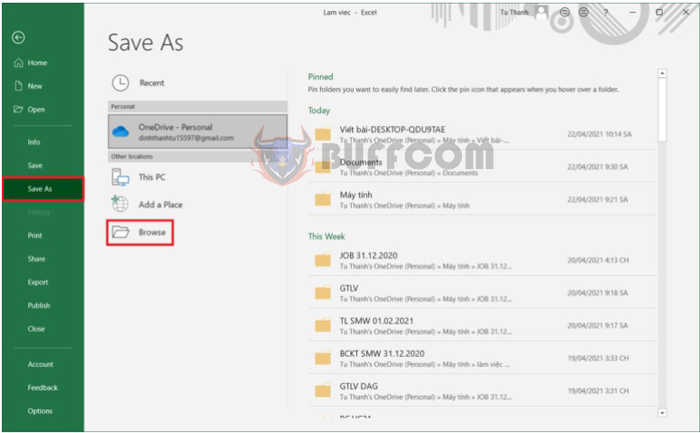
Step 1: On the Ribbon toolbar, select the File tab. Next, click on Save as. Then, click on Browse to choose the storage location and file format.
What is Macro in Excel How to create and run a Macro in Excel
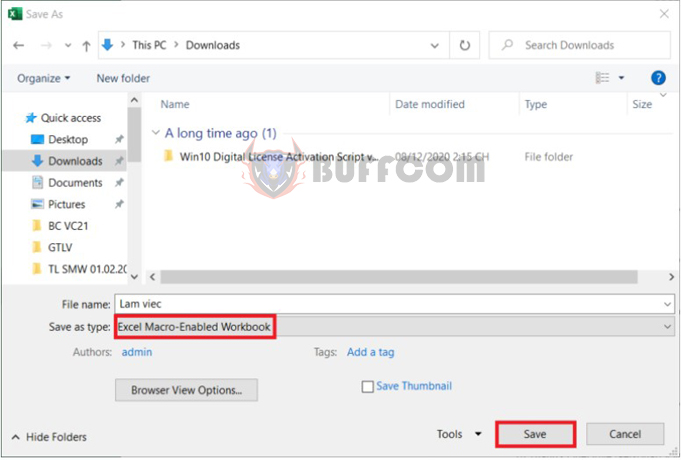
Step 2: Here, select Excel Macro-Enable Workbook in the Save as type box. Then, click Save to save the file in (.xlsm) format.
What is Macro in Excel How to create and run a Macro in Excel
5. How to save the VBA code of a Macro.
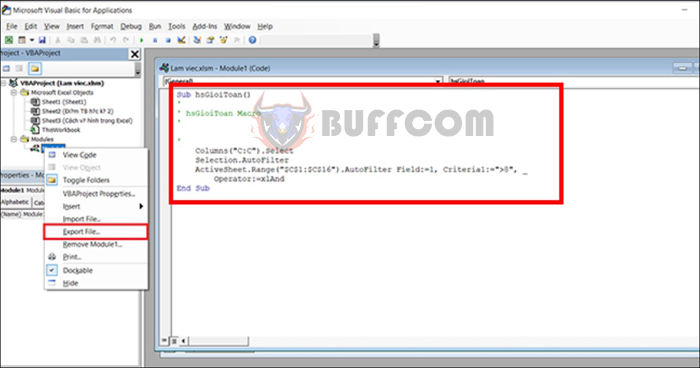
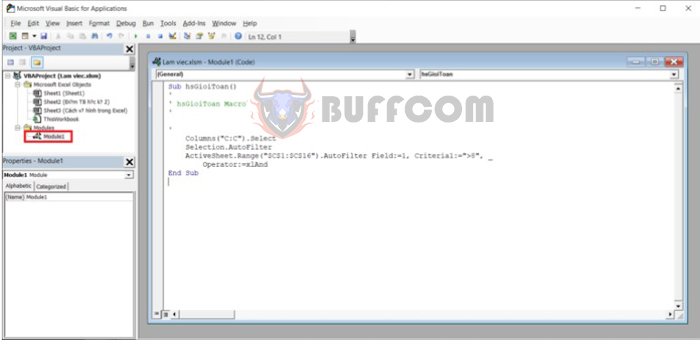
Step 1: Use the Alt + F11 key combination. The Microsoft Visual Basic for Applications dialog box will appear. Double-click on the Module containing the VBA code of the Macro that you want to save.
What is Macro in Excel How to create and run a Macro in Excel
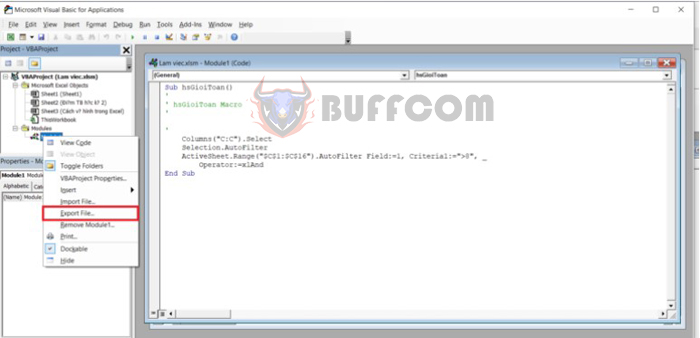
Step 2: Right-click on the Module’s code of the Macro you want to save. Then, select Export File. Then click Save to save the file in (.bas) format.
What is Macro in Excel How to create and run a Macro in Excel
Macro is a useful tool to help you save time and increase productivity in Excel. With simple instructions like those above, you can easily create and use macros in Excel without being a professional programmer. However, you need to ensure that your macros work correctly and do not cause errors when performing tasks. If you need support or have any questions related to macros in Excel, refer to various online resources and information sources for additional knowledge and experience. Wishing you success!

