• Microsoft Office
  • Microsoft Windows
  • Other Software
    • Microsoft Visual
    • Microsoft Project
    • Microsoft Visio
  • Anti Virus
  • Blog
    • Word
    • Excel
    • Powerpoint
    • Software tricks/tips
  • POLICIES
    • PAYMENT GUIDE
    • SHIPPING POLICY
    • REFUND POLICY
    • TERMS & CONDITIONS
    • Contact Us

No products in the cart.

  • Microsoft Office
  • Microsoft Windows
  • Other Software
    • Microsoft Visual
    • Microsoft Project
    • Microsoft Visio
  • Anti Virus
  • Blog
    • Word
    • Excel
    • Powerpoint
    • Software tricks/tips
  • POLICIES
    • PAYMENT GUIDE
    • SHIPPING POLICY
    • REFUND POLICY
    • TERMS & CONDITIONS
    • Contact Us
Excel

Automatic data entry guide in Excel

0 Comments

Autofill allows Excel to automatically fill in data in rows or columns through user-defined settings. The automatic data entry mode in Excel is applied to some default fields such as day, date, month, etc. And you can also set up Excel to autofill with other fields. This will save you a lot of time when working with large spreadsheets and increase productivity. In this article, Buffcom.net will guide you on how to use Autofill with just a few basic steps.

Setting up automatic data entry

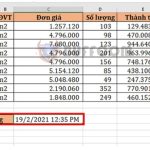
In Excel, some fields are set up for automatic data entry, such as day, date, month. To automatically enter data into these fields, you only need to enter a value in the first cell, then left-click and drag down. Then, the following values will be automatically filled in until the selected cell is reached.

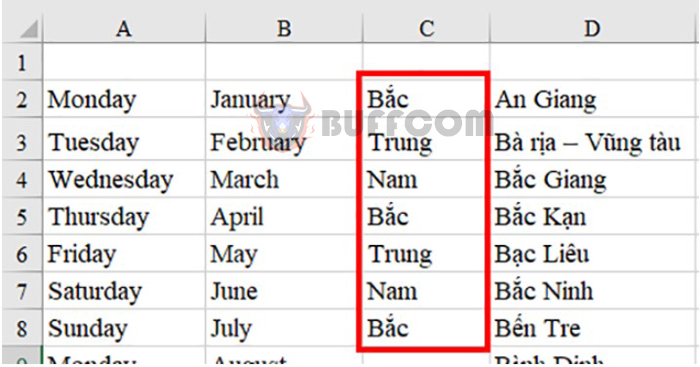
Specifically, for the “day” field, when you enter “Monday” and drag down, the cells below will automatically fill in “Tuesday” and “Wednesday” until “Sunday,” then return to “Monday.” The “month” field works similarly.

Automatic data entry guide in Excel

Automatic data entry guide in Excel

You can also set up Excel to autofill with other fields. You can do this in one of two ways:

Method 1: Enter directly into the Custom List

Suppose you want to automatically enter the region field: North, Central, South. That is, when you enter “North” and drag down, Excel will automatically enter “Central” and “South.” To set up, do the following:

Step 1: On the toolbar, select File, then select Options.

Automatic data entry guide in Excel

Automatic data entry guide in Excel

Step 2: When the Excel Options dialog box appears, select the Advanced tab. Scroll down to the General section, then select Edit Custom Lists.

Automatic data entry guide in Excel

Automatic data entry guide in Excel

Step 3: Customize in Custom Lists:

  • Select NEW LIST in the Custom Lists section.
  • Enter “North,” “Central,” “South” (with line breaks) in the List entries field.
  • Select Add, then press OK.
Automatic data entry guide in Excel

Automatic data entry guide in Excel

You have completed the setup. Now try entering “North” and dragging down to see Excel automatically fill in the following values.

Automatic data entry guide in Excel

Automatic data entry guide in Excel

Method 2: Input data from a spreadsheet into Custom List

Method 1 can only be used when the data field has few values and can be manually inputted. However, when dealing with large amounts of data, you can use Method 2. Suppose you need Excel to automatically input the names of 63 provinces/cities. Beforehand, you need to have a list of the 63 provinces/cities in an Excel spreadsheet. Then follow these steps:

Step 1: Select File on the toolbar, then choose Option.

Automatic data entry guide in Excel

Automatic data entry guide in Excel

Step 2: When the Excel Options dialog box appears, select Advanced. Scroll down to find General and then choose Edit Custom Lists.

Automatic data entry guide in Excel

Automatic data entry guide in Excel

Step 3: Customizing in Custom Lists:

  • Choose NEW LIST in the Custom Lists section.
  • Click on Import list from cells and select the prepared data of the 63 provinces/cities.
  • Choose Import, then click OK.
Automatic data entry guide in Excel

Automatic data entry guide in Excel

Now you have completed the setup. Let’s try inputting the name of the first province/city and then drag down to have Excel automatically fill in the remaining values.

Automatic data entry guide in Excel

Automatic data entry guide in Excel

Deleting the autofill data entry field

To delete the autofill data entry field in Excel, follow these steps:

Step 1: Select File on the toolbar, then choose Option.

Step 2: When the Excel Options dialog box appears, select Advanced. Scroll down to find General and then choose Edit Custom Lists.

Automatic data entry guide in Excel

Automatic data entry guide in Excel

Step 3: Select the field you want to delete, then choose Delete and press OK.

Automatic data entry guide in Excel

Automatic data entry guide in Excel

Excel will now notify you that this field will be deleted, press OK to complete.

Automatic data entry guide in Excel

Automatic data entry guide in Excel

In conclusion, autofill is a powerful feature in Excel that can save users a lot of time and effort in data entry. Whether you want to input a simple list of values or a complex series of patterns, autofill can help you complete the task quickly and accurately. By following the steps we have outlined above, you can customize your own autofill lists and use them repeatedly in your worksheets. Remember to double-check the data and format before you apply autofill, and be cautious with sensitive or confidential information. With practice and creativity, you can master autofill and enhance your productivity in Excel. Thank you for reading, and happy autofilling!

Rate this post
35
279 Views
Steps to Create Typing Animation Effect in PowerPointPrevSteps to Create Typing Animation Effect in PowerPointMarch 10, 2023
3 Ways to Automatically Insert Current Date and Time in Excel WorksheetMarch 10, 20233 Ways to Automatically Insert Current Date and Time in Excel WorksheetNext

Leave a Reply Cancel reply

You must be logged in to post a comment.

Buy Windows 11 Professional MS Products CD Key
Buy Office 2021 Professional Plus Key Global For 5 PC
Top rated products
  • Kaspersky Total Security 2021 1 year 1 device key Global Kaspersky Total Security 2021 1 year 1 device key Global
    Rated 5.00 out of 5
    $27.00
  • Avast Ultimate Suite 2021 2 Years 10 Devices Global Avast Ultimate Suite 2021 2 Years 10 Devices Global
    Rated 5.00 out of 5
    $77.00
  • Buy Windows 11 Pro CD Key License Buy Windows 11 Pro CD Key License
    Rated 5.00 out of 5
    $6.00
  • Kaspersky Total Security 2021 1 year 5 devices key Global Kaspersky Total Security 2021 1 year 5 devices key Global
    Rated 5.00 out of 5
    $46.00
  • Avast Premium Security 2021 Avast Premium Security 2021 1 Device 1 Year Global
    Rated 5.00 out of 5
    $11.00
Products
  • Microsoft Visio Standard 2021 Key 1PC Microsoft Visio Standard 2021 Key 1PC $13.00
  • Kaspersky Internet Security 2021 1 year 5 devices key Global Kaspersky Internet Security 2021 1 year 5 devices key Global
    Rated 5.00 out of 5
    $45.00
  • Windows Server 2022 Standard Key Global Windows Server 2022 Standard Key Global
    Rated 4.10 out of 5
    $7.00
  • Windows 11 Pro Key Global Windows 11 Pro Key Global
    Rated 5.00 out of 5
    $6.00
  • Trend Micro Internet Security 3 Devices 1 Year Key GLOBAL Trend Micro Internet Security 3 Devices 1 Year Key GLOBAL
    Rated 5.00 out of 5
    $17.00
  • Microsoft Visio 2016 professional CD Key Global Microsoft Visio 2016 professional CD Key Global
    Rated 4.94 out of 5
    $28.50
  • AVG Ultimate 2021 with Antivirus + Cleaner, Secure VPN 10 Devices 1 Year AVG Ultimate 2021 with Antivirus + Cleaner, Secure VPN 10 Devices 1 Year
    Rated 4.91 out of 5
    $34.00
  • Kaspersky Small Office Security 20 PCs + 20 Mobiles + 2 Servers 1 Year Kaspersky Small Office Security 20 PCs + 20 Mobiles + 2 Servers 1 Year $284.73
  • Kaspersky Plus - 1 Device 1 Year - GLOBAL Kaspersky Plus - 1 Device 1 Year - GLOBAL $23.00
  • Windows Server 2019 Remote Desktop Services 50 USER Connections Key Global Windows Server 2019 Remote Desktop Services 50 USER Connections Key Global
    Rated 4.75 out of 5
    $20.00
Product categories
  • Anti Virus
  • Microsoft Office
  • Microsoft Project
  • Microsoft Visio
  • Microsoft Visual
  • Microsoft Windows
  • Other Software
  • Uncategorized

Buffcom.net always brings the best digital products and services to you. Specializing in Office Software and online marketing services

BIG SALE 50% IN MAY

Microsoft Office
Microsoft Windows
Anti-Virus
Contact Us

Visit Us:

125 Division St, New York, NY 10002, USA

Mail Us:

buffcom.net@gmail.com

TERMS & CONDITIONS | PAYMENT GUIDE  | SHIPPING POLICY  | REFUND POLICY

Copyright © 2019 buffcom.net  All Rights Reserved.