Customization Tips for a Productive Windows 11 Pro Experience
Microsoft released Windows 11 in October 2021, and despite its two-year presence, I stuck with Windows 10, awaiting stability. However, circumstances led me to adopt Windows 11 Pro on a new laptop in September 2023. After a few days, certain “improvements” hindered my productivity, prompting me to seek ways to tailor the OS to my preferences. In this article, I share five modifications that enhanced my Windows 11 experience.
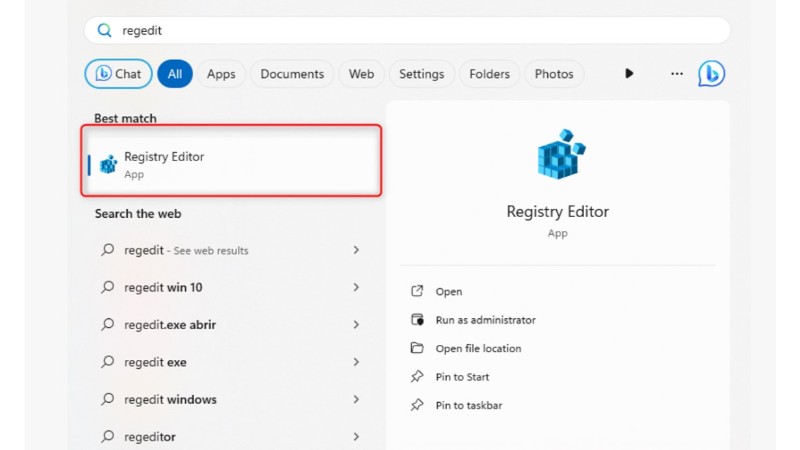
Disable “Bing” Search in the Start Menu:
Open the Registry Editor.

Windows 11 Pro Experience
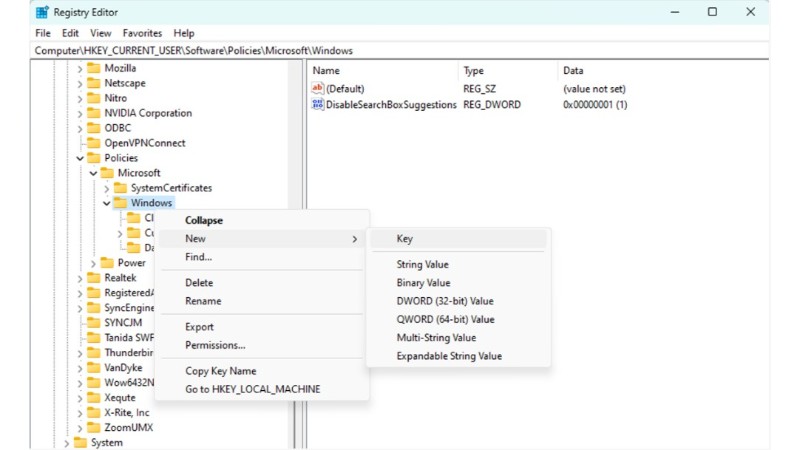
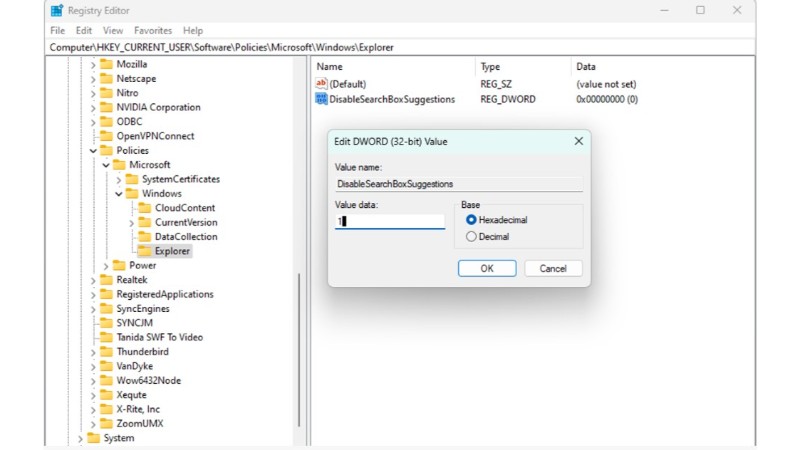
Navigate to Computer\HKEY_CURRENT_USER\Software\Policies\Microsoft\Windows.
Create a new key named “Explorer.”
Windows 11 Pro Experience
Inside this key, create a new DWORD (32-bit) Value called “DisableSearchBoxSuggestions.”
Set its value to “1” and restart Windows.
Windows 11 Pro Experience
Restore the Windows 10 Context Menu:
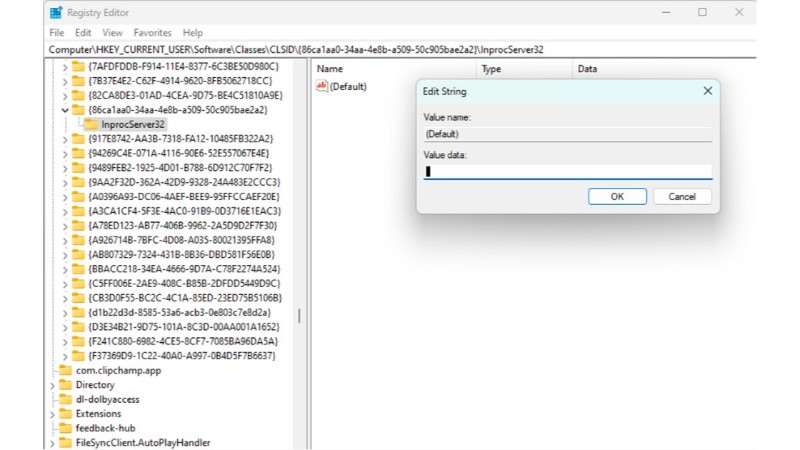
Go to Computer\HKEY_CURRENT_USER\Software\Classes\CLSID.
Create a new key with the name {86ca1aa0-34aa-4e8b-a509-50c905bae2a2}.
Inside, create a key named “InprocServer32.”
Double-click on the Default file in InprocServer32, leaving the Data field empty.
Windows 11 Pro Experience
Close the registry, reopen File Explorer, and experience the classic context menu.
Force Windows 11 Taskbar to Display Left:
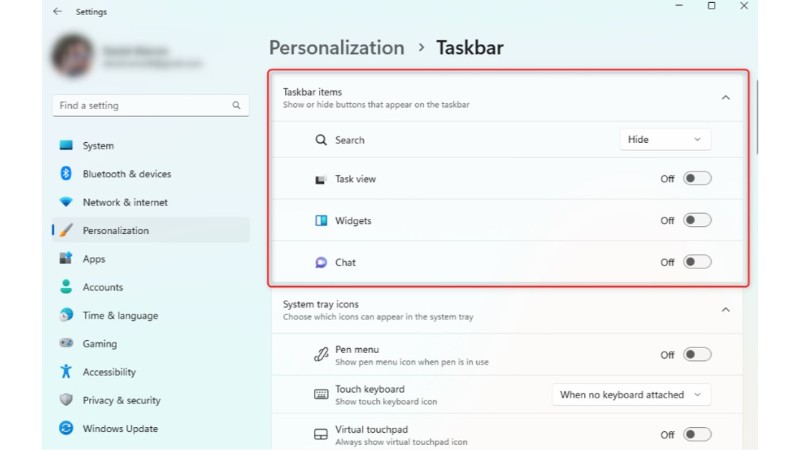
Right-click on the taskbar and select “Taskbar Settings.”
Hide items in the Taskbar items section.
Windows 11 Pro Experience
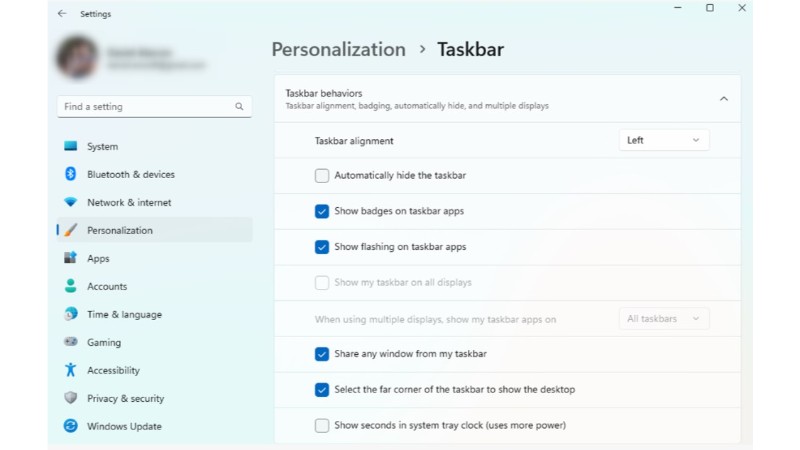
Scroll down to “Taskbar behaviors” and choose the desired alignment.
Windows 11 Pro Experience
Personalize Start Menu Items:
Right-click on the Desktop, go to personalization, and select “Start.”
Customize the Start menu layout to your preference.
Adjust Windows Device Monitoring Settings:
In the “personalization” window, navigate to the Device Usage section.
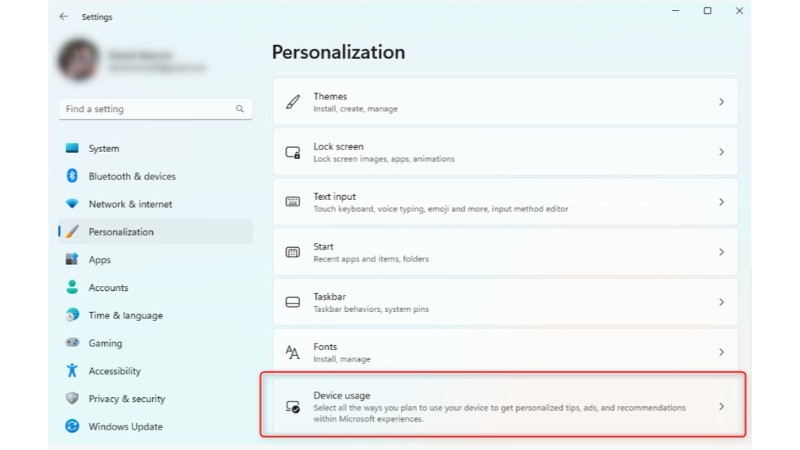
Windows 11 Pro Experience
Turn off all tracking options.
Final Thoughts:
While Windows 11 introduces a new interface, I adapted it to my workflow. These adjustments might help those who prefer the Windows 10 style, ensuring a personalized and productive Windows 11 experience.

