Excel File Security
Excel file security or workbook protection in Excel, protecting Excel worksheets, securing Excel files, and so on.
We can apply security to an Excel file using the protection concept available in the Review tab. There are two security-related features in MS Excel.
Worksheet protection: Protects the worksheet from being modified or restricts modification for certain users.
Workbook protection: Protects a worksheet from being inserted or deleted and also requires a password to open the Excel file.
Worksheet Protection
You may want to protect a worksheet for various reasons. One reason is to prevent yourself or someone else from accidentally deleting important formulas or data. A common scenario is to protect a worksheet so that data can be changed, but the formulas cannot be changed.
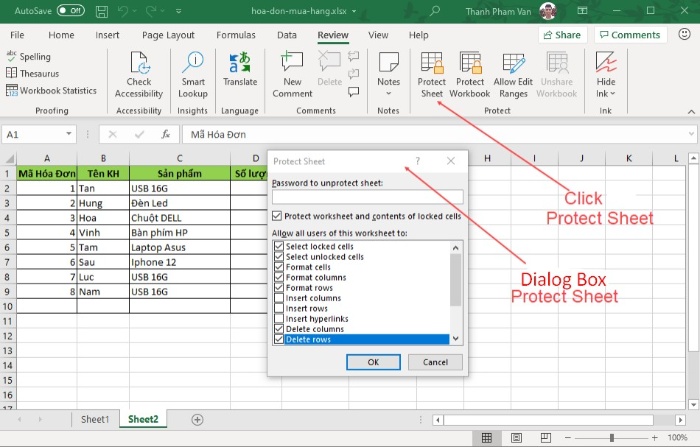
To protect a worksheet, select Review » Protect » Protect Sheet. Excel will display the Protect Sheet dialog box. Note that providing a password is optional. If you enter a password, that password will be used to protect the worksheet. You can choose different options in which the worksheet will be protected.
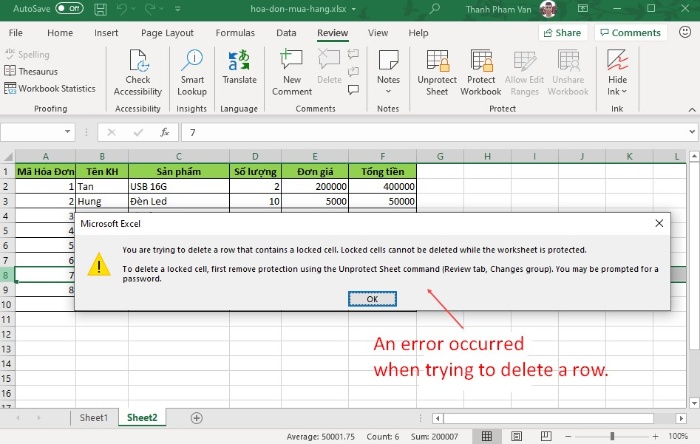
Suppose you have selected the Delete rows option; then Excel will not allow you to delete rows of the worksheet.
Excel File Security
When someone wants to change the format of cells, they will receive an error like this:
Excel File Security
To remove protection from the protected worksheet, select Review » Protect » Unprotect Sheet. If the worksheet is protected by a password, you will be prompted to enter that password.
Protecting Excel Files
Excel offers three ways to protect a file:
Require a password to open the Excel file.
Prevent users from adding or deleting worksheets, hiding or unhiding worksheets.
Prevent users from resizing or moving windows.
Require a password to open the Excel file
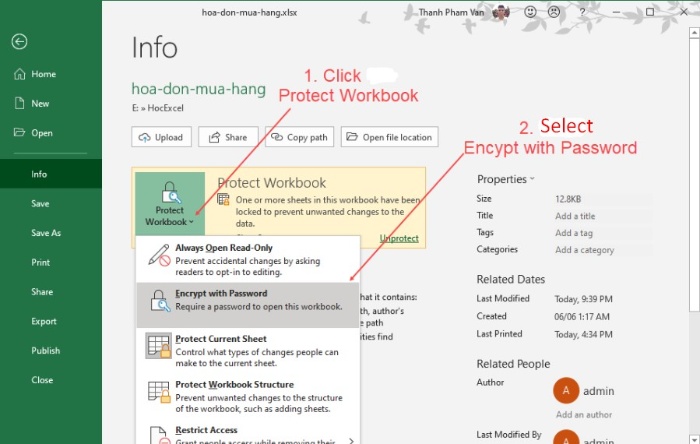
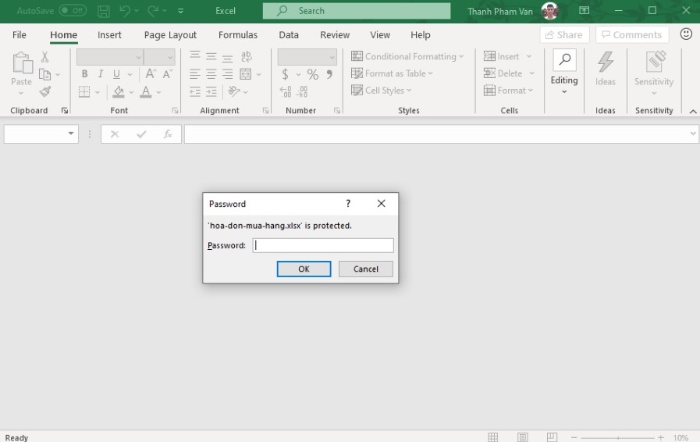
Excel allows you to save a file that is protected by a password. After doing so, anyone attempting to open this Excel file will need to enter the password. To add a password to an Excel file, follow these steps:
– Select File » Info » Protect Workbook » Encrypt With Password. Excel will display the Encrypt Document dialog box.
– Enter a password and click OK.
– Re-enter the password and click OK.
– Save the changes to the Excel file (Ctrl + S).
Excel File Security
Require a password to open the Excel file:
Excel File Security
To remove the password from the workbook, repeat the same process. However, in step 2, delete the existing password characters.
Protecting the Workbook and Windows Structure
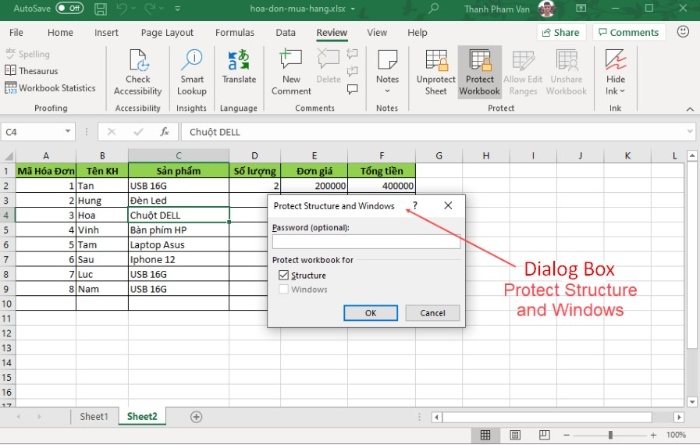
To prevent others (or yourself) from performing certain actions in the workbook, you can protect the structure and windows of the workbook. When the structure and windows of the workbook are protected, users cannot add or delete worksheets, hide or unhide worksheets, etc., and may not be allowed to resize or move the windows of the workbook.
To protect the structure and windows of a worksheet, follow the steps below:
– Select Review » Protect » Protect Workbook to display the Protect Workbook dialog box.
– In the Protect Workbook dialog box, select Structure and Windows.
– Enter a password (optional).
– Click OK.
Excel File Security


