Guide To 5 Actions With Quick Access Toolbar

Microsoft Office is a useful software for studying and working, but have you fully exploited the features in this application? Have you ever heard of Quick Access Toolbar – the toolbar that allows quick selection of some operations in Word, Excel, PowerPoint?
Let’s explore in detail the options for adding, deleting, and editing operations on the Quick Access Toolbar with Buffcom.net to shorten the time to perform operations in the following article.
What is Quick Access Toolbar?
Quick Access Toolbar is the toolbar that allows us to quickly select command buttons when operating on Microsoft programs (Word, Excel, PowerPoint, Outlook). With just one click, we can add additional command buttons or use them on the Quick Access Toolbar.
Thanks to this toolbar, the process of working on Word or Excel becomes much faster.
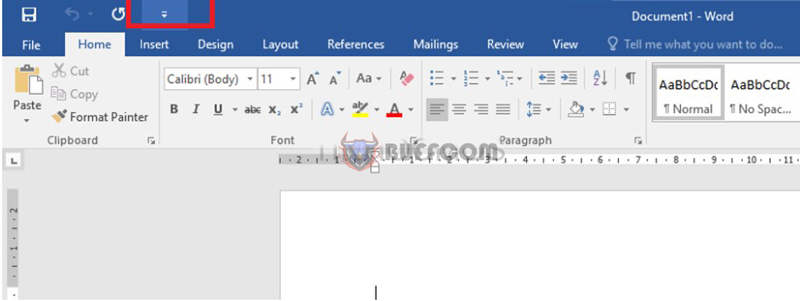
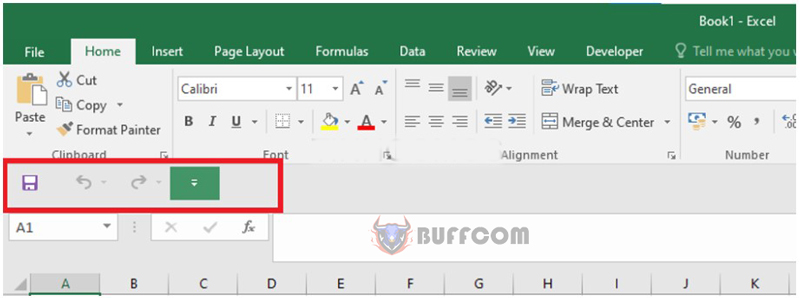
The Quick Access Toolbar can be located in the following 2 positions:
Located above the Ribbon toolbar
 Located below the Ribbon toolbar (just above the fx formula)
 Instructions for Using Quick Access Toolbar
Note: The illustrations in this article guide the actions of using and editing the Quick Access Toolbar in Word, similar to editing the Quick Access Toolbar in Excel and PowerPoint.
Usually, when using the Quick Access Toolbar, we need to perform the following actions:
How to Add/Remove Available Features on Quick Access Toolbar
Initially, the toolbar will default to the following image. The items with a tick mark have been selected to add to the Quick Access Toolbar. The selected features are: Save, Undo, Redo.
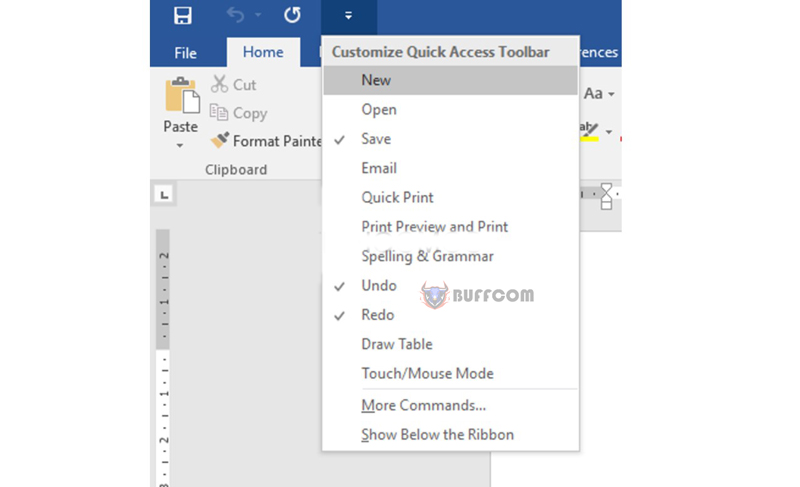 To add or remove unnecessary features, simply click in front of its name.
How to Add Unavailable Features
If you want to add more features to the toolbar that are not displayed, you can do the following:
Step 1: On the Quick Access Toolbar, click on the More Commands... option.
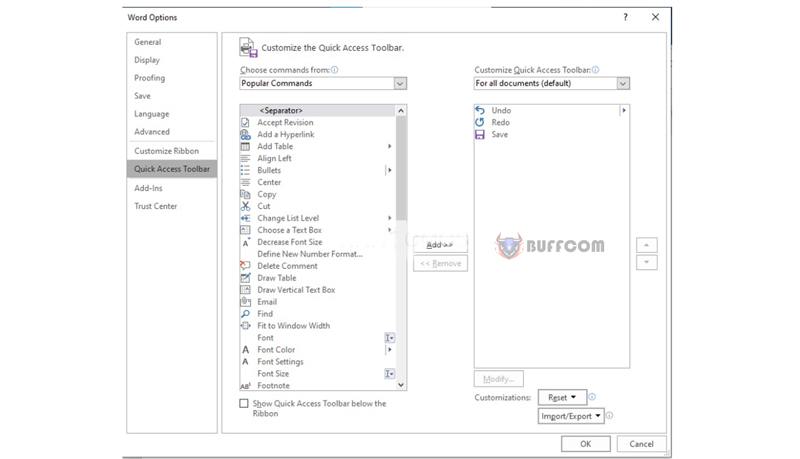
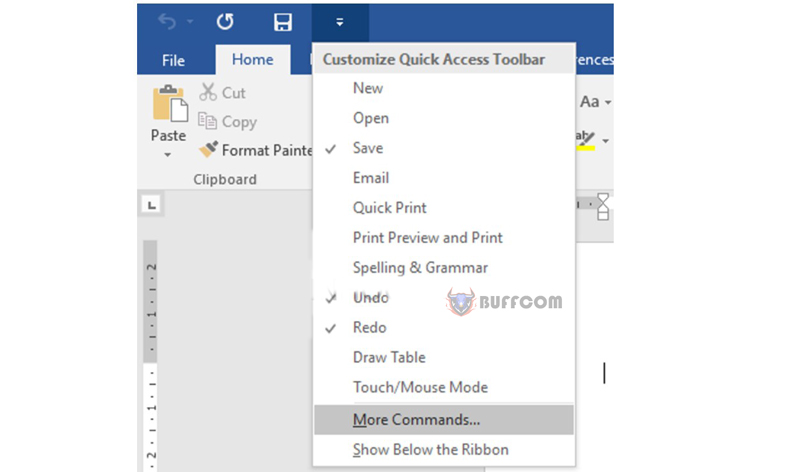 Step 2: Once the dialog box appears, select the command buttons you want to add to the Quick Access Toolbar, then click the Add button.
Step 3: The selected command buttons will be displayed in the box on the right. Finally, click OK.
 How to Remove Command Buttons from the Quick Access Toolbar
After some time of use, if you feel that these command buttons are unnecessary and want to remove them, you can do so by following these methods:
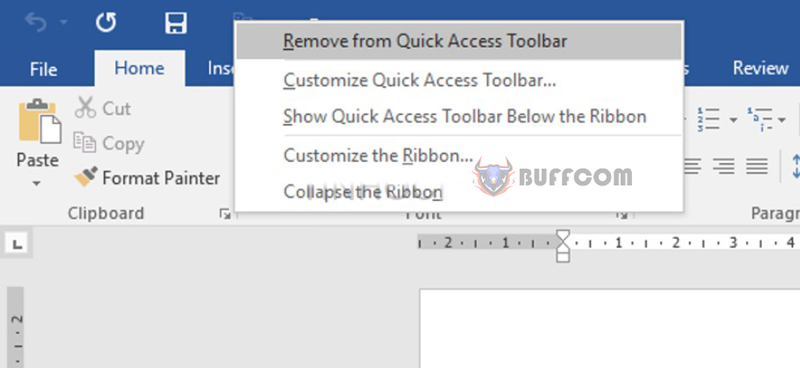
Method 1: On the Quick Access Toolbar, right-click the command button and select the Remove from Quick Access Toolbar option.
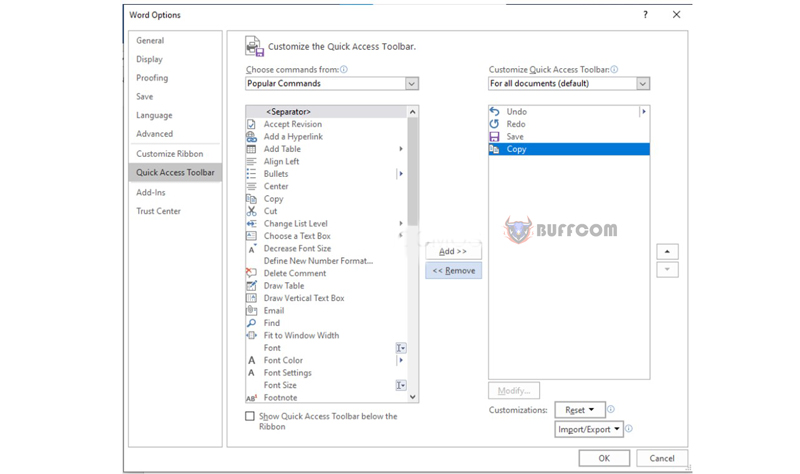
 Method 2: Open the dialog box on the More Commands… option. Then select the command buttons you want to remove and click the Remove button. Finally, click OK.
 How to Change the Position of Command Buttons
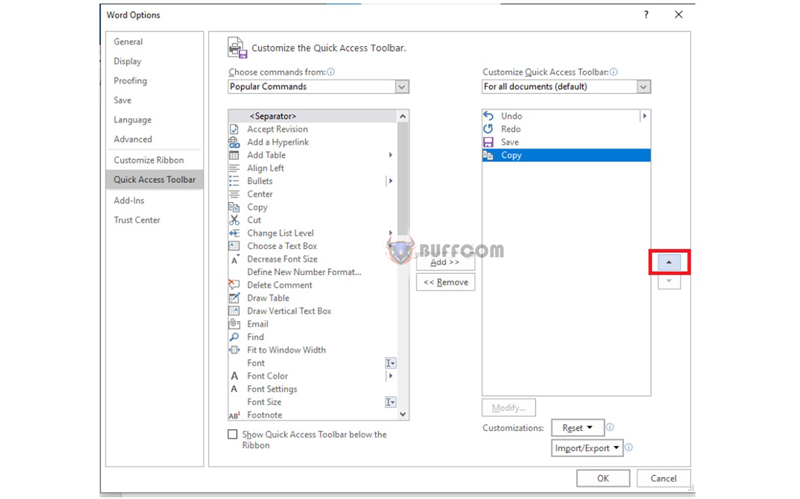
To make it more convenient during use, you can also change the position of command buttons by following these steps:
In the dialog box opened in the More Commands… option, select the command button you want to reposition (in the box on the right), then click on the arrow button as shown below. Finally, click OK.
 How to Reset the Quick Access Toolbar to Its Default State
If after changing the command buttons, you want to reset the toolbar to its default state, do the following:
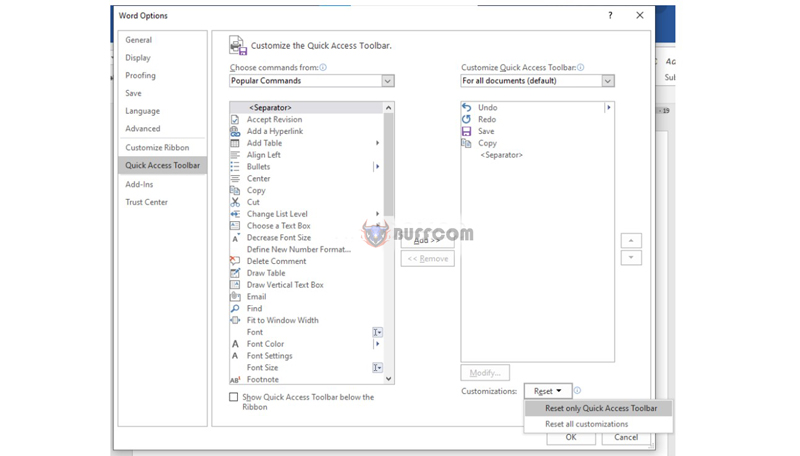
Step 1: Open the dialog box by right-clicking and selecting More Commands…
Step 2: Click on Reset, and then select Reset only Quick Access Toolbar.
 Step 3: Select Yes.
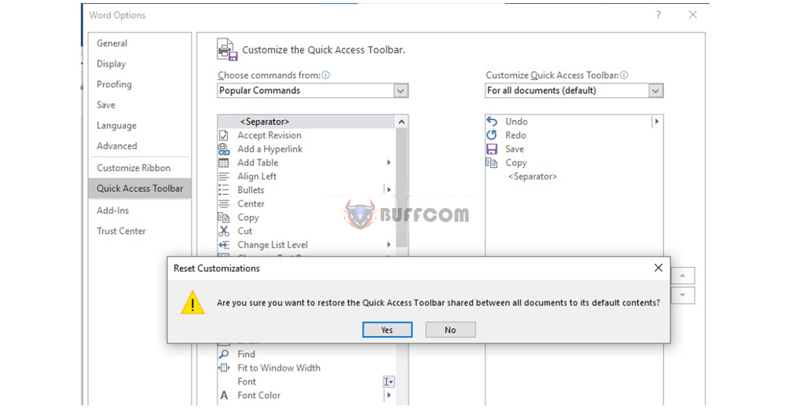 This will return the toolbar to its original state.
Conclusion About the Quick Access Toolbar
Above are 5 very simple operations with the Quick Access Toolbar. We hope you will apply them effectively when using Microsoft Word and Excel programs.
Don’t forget to follow Buffcom.net to buy cheap and genuine office software when needed!

