How to Blur Images in Word and Tips for Image Editing in the Tool

How to blur images in Word? How to edit images in Word? How to insert a blurred image into a Word page? A detailed guide on how to edit images in Word? Using illustrations while editing text in the Word tool is a common task, but not everyone knows how to edit images properly, especially when it comes to blurring images in Word. Moreover, if you are looking for ways to use blurred images to leave a personal mark in Word documents, then this article is what you are searching for. Let’s follow Buffcom.net to discover the features related to images in Word.
How to Blur Images and Edit Images in Word
Step 1: Insert the image into Word
First, select Insert -> Picture.

How to blur images in Word
In the Insert Picture window, select the image you want to insert into Word and click Insert.
Step 2: After inserting the image, to change the blur level of the image, select the image and then select the Format tab (or right-click and select Format to open the dialog box below).
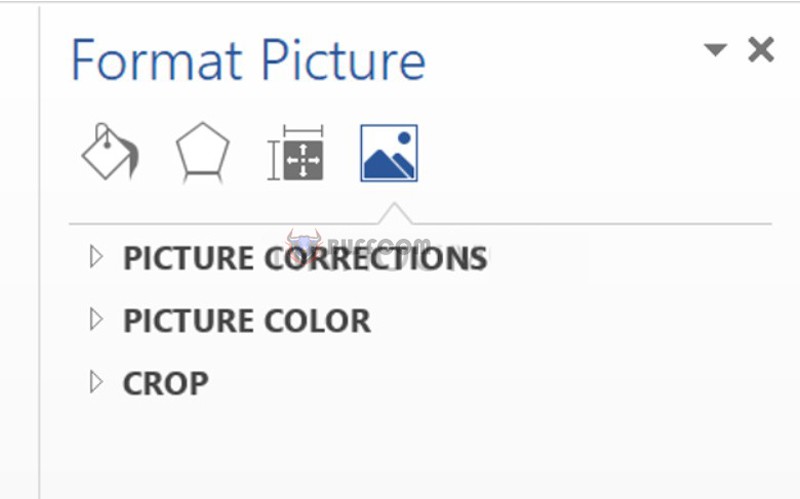
How to blur images in Word
Step 3: To change the brightness and contrast of the image, select Format -> Corrections -> select the brightness and contrast level you desire.
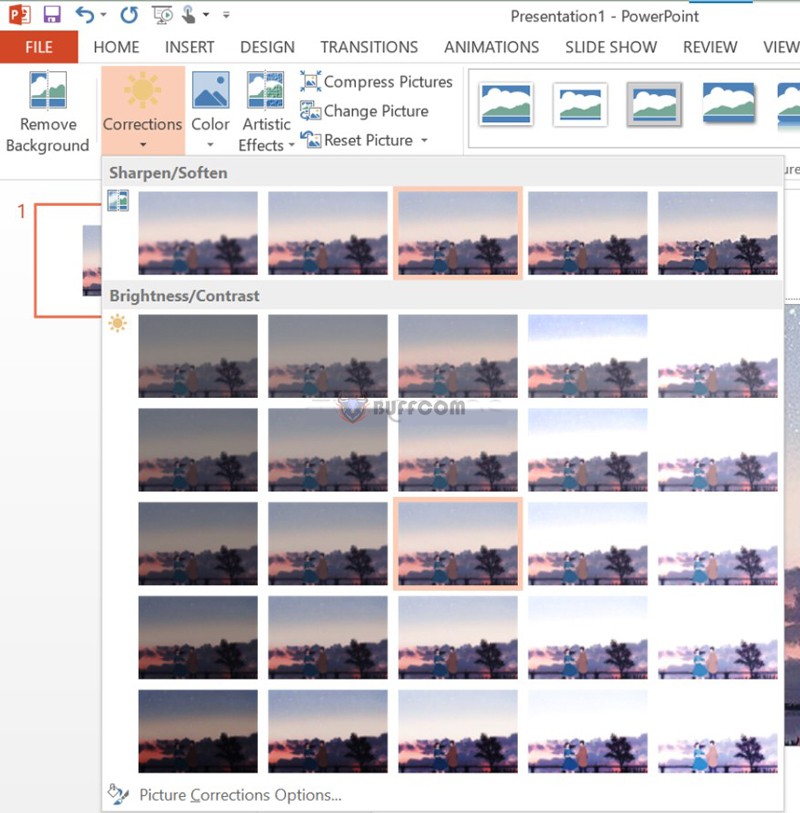
How to make an image blurry in Word
In addition to the color features, you can also edit the image to blur it according to various criteria in the Format tab of the image. For example, you can choose the sharpness level under “Sharpness.”
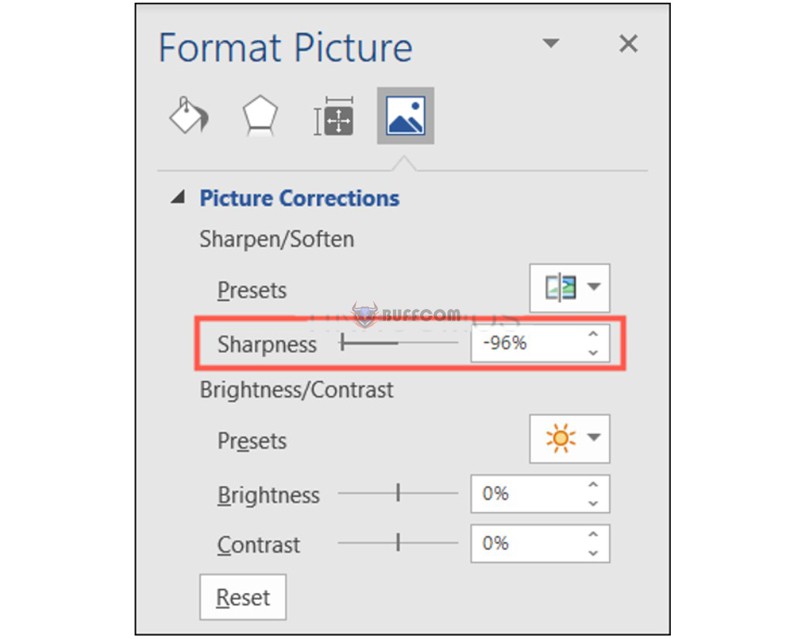
How to make an image blurry in Word
If you want to reset to the original settings, select reset.
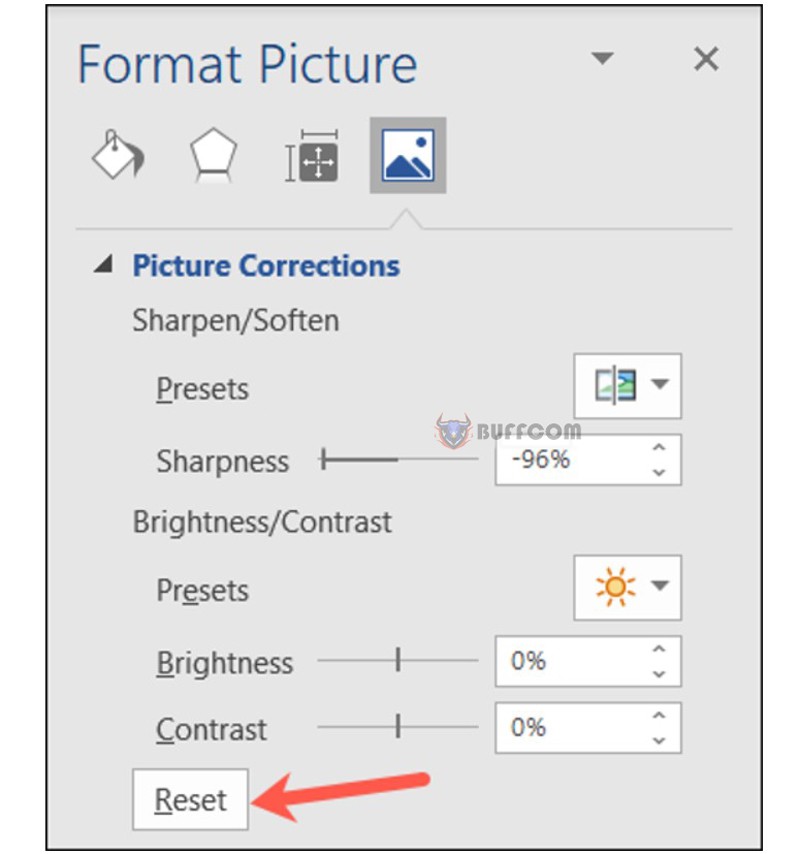
How to make an image blurry in Word
You can set the transparency level of the image to create a blurred effect throughout the image.
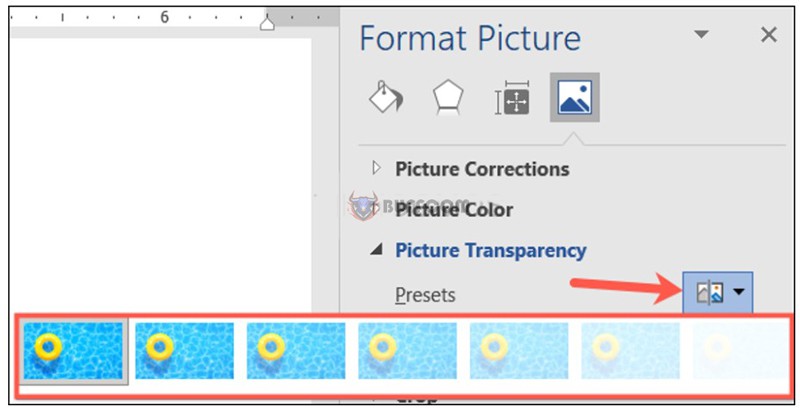
How to blur images in Word
After clicking on “picture transparency,” select the transparency level as shown below.
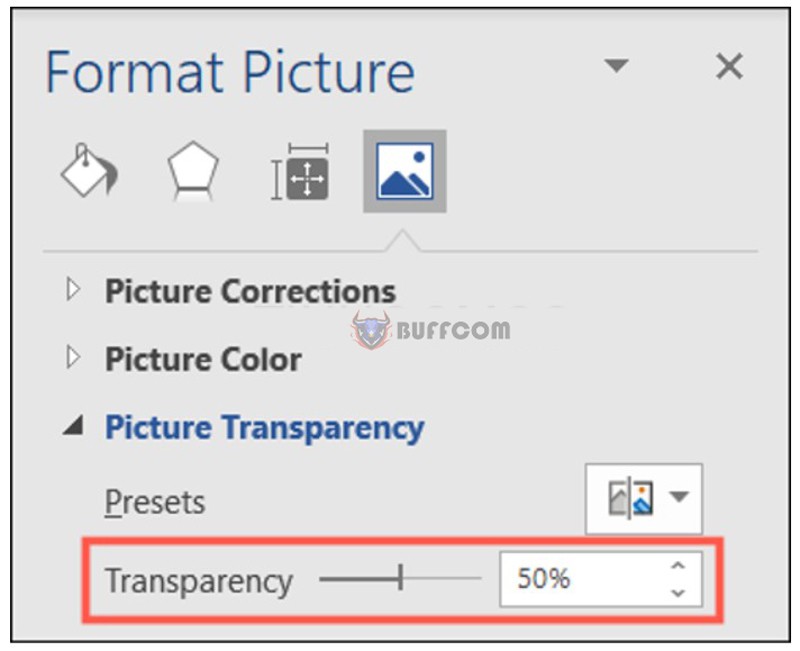
How to make an image blurry in Word
The result is illustrated below.

How to blur images in Word
Inserting Watermark in Word
Many people want to install blurry images/sunken images on each page of their editing document to create their own imprint. This is how to create a watermark, also known as a seal.
Step 1: Select Design -> Watermark -> Custom Watermark.
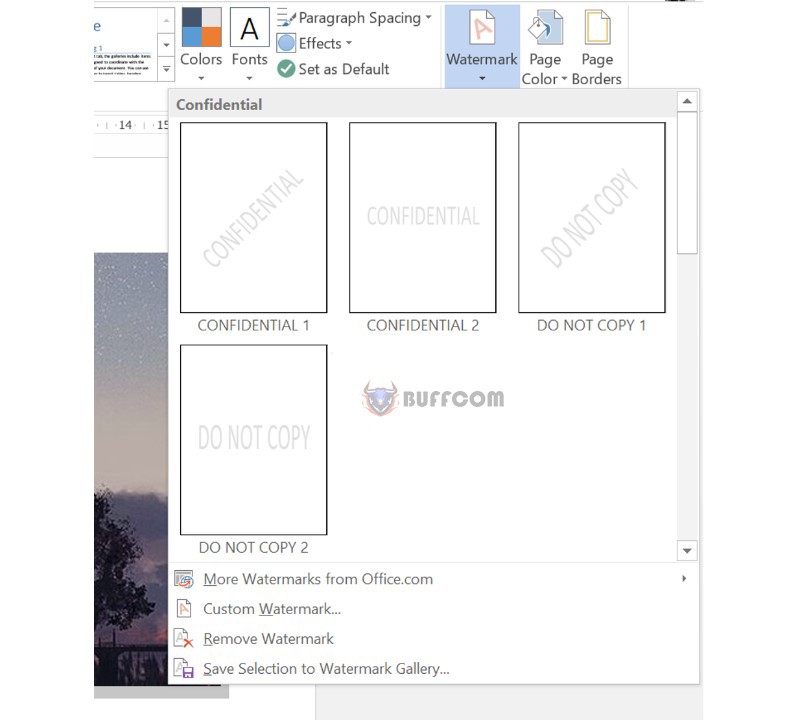
How to make an image blurry in Word
Step 2: In the Printed Watermark window, select Picture watermark and then select Select Picture.
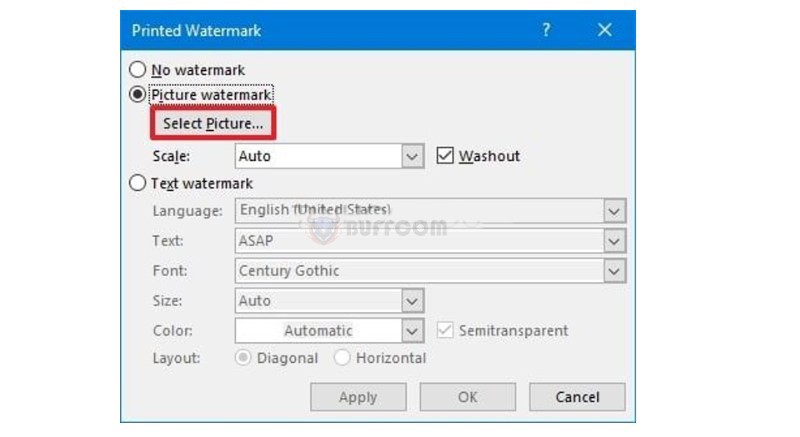
How to blur images in Word
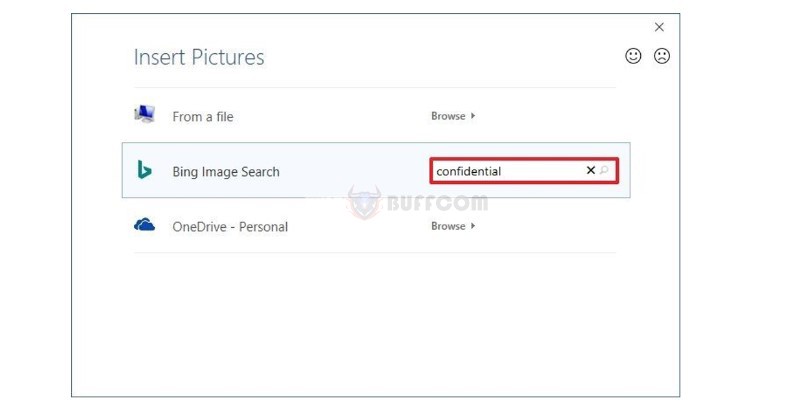
Step 3: In the Insert Pictures section, you can add images from your computer (From a file) or search for images on the web using Bing Image Search or images saved on OneDrive. For example, if you want to add an image from your computer, select From a file.
How to make an image blurry in Word
In the Select Picture window, select the image you want to add to Word and click Insert.
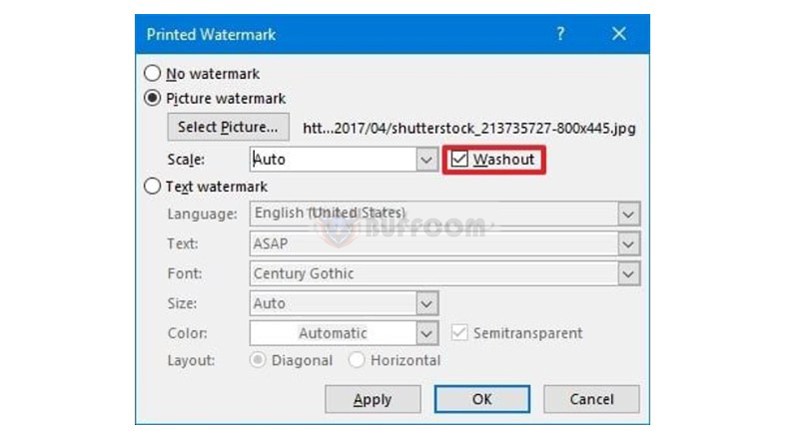
Step 4: Next, to adjust the width of the image, select Scale, check the Washout box to blur the image, and then click OK to add the blurry image.
How to blur images in Word
So you have added a watermark in Word.
Conclusion
Above, Buffcom.net has sent you the most detailed instructions on how to blur images in Word in various ways depending on the purpose of everyone. Office computing today is a required skill in learning and working. Mastering the knowledge from basic to advanced in a systematic way, and to use the latest features, you can contact Buffcom.net to find the software you need.


