How to create a frame in Word 2013, 2016, 2010, 2007, 2003 in just 3 quick steps

How to create a frame in Word 2013, 2016, 2010, 2007, 2003 in just 3 quick steps. When working with Microsoft Word, creating a frame for your text can make it unique and more visually appealing, helping you make a good impression. Buffcom.net has compiled several ways to create frames in Word 2013, 2016, 2010, 2007, and 2003.
The frame feature in Word is a popular tool used by many to present essays, lesson plans, and documents that leave an impression on the reader. Users can choose from different types of frames, including solid or dashed lines, or even add some decorative elements to the frame. This is one of the basic steps in working with text in Word.
The method for creating frames in different versions of Word may differ slightly. In this article, Buffcom.net will guide you on how to create frames in Word 2013, 2016, 2010, and even 2007.
Note: In this tutorial, Buffcom.net will use the Shape tool to create frames in Word. With this method, you must create the frame first and then enter the text.
How to create a frame in Word 2013, 2016
The steps in this article are for Word 2016. However, you can still apply the steps to create frames in Word 2013 as shown below.
Step 1:
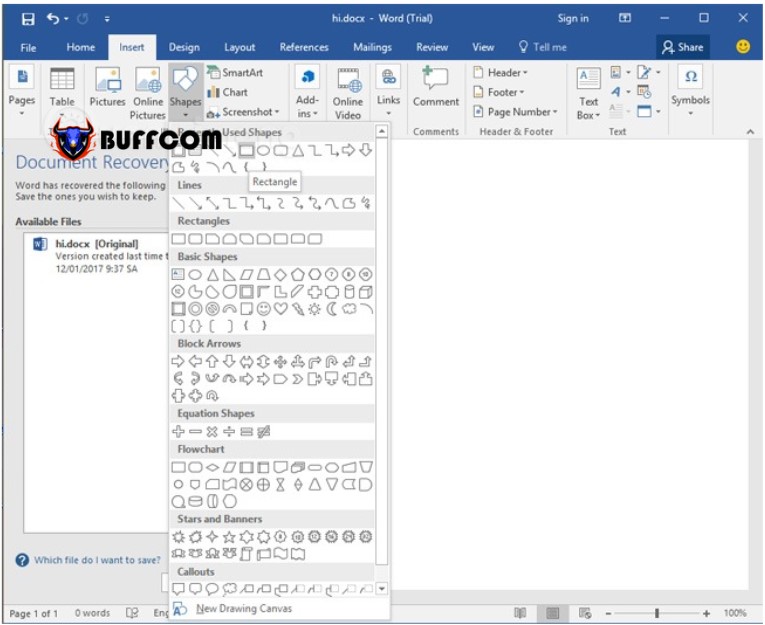
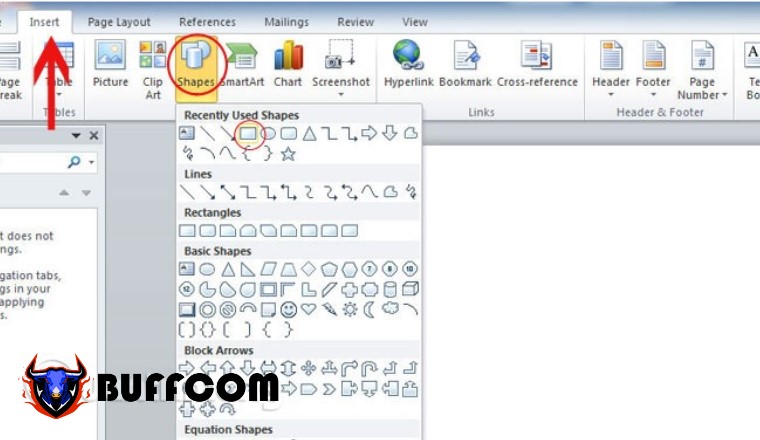
Open the document you want to add a frame to, click on the menu >Insert>Shapes> select the type of frame you want to create, in this case, Buffcom.net selects the Rectangle option as shown in the illustration below.
How to create a frame in Word 2013, 2016, 2010, 2007, 2003
Step 2:
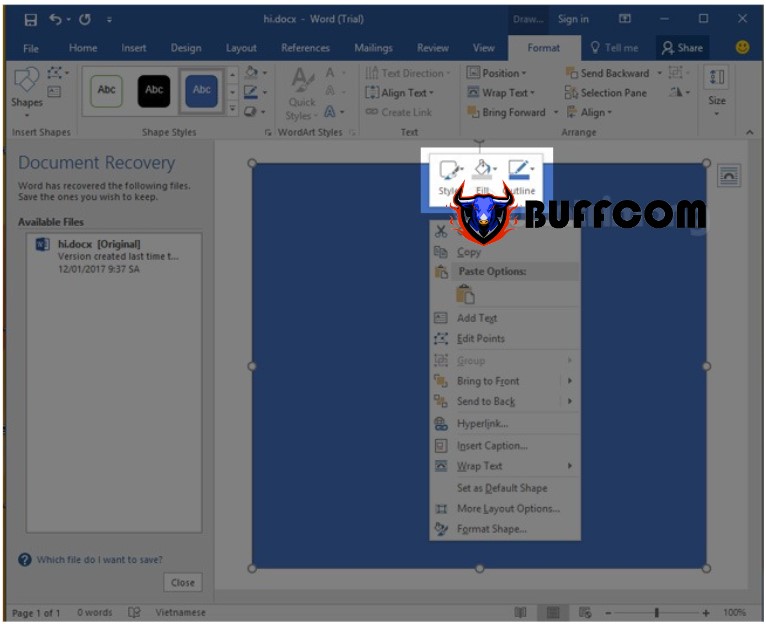
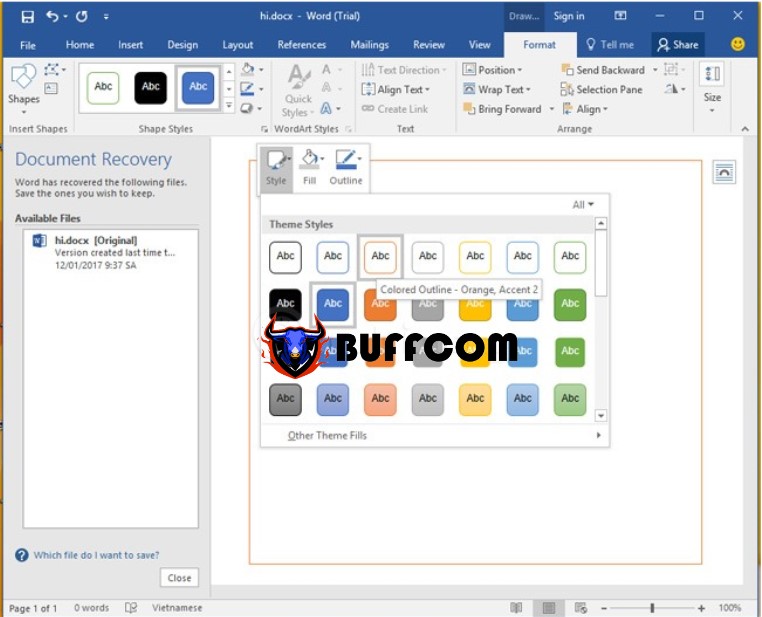
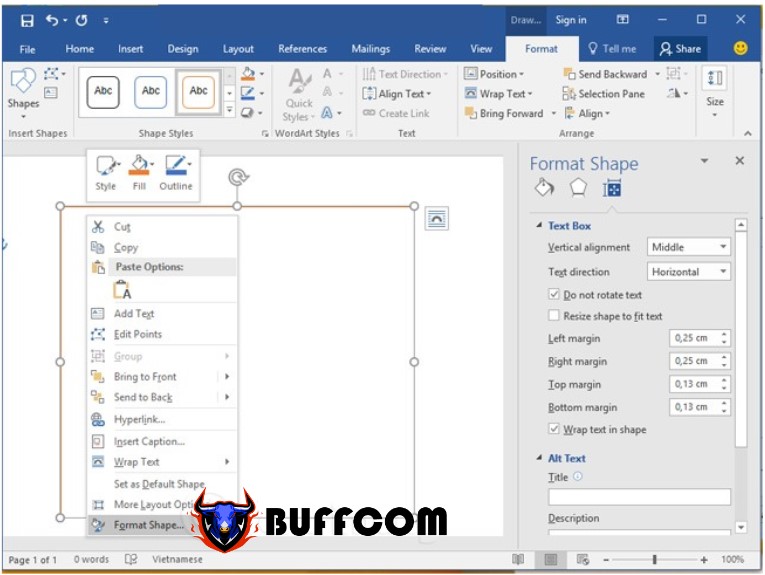
Right-click on the newly inserted frame, choose Style, Fill, or Outline to customize the frame quickly.
How to create a frame in Word 2013, 2016, 2010, 2007, 2003
How to create a frame in Word 2013, 2016, 2010, 2007, 2003
Step 3:
Right-click on the frame, choose Format Shape to open up various formatting options for the frame and the text inside the frame.
How to create a frame in Word 2013, 2016, 2010, 2007, 2003
How to insert a frame in Word 2010, Word 2007, Word 2003
Step 1:
Open the document, select the Insert menu, under Shapes, click on the rectangle icon.
How to create a frame in Word 2013, 2016, 2010, 2007, 2003
Step 2:
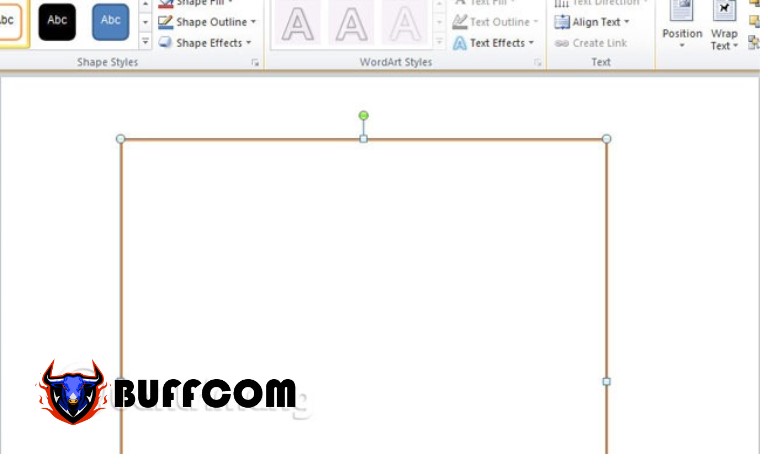
Once the rectangle frame appears as shown in the illustration below, you can move the margin by clicking on the frame border.
How to create a frame in Word 2013, 2016, 2010, 2007, 2003
Step 3:
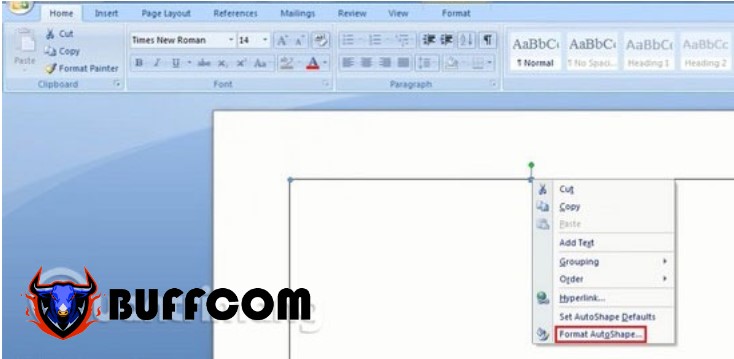
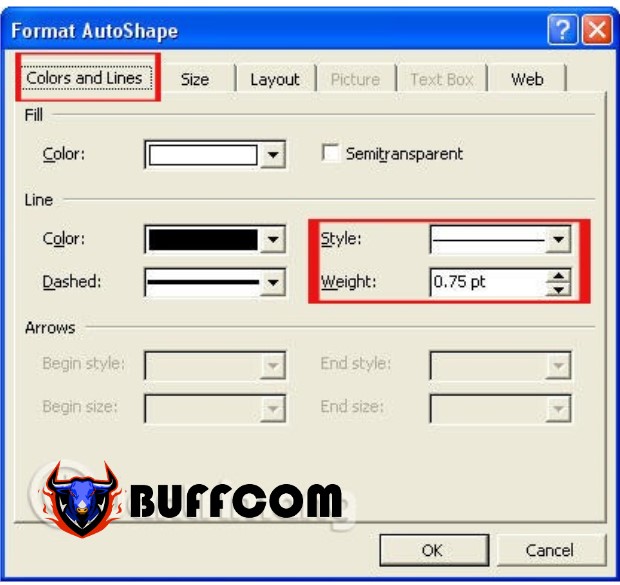
Right-click on the frame border, choose Format Auto Shapes to customize the frame border’s thickness.
How to create a frame in Word 2013, 2016, 2010, 2007, 2003
Step 4:
After clicking, a window will appear (as shown in the illustration), select Colors and Lines, and look in the Style options to choose the type of frame, and select Weight to adjust the thickness of the frame border.
 How to insert text into a frame in Word
Step 1:
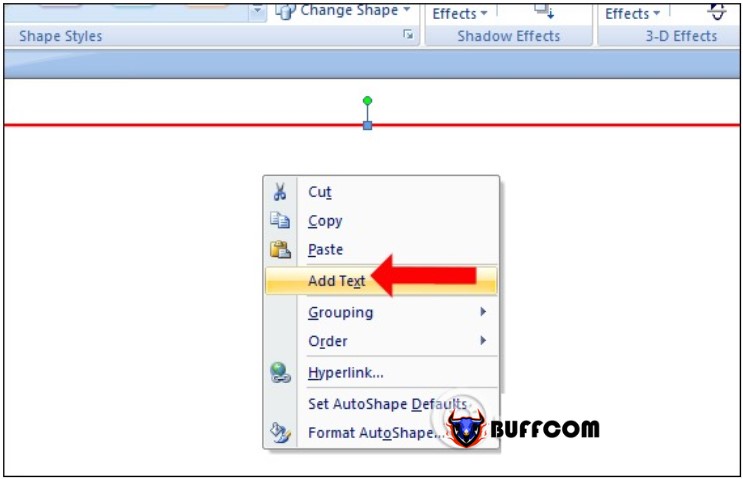
After creating the frame as instructed above, right-click inside the frame and select Add Text.
 Step 2:
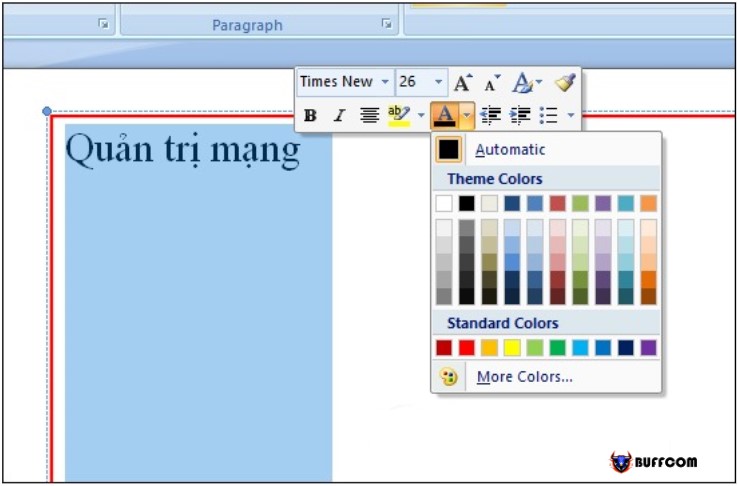
Next, enter the content into the created frame, and you can still change the display format of the text right within the frame as usual.
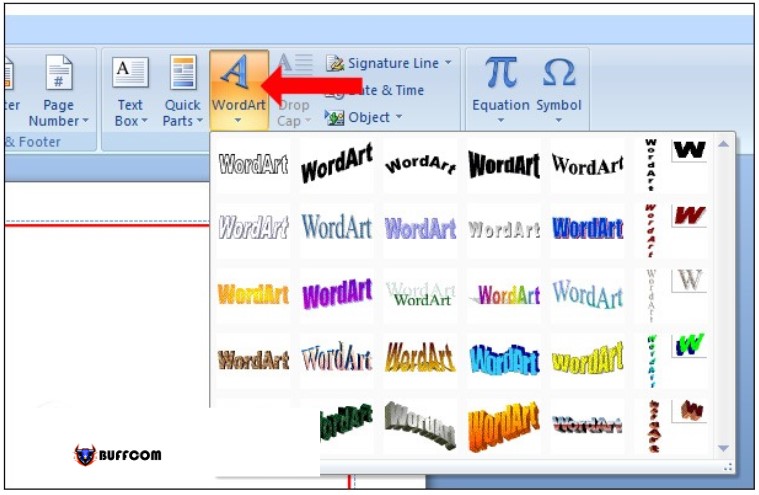
 Or if you want to insert some Word Art styles into the newly created text frame, click on the Insert tab and select WordArt.
How to create a frame in Word 2013, 2016, 2010, 2007, 2003
Step 3:
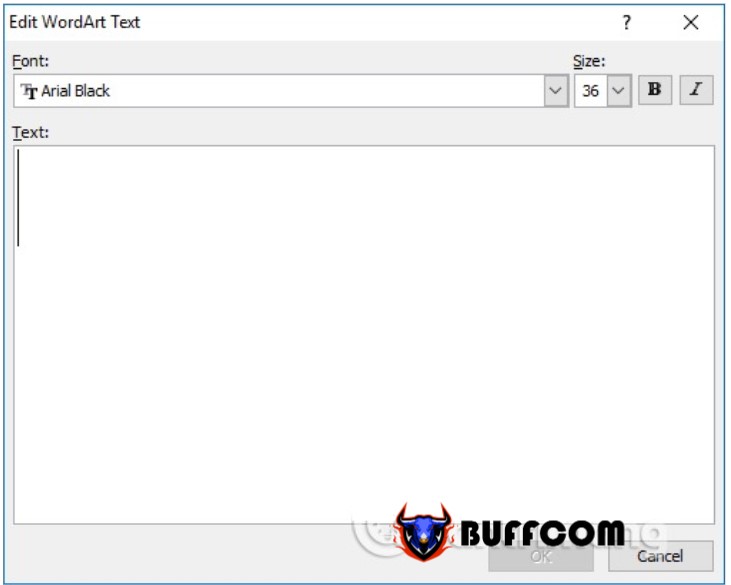
Select the artistic font you want to use, then enter the text into the WordArt Text frame.
How to create a frame in Word 2013, 2016, 2010, 2007, 2003
The entered text will quickly appear in the text frame with the selected font. Next, enter the text for the cover page as usual.
How to insert a nested frame in Word
If you have already created an outer cover frame and want to insert an inner nested frame for decoration purposes, follow the same steps as above, click on Shape and move the newly nested frame inside the created frame. Then right-click and select Format Auto Shapes to change the format for the cover frame.
If the outer frame is in the form of a solid line, you can try setting the inner nested frame in the form of dashed lines in the Dashed option. In terms of size, thickness, and color, you can also change them in the Weight and Colors section.
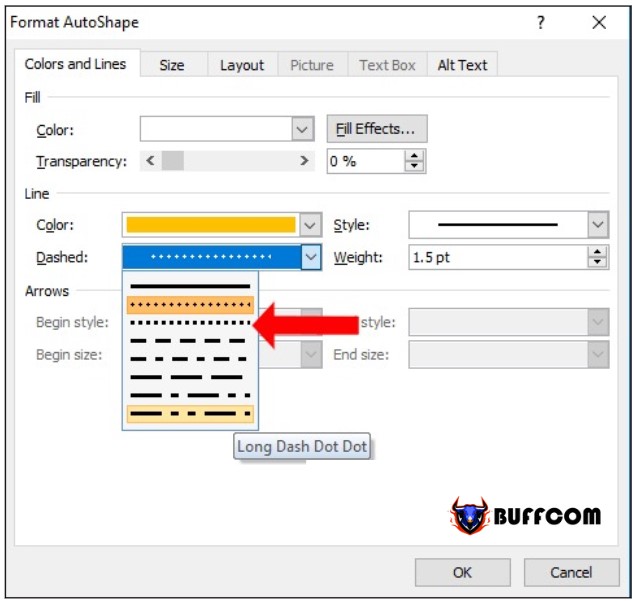 As a result, the two frames will nest inside each other as illustrated below.
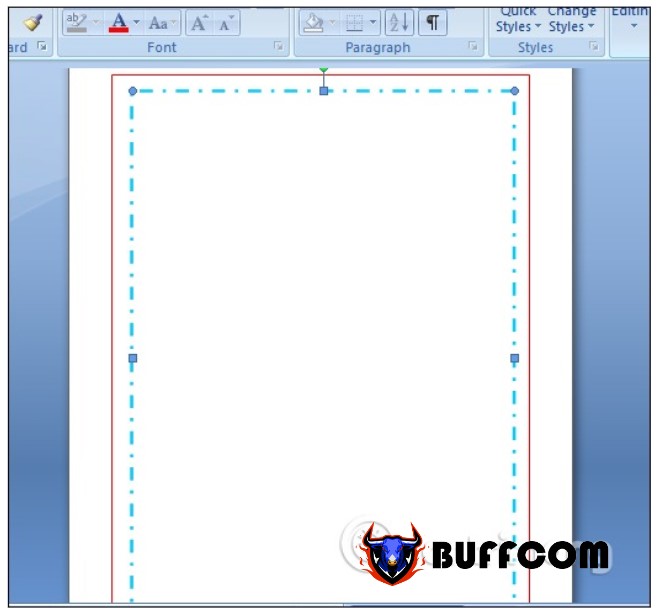 The frame formats in the Shape tool are quite simple, only selecting a solid or dotted frame style and choosing a color. If you want to customize patterns for the cover frame, consider using the Page Border tool as when creating a cover page in Word.
Through this article, Buffcom.net has guided you on how to create cover frames in Word 2013, 2007, 2010, and 2016. Whether you are using any version of Word, just find the heading with the version number and follow the instructions.


