How to Create and Enable a Guest Account on Windows 10
For personal computers, there are often important data that cannot be shared with others. However, if you need to lend your computer to someone else, you need to create a separate account for them to use, which can be time-consuming and difficult. The fastest way is to enable the Guest account feature on Windows 10. However, the Guest account on Windows 10 is not enabled by default, and you need to activate it. Today, Buffcom.net will guide you on how to enable the Guest account on Windows 10.
What is a Guest Account?
The Guest account is a default account available on Windows but is not enabled by default. With this Guest account, it prevents users from interfering with system settings, installing software, and changing the password for the Guest account to ensure maximum security features of the computer.
Users can only use available applications and software (or those shared from the main account) and can power on/off the computer. They cannot perform any actions that can affect Windows or personal data.
How to Enable the Guest Account on Windows 10
The Guest account is a pre-existing account on Windows, so you don’t need to create it. You just need to locate the place where the account is stored and activate it. Currently, with Windows 10, there are three different ways to enable the Guest account. In this article, we will start with the fastest and simplest methods and progress to more advanced methods.
Method 1: Enabling the Guest Account via Command Prompt
Command Prompt is an efficient tool on Windows computers that can perform various tasks quickly and without complications through command lines.
To fully utilize Command Prompt, you need to run the program with Admin rights. If you don’t run it as an Admin, the system will display an error immediately when you enter the command.
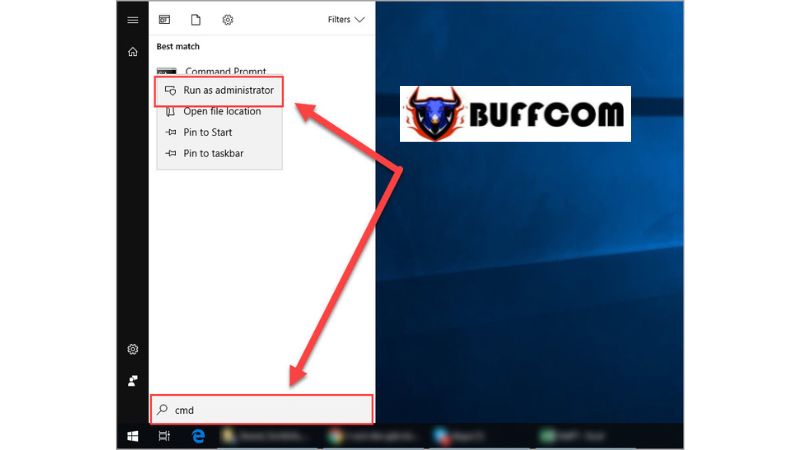
Step 1: Open the Start menu on the Taskbar and type “CMD“. The Command Prompt program will appear, right-click on it, and select “Run as administrator“.
 Step 2: When the Command Prompt window opens, enter the following command and press Enter.
net user guest /active:yes
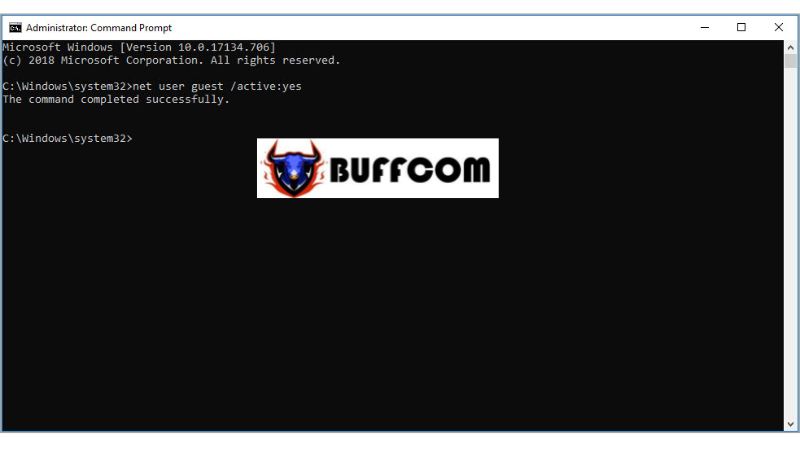 Step 3: When the message “The command completed successfully” appears, it means the process is successful. Close the Command Prompt window and check.
 Method 2: Enabling the Guest Account via Group Policy
Note: This method cannot be used with Windows 10 Home edition.
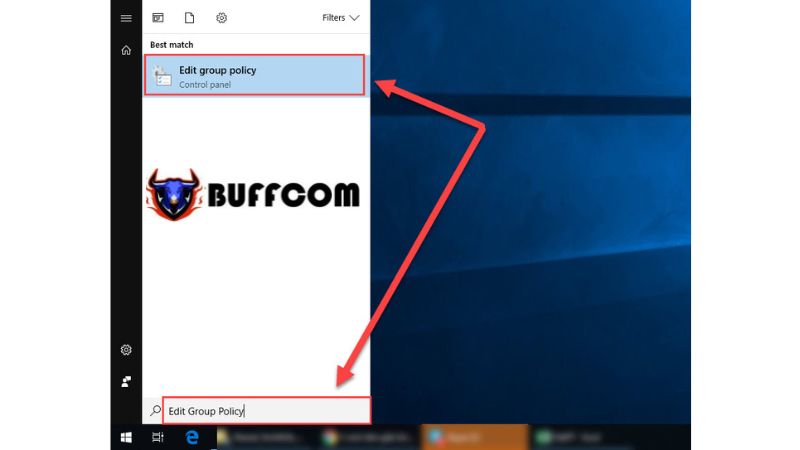
Step 1: Open the Group Policy Editor by opening the Start menu, typing “Edit Group Policy,” and pressing Enter.
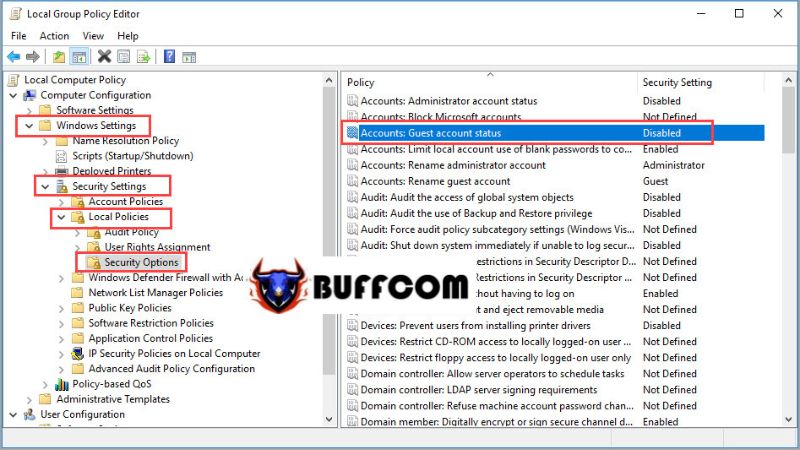
 Step 2: Once here, navigate through the following folders on the left-hand side to access the Guest settings:
Computer Configuration → Windows Settings → Security Settings → Local Policies → Security Options
After accessing Security Options, find the line “Accounts: Guest account status” on the left side and double-click to configure it.
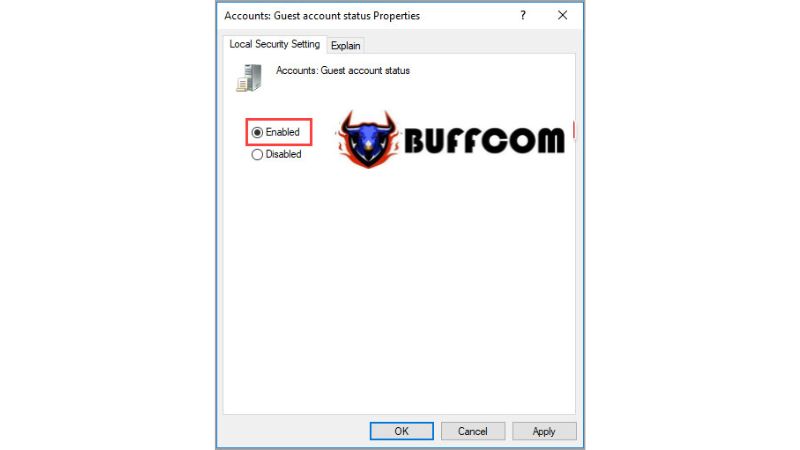
 Step 3: When the “Accounts: Guest account status” window opens, select “Enabled” and click OK to complete the process.
 Method 3: Enabling the Guest Account via Local Users and Groups
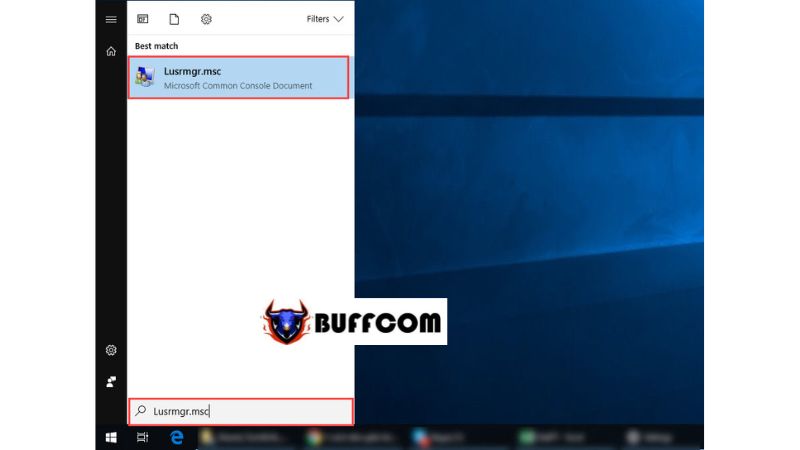
Step 1: Open the Start menu and enter “Lusrmgr.msc” into the search box, then press Enter to open it.
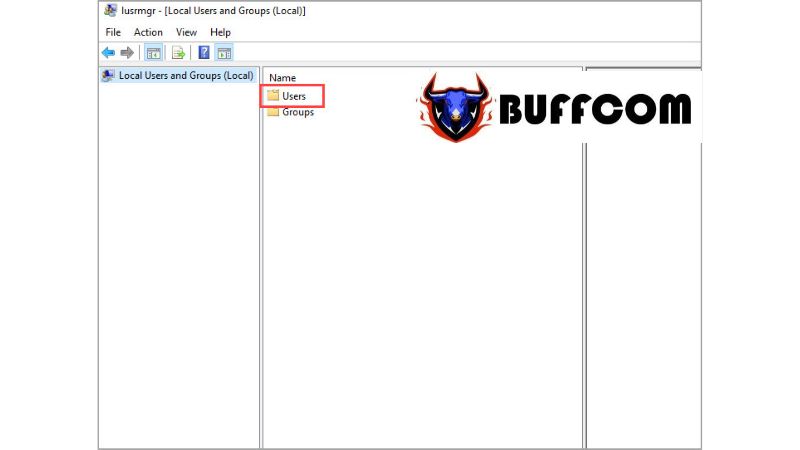
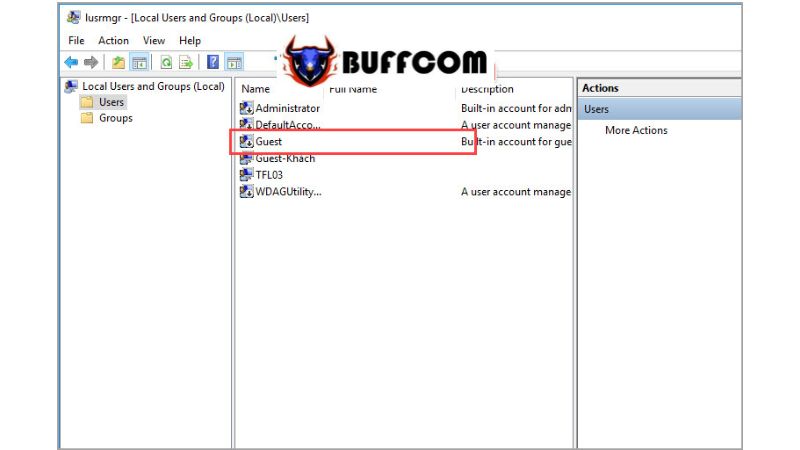
 Step 2: When the Local Users and Groups window opens, select “Users“.
 Step 3: Double-click on “Guest” to access its settings.
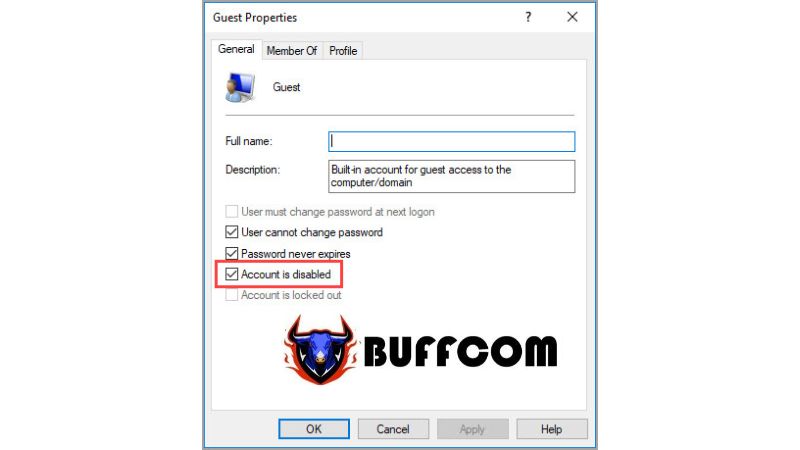
 Step 4: Here, uncheck the “Account is disabled” option and click OK to complete the process.
 In this way, Buffcom.net has guided you on the quickest and simplest method to create and enable a Guest account on Windows 10. Good luck!


