How To Disable Updates On Windows 10, Turn Off Auto Updates On Windows 10
This article will guide you on how to disable updates on Windows 10. With just a few steps, you can turn off auto updates on Windows 10. Let’s take a look at the article.
First, let me provide an overview of updates on Windows 10. Updates help you keep your computer’s drivers up to date and fix any Windows-related issues. Therefore, before disabling updates on Windows 10, it is recommended to update Windows once and then proceed with the disabling.
How to Disable Updates on Windows 10, Turn Off Auto Updates on Windows 10
In this article, I will introduce three methods to disable Windows updates on Windows 10. You can choose any method you prefer.
Method 1: Disable updates in Windows 10 through the system settings
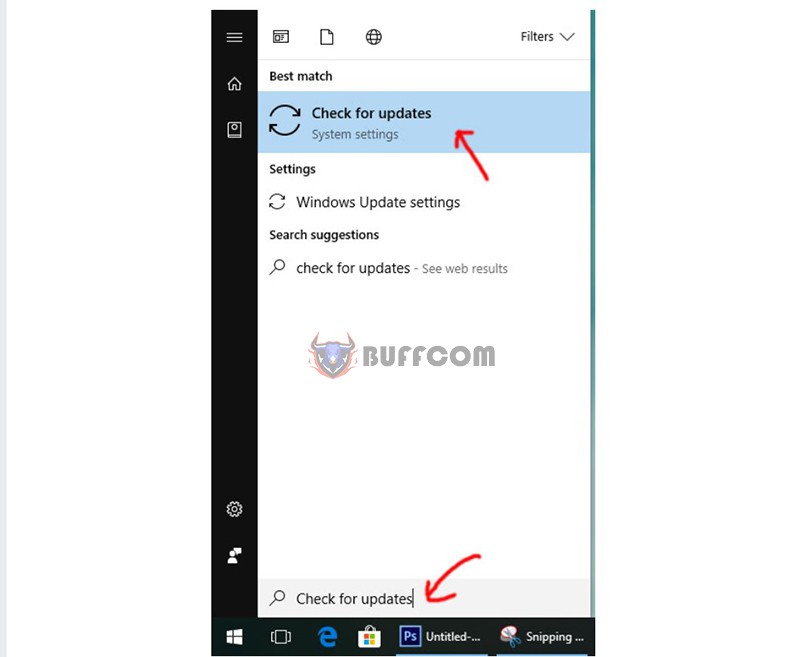
Step 1: Click on the Start button at the bottom left corner of the screen, then type “check for updates” and select “Check for updates” as shown in the image below.
 Step 2: In this step, select “Windows Update,” and under “Update settings,” choose “Advanced options.”
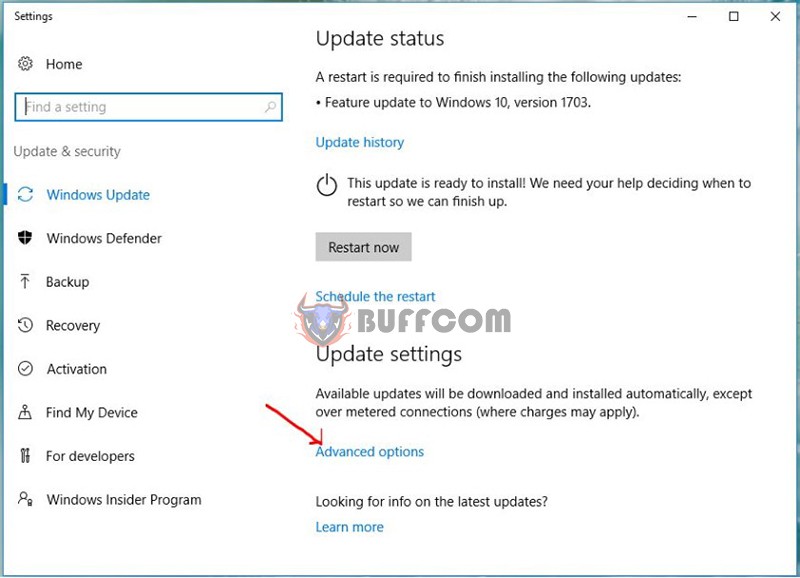 Step 3: In this interface, I am using Windows 10 Pro, and all I need to do is check the option “Defer feature upgrades” to disable Windows updates.
For other versions of Windows 10, you may need to select another option called “Notify to schedule restart” before being able to choose “Defer upgrades.”
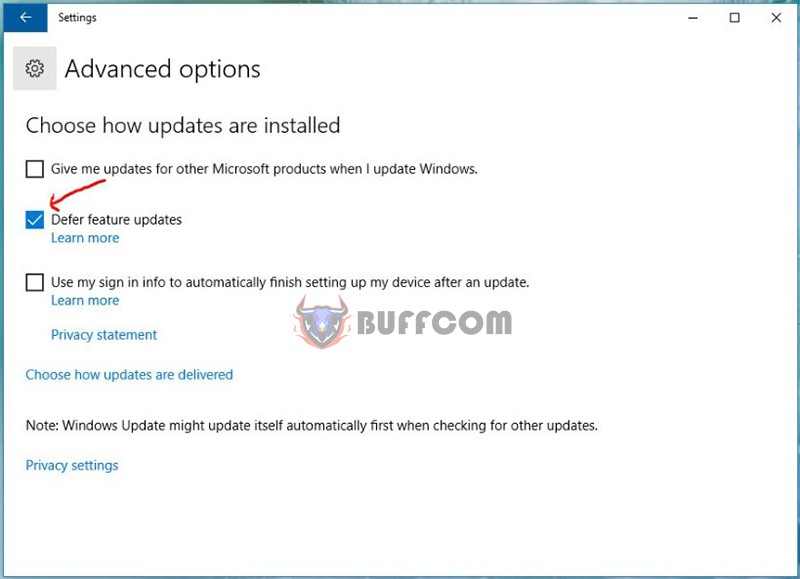 To clarify, this method does not completely disable Windows 10 updates, but it prompts you when updates are available. To fully disable updates, you can refer to method 2.
Method 2: Disable Windows 10 updates through the system services
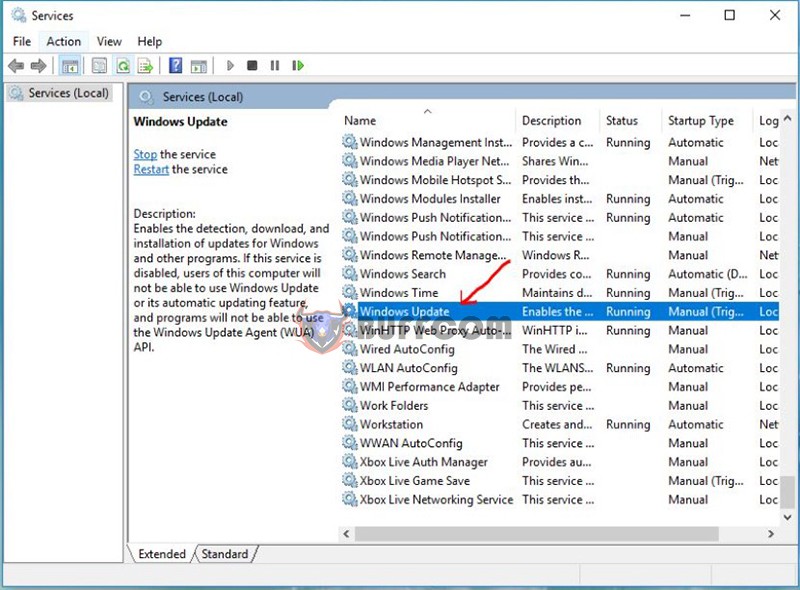
Step 1: Again, click on the Start button, type “services,” and select “Services.”
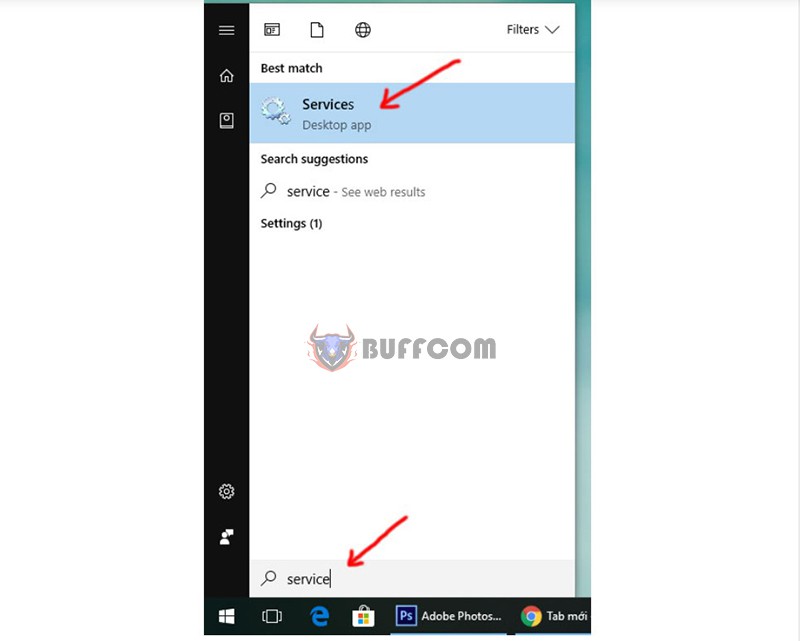 Step 2: In the Services window, scroll down and look for the file named “Windows Update.” Double-click on it to select.
 Step 3: In the properties interface, perform the following:
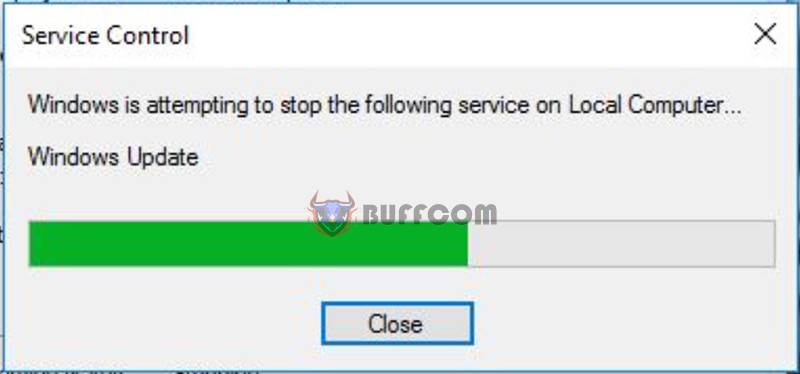
Under “Startup type,” select “Disabled.”Click on “Stop.”Then, select “OK.”
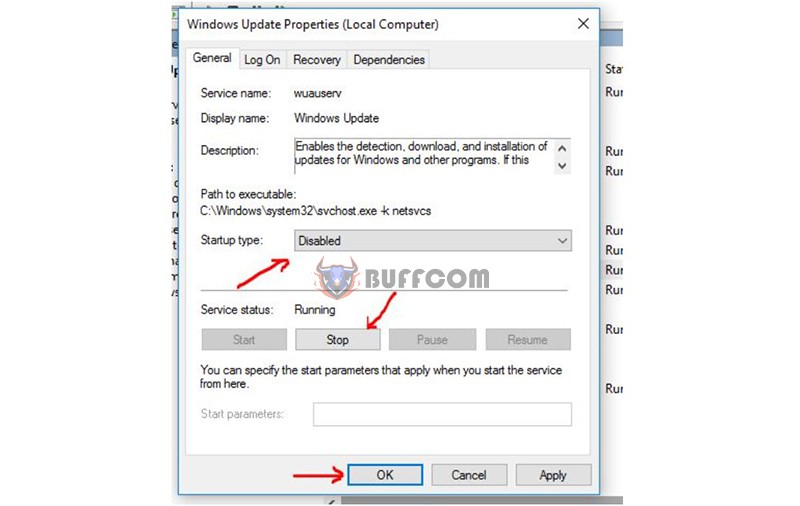 Once you complete these steps, you have successfully disabled Windows 10 updates.
 Method 3: Disable Windows 10 updates through Group Policy Editor
To access the Group Policy Editor, follow these steps:
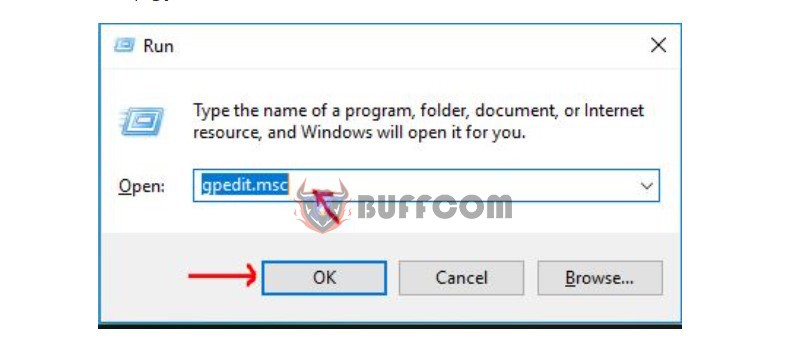
Step 1: Press the Windows key + R, type “gpedit.msc” in the Run dialog box, and hit Enter.
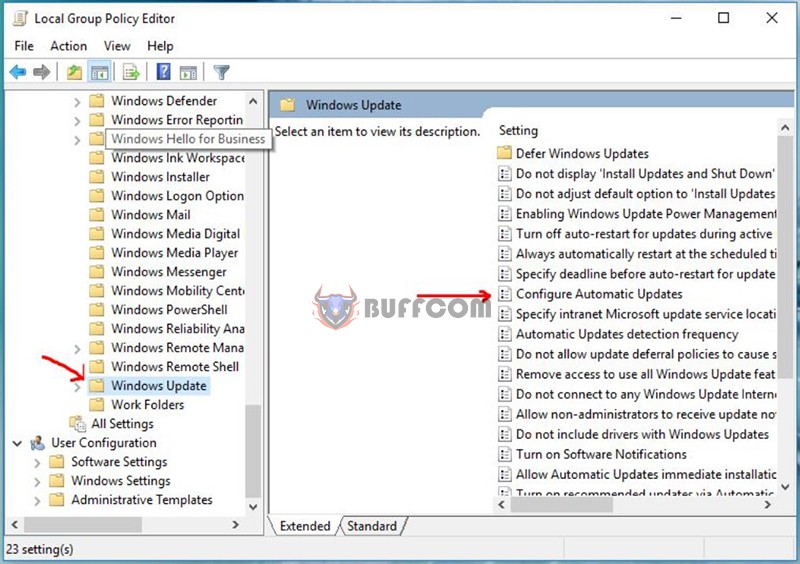
 Step 2: In the Local Group Policy Editor interface, navigate to “Computer Configuration” -> “Administrative Templates” -> “Windows Components” -> “Windows Update.”
Click on the file “Configure Automatic Updates.”
 Step 3: In the “Configure Automatic Update” interface, select the “Disabled” option as shown in the image, and click “OK.
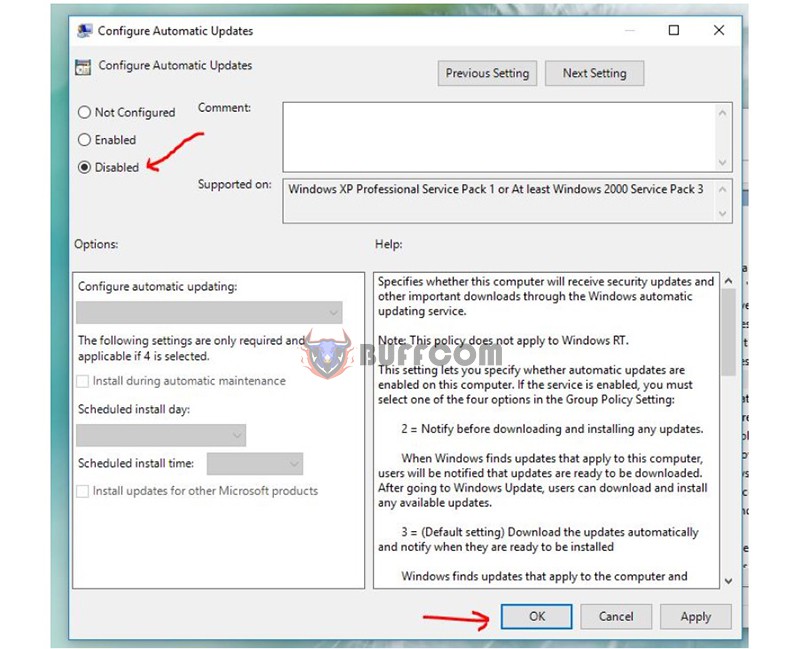 ”
”
In conclusion, I hope the above methods can help you disable updates on Windows 10. For purchasing genuine Windows keys, please contact Buffcom.net!

