How to Fix Yellow Screen Issues on Windows

Nowadays, laptops have become one of the essential personal devices for everyone, especially for office workers. The problem of the yellowing laptop screen often occurs in devices that have been used for a long time, causing discomfort for users. What causes the laptop screen to turn yellow? Is there any quick and effective way to fix this problem?
What causes a yellowing laptop screen?
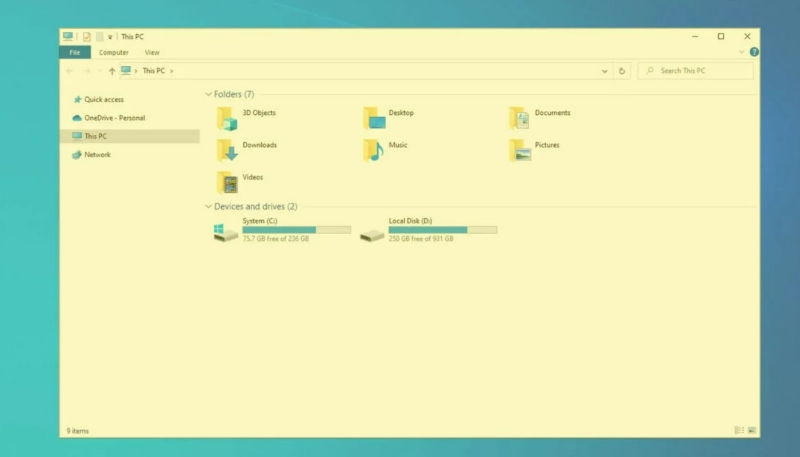 Normally, computer screens have a white color along with blue light to give users a comfortable feeling when using them. This light also helps to reduce eye strain when using for a long time. However, some laptop users still complain about the extremely uncomfortable yellowing screen. According to experienced and knowledgeable people in the field of computers, the yellowish screen can be caused by some of the following basic reasons:
- The computer screen is running on the “Night Shift” mode in Windows 10. With this mode, the computer screen will automatically turn slightly yellow. It is known that this mode is designed to protect the eyes.
- Another common cause of a yellowing laptop screen is a faulty screen cable. Specifically, if the screen cable of your device is old, broken, or faulty, it will affect the signal transmission and the quality of the connection to the screen.
- If the graphics card of the device uses an incompatible or outdated driver version, it will also cause screen errors and make this part turn yellow. Incorrect color adjustments or damaged internal components will also cause the screen to turn yellow.
How to fix the yellowing laptop screen?
 How to fix yellow screen on laptop? Regardless of the cause, a yellowish screen can be quite uncomfortable for users. Here are some methods to fix it:
Clean the device
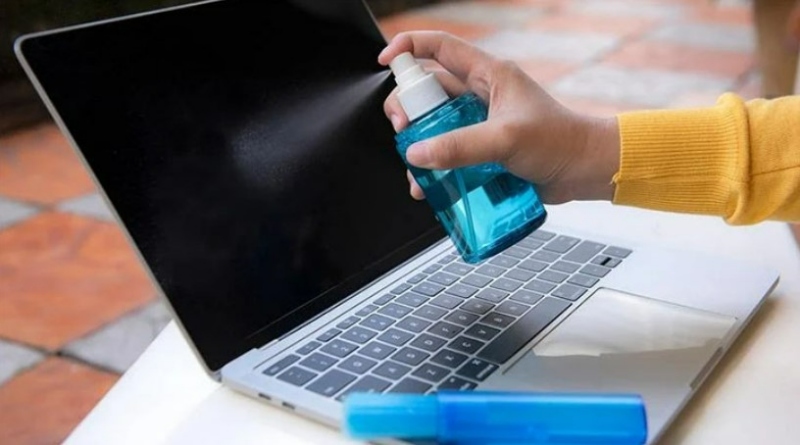 In many cases, not cleaning the laptop for a long time can cause the screen to be covered in dust, which affects the brightness and color of the display. Therefore, it is recommended to clean the screen and the device regularly for better performance.
Use an automatic repair tool
If cleaning the screen does not solve the issue, it is possible that the screen or the device itself is damaged. In this case, you can use the automatic repair tool provided by Microsoft to quickly resolve the problem. The steps to use the Microsoft automatic repair tool to fix the yellow screen issue are as follows:
Click on the Settings option on your laptop. You can also access this menu by using the search bar or pressing the Windows + I keys.
In the Settings menu, select the Update & Security option. 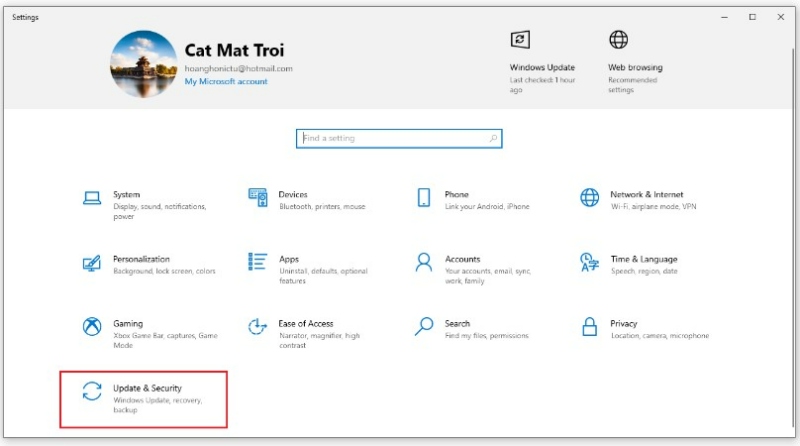
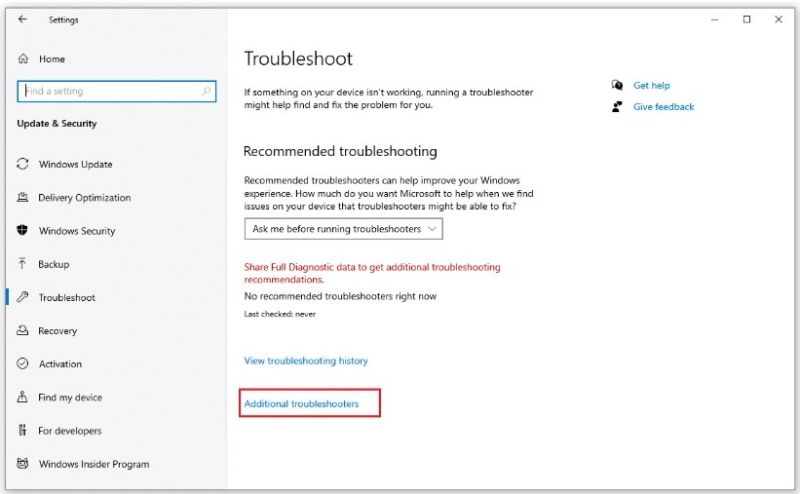
Click on Troubleshoot, then select Network Adapter. Choose Run the troubleshooter and follow the instructions. The system will automatically scan for and fix the yellow screen issue. 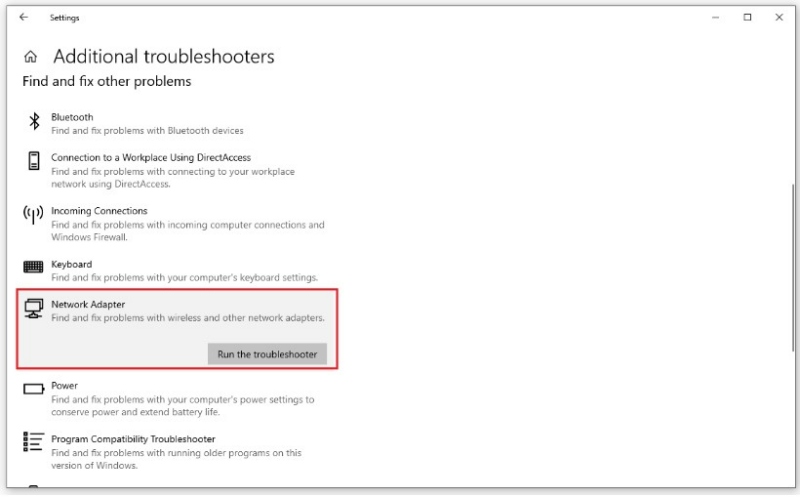
Turn off Night Light mode
Enabling Night Light mode on a Windows 10 laptop can also cause a yellowish screen. Therefore, when you encounter this issue, don’t forget to check and turn off Night Light mode by selecting the notification icon in the lower-right corner of the screen and clicking on Night Light to turn it off quickly. 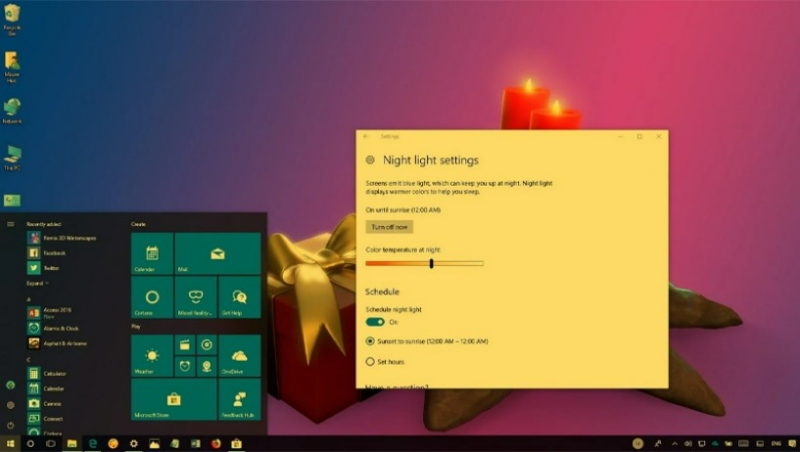
Using Control Panel to adjust device color
Another option that you can apply to quickly fix the problem of a yellowish laptop screen is to adjust the color settings for the device using the Windows 10 Control Panel tool. With the following steps, we can adjust the screen brightness to suit our own usage needs:
Step 1: On the Taskbar, type “Color Management” and then press Enter to search. 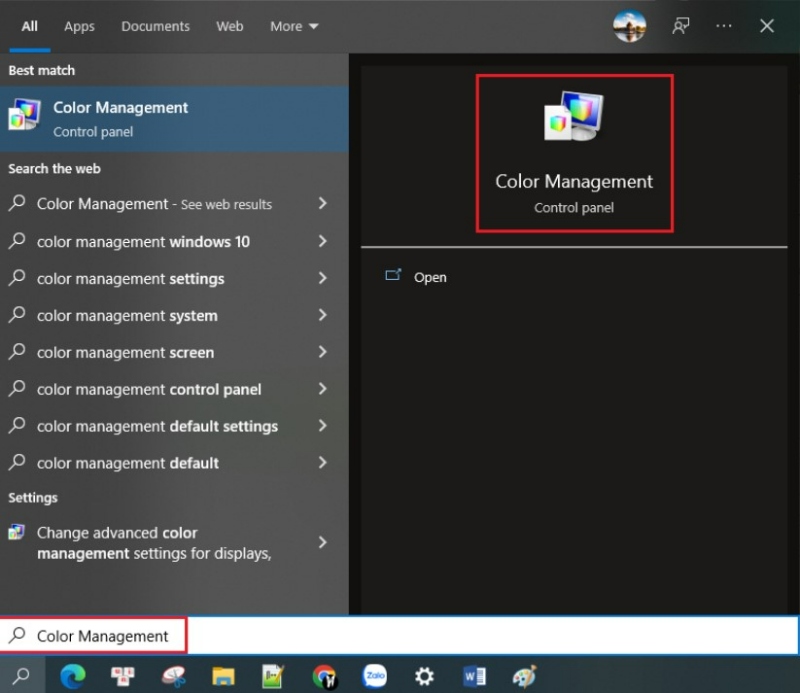
Step 2: When the dialog box opens, continue to check the “Use my settings for this device” box. Then, users select “Profile associated with this device” and click “Remove”. 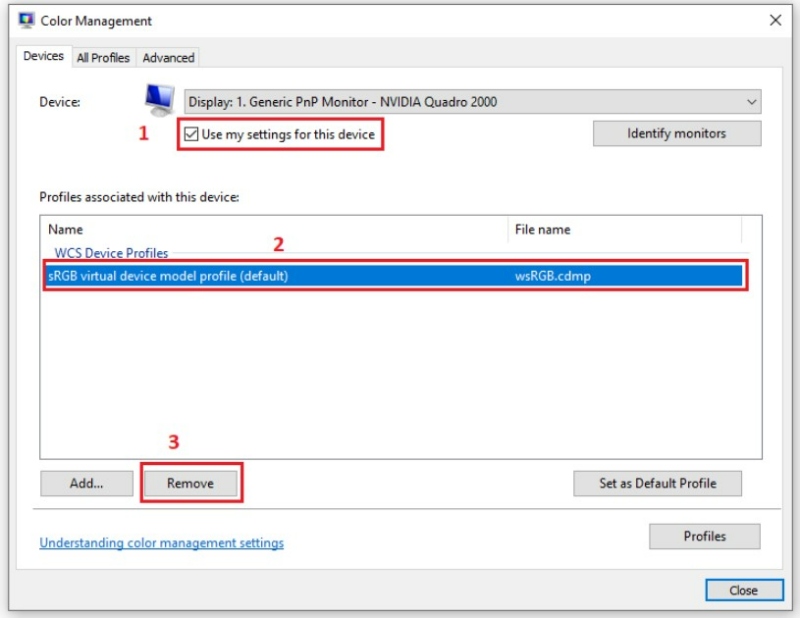
Step 3: In the notification dialog box, select “Continue” and then select “Close” to complete the adjustment. 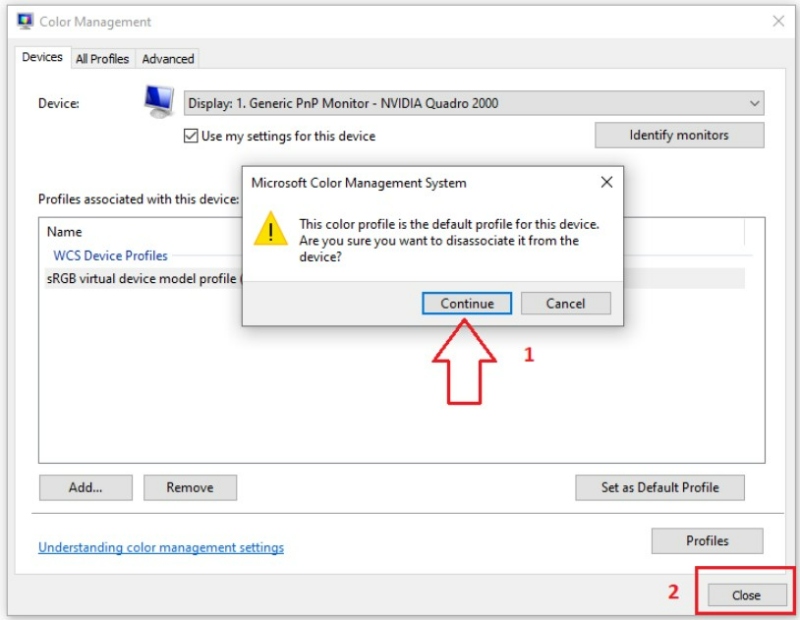
It cannot be denied that the problem of a yellowish laptop screen still frequently occurs and affects users. Therefore, Buffcom.Net hopes that this article can support customers in finding the best solution for themselves.


