How to Mark All Emails as Read in Outlook
How to Mark All Emails as Read in Outlook: Have you ever found yourself with a cluttered inbox in Outlook, filled with numerous unread emails? It can be overwhelming and time-consuming to sift through them all. But fret not! We’re here to help you streamline your email management process. In this guide, we’ll show you how to mark all your emails as read in Outlook., whether you’re using the desktop application or the web version. By the end of this tutorial, you’ll have a clean and organized inbox, allowing you to stay on top of your important messages. So let’s get started and make your email management a breeze!
Mark All Emails as Read in Outlook Desktop
If you’re an Outlook desktop user, first, launch the Outlook application on your computer. In the left sidebar of the application, locate the folder containing all the emails you want to mark as read.
Find the email folder.
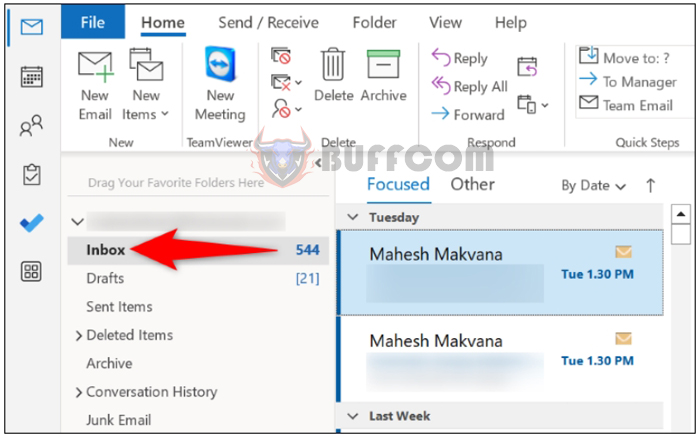
Right-click on that email folder and from the dropdown menu, select “Mark All as Read”.
Select “Mark All as Read” from the menu.
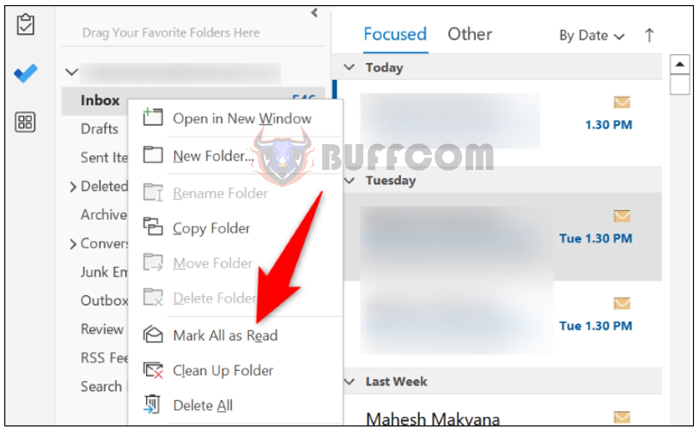
And that’s it. You’ll notice that Outlook has marked all the emails in that specific folder as read.
Mark All Emails as Read in Outlook Web
Marking emails as read in the web version of Outlook is also straightforward. To do this, open your preferred web browser and navigate to Outlook.com. On the web page, sign in to your account if you haven’t done so already.
In the left sidebar of Outlook, find the folder that contains the emails you want to mark as read.
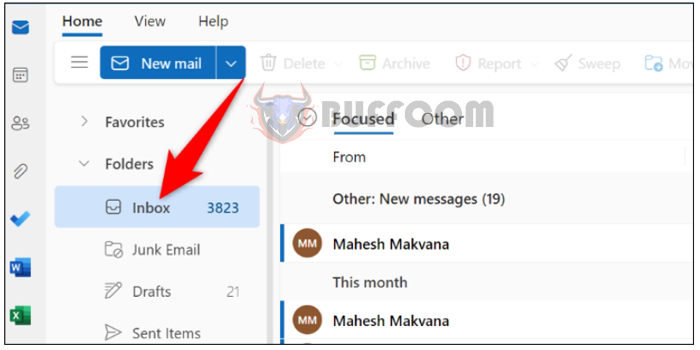 Identify the email folder.
Right-click on the folder, and from the dropdown menu, select “Mark All as Read”.
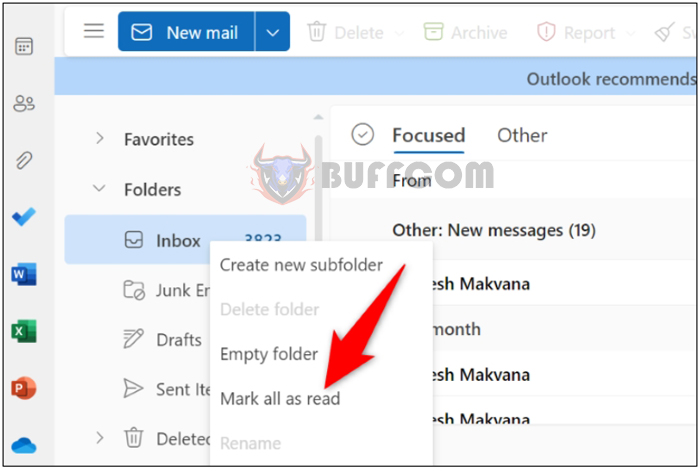
How to Mark All Emails as Read in Outlook
Your selected Outlook folder’s emails are now marked as read. You’re all set.
And there you have it! Whether you’re using Outlook on your desktop or the web version, marking all your emails as read is a breeze. By following these simple steps, you can quickly clear your unread email count and stay organized. Now you can manage your inbox with ease and focus on the messages that truly matter. Happy emailing!

