How To Partition, Merge, And Create Hard Drives In Windows 10 Without Software
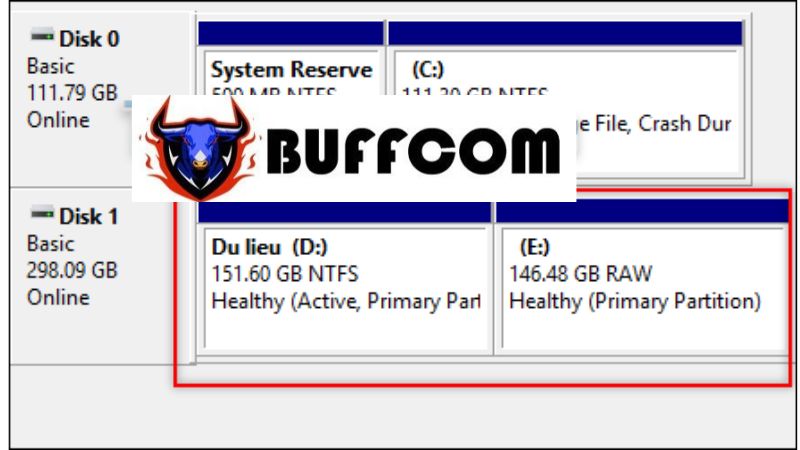
Usually, when you purchase a new computer, it comes with only one drive that contains the operating system. This can be inconvenient for managing and storing data. Therefore, it is necessary to partition the hard drive to make it easier to manage and avoid data loss when reinstalling Windows. This process is very simple and does not require any additional software. It applies to Windows 7 and later versions, and this article will focus on Windows 10.
GUIDE TO PARTITION, MERGE, AND CREATE HARD DRIVES WITHOUT SOFTWARE
Partitioning a hard drive
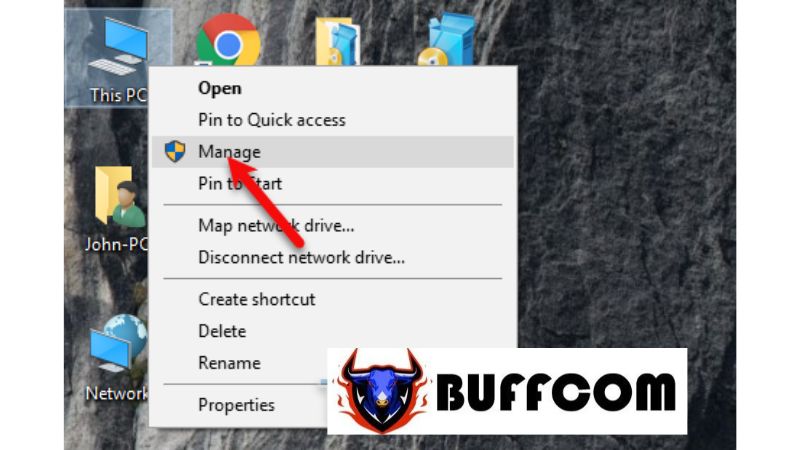
Step 1: Right-click on “This PC” and select “Manage“.
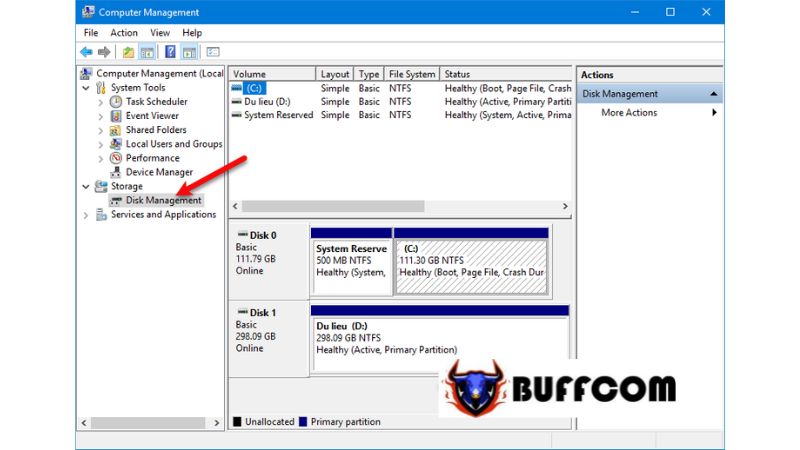
 Step 2: In the left column, select “Disk Management“, and you will see the hard drive partitions appearing on the right.
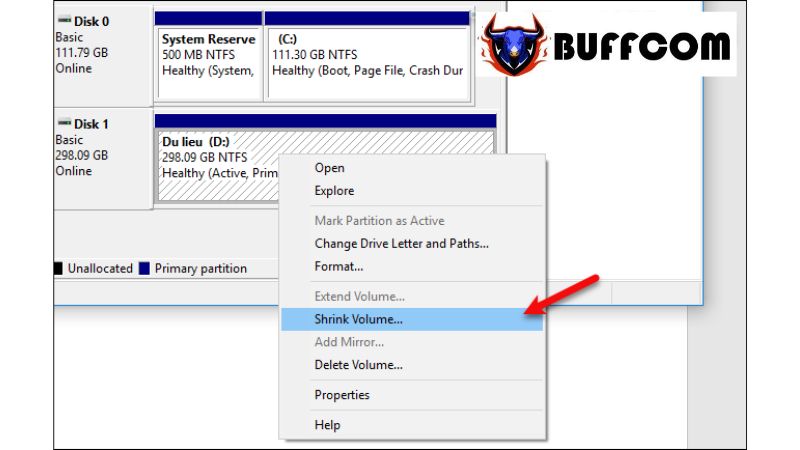
 Step 3: Right-click on the partition you want to shrink and select “Shrink Volume…”.
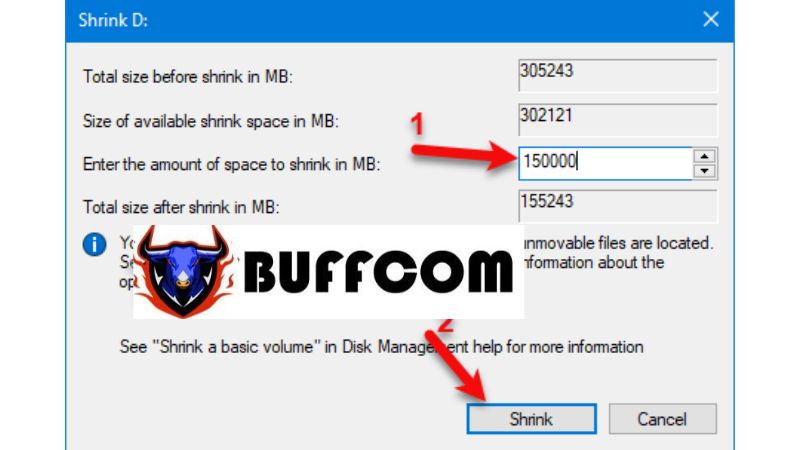
 Step 4: Enter the desired size for the new partition and click “Shrink“.
Note: The entered size must be smaller than the available shrink space displayed in the “Size of available shrink space” field.
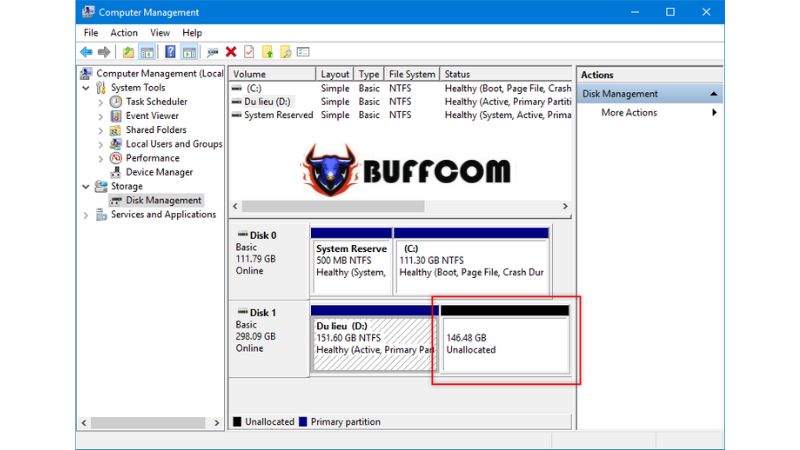
 After partitioning, you will see a new “Unallocated” partition (which is not yet usable). To make use of this partition, we need to create it as a new hard drive partition.
 Creating a new hard drive partition
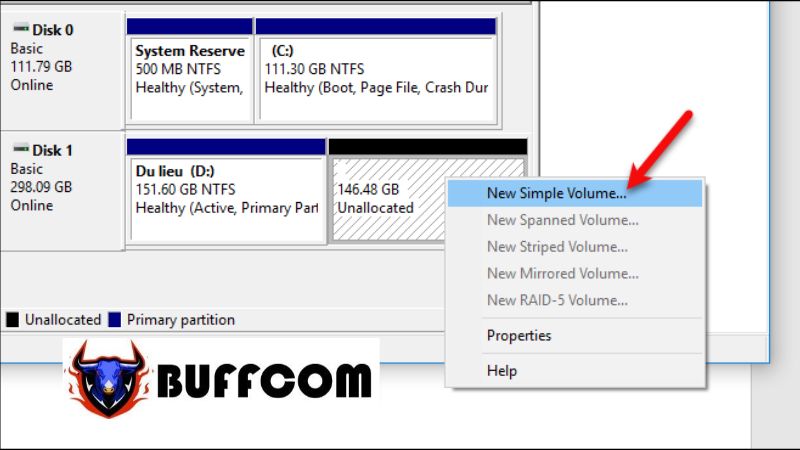
Step 1: Right-click on the “Unallocated” partition and select “New Simple Volume…”.
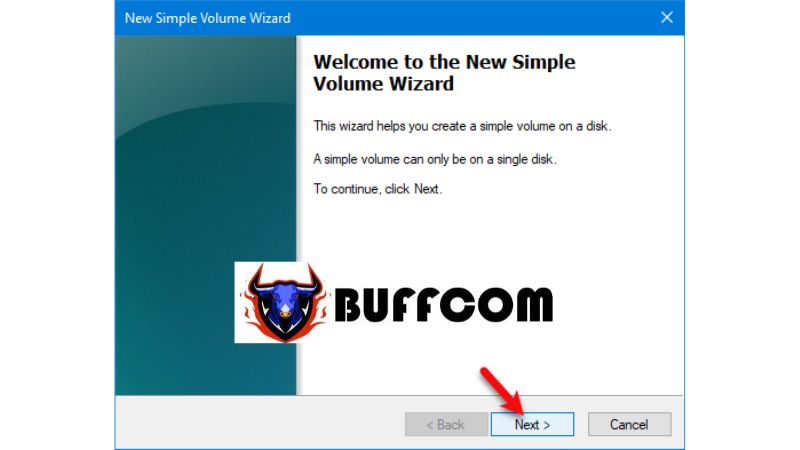
 Step 2: Click “Next“.
 Step 3: Enter the desired size for the new partition and click “Next“.
Note: The entered size must be smaller than or equal to the “Maximum disk space” displayed.
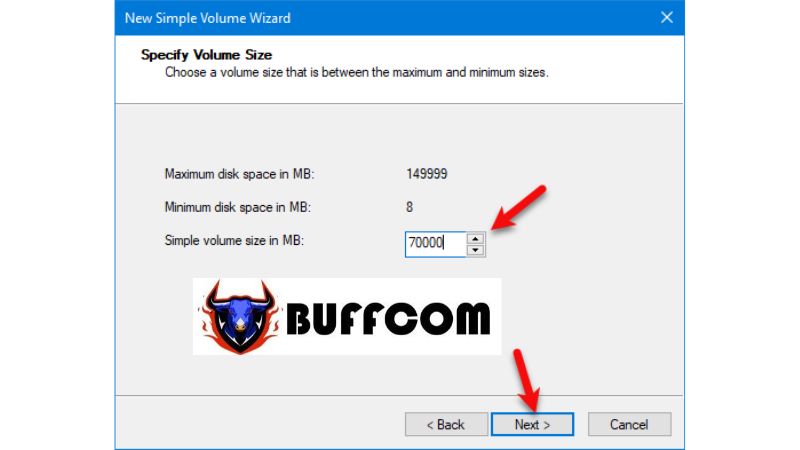 Step 4: Select a name for the new partition and click “Next“.
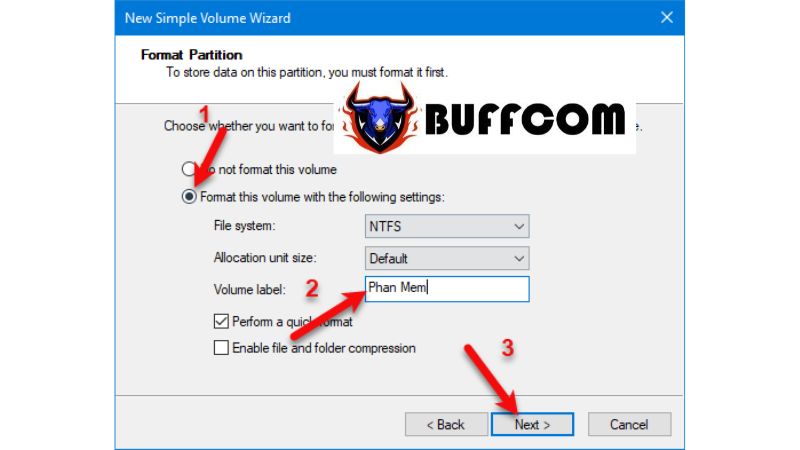
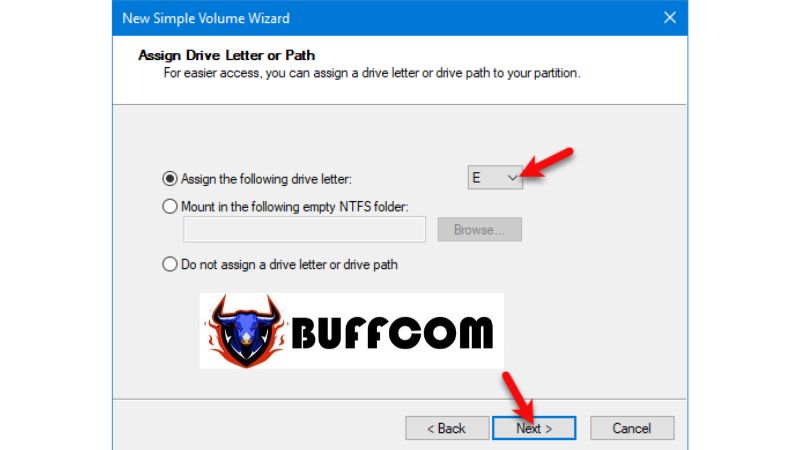 Step 5: Check the option “Format this volume with the following settings“, enter a volume label for the new partition, and click “Next“.
 Step 6: Click “Finish” to complete the process.
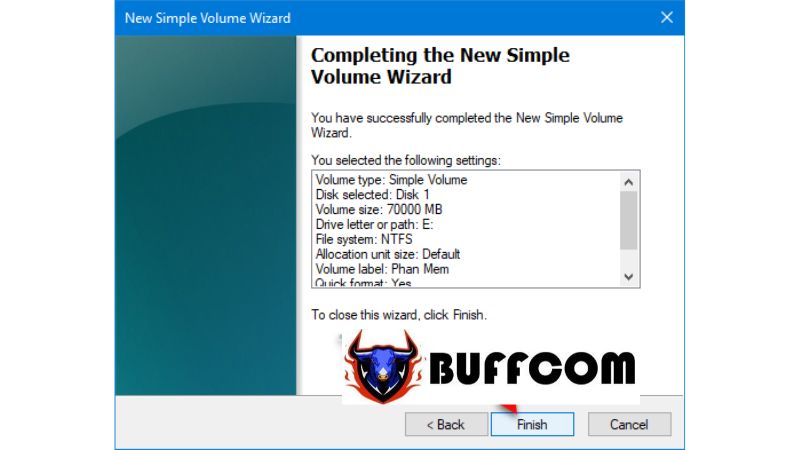 Wait for the computer to format the new hard drive partition.
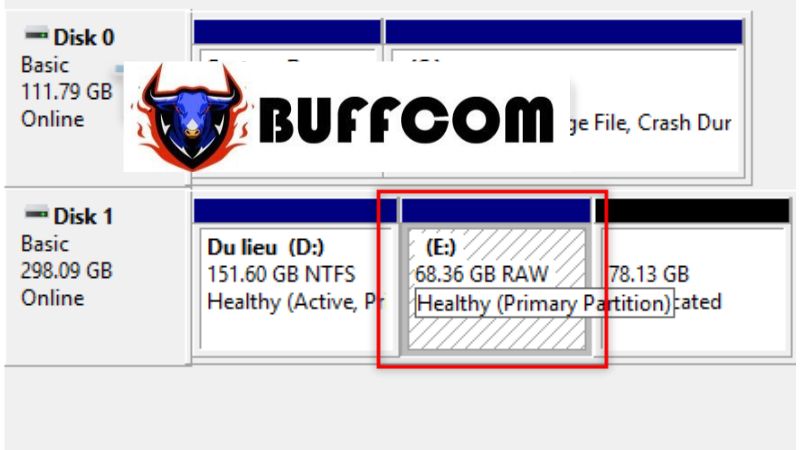 Merging the partition into an existing hard drive
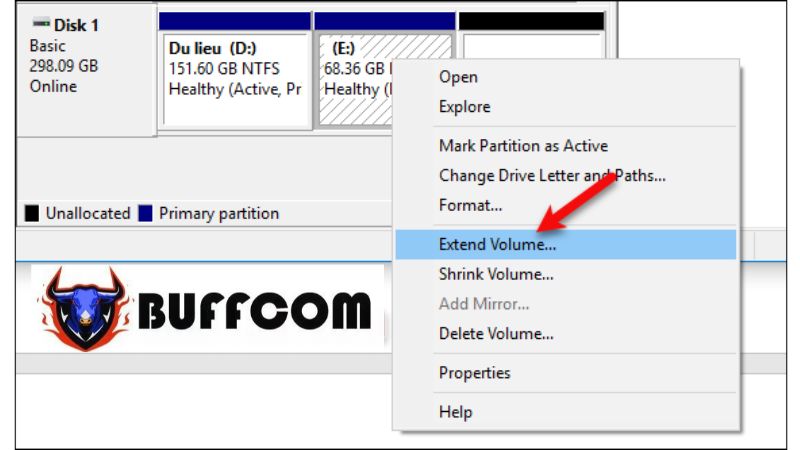
Step 1: Right-click on the drive you want to merge and select “Extend Volume...”.
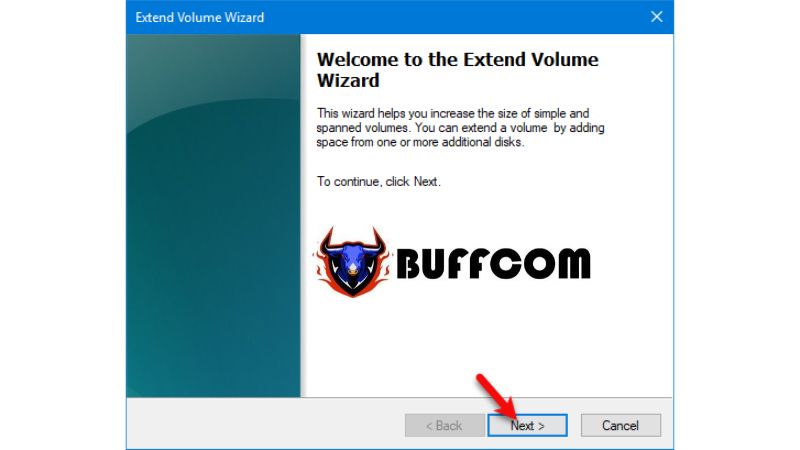
 Step 2: Click “Next“.
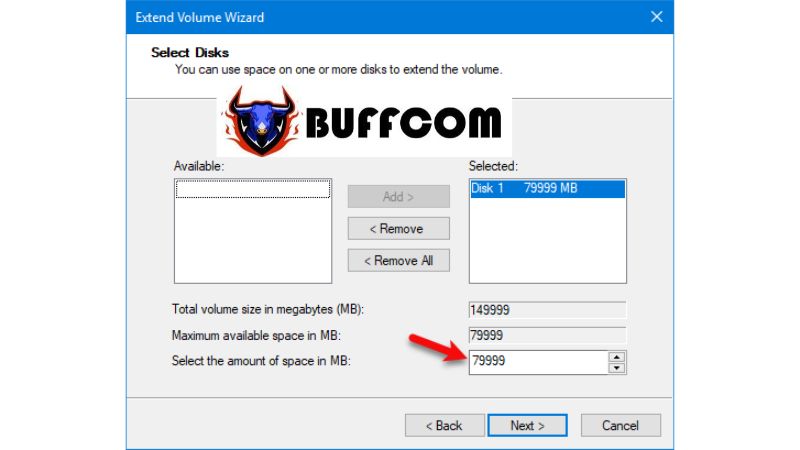
 Step 3: Enter the size you want to merge and click “Next“.
Note: The merge size must be smaller than or equal to the “Maximum available space” displayed.
 Step 4: Click “Finish” to complete the merge.
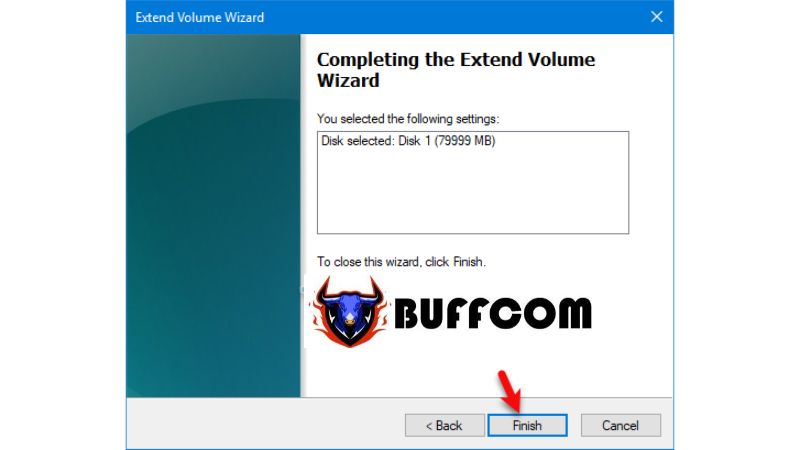 That’s it, the merge is complete.
 This article has provided a guide on partitioning, merging, and creating hard drives without software on Windows 10. The same steps can be applied to Windows 7 and 8. Thank you for following along. If you are interested in a genuine Windows key, please contact Buffcom.net for assistance!


