How to save Word document as image (png, jpeg and so on)?

Saving a Word document as an image can simplify document transfer and viewing. Here are three methods to achieve this:
Save One Page of Document as Image with Screenshot Feature in Word (5 Steps)
If you have Word 2010 or later versions, you can utilize the Screenshot feature:
- Open the Word document and display the specific page you want to save as an image. Ensure you’re viewing one page by clicking on View > One Page.

- Create a new document by clicking File > New or pressing Ctrl + N.
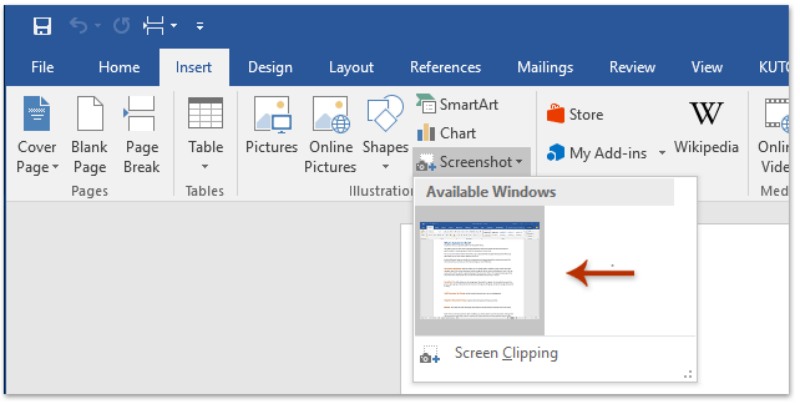
- In the new document, navigate to Insert > Screenshot and select the screenshot of the document from the drop-down list. Alternatively, choose Insert > Screenshot > Screen Clipping to draw the scope you want to save as an image.

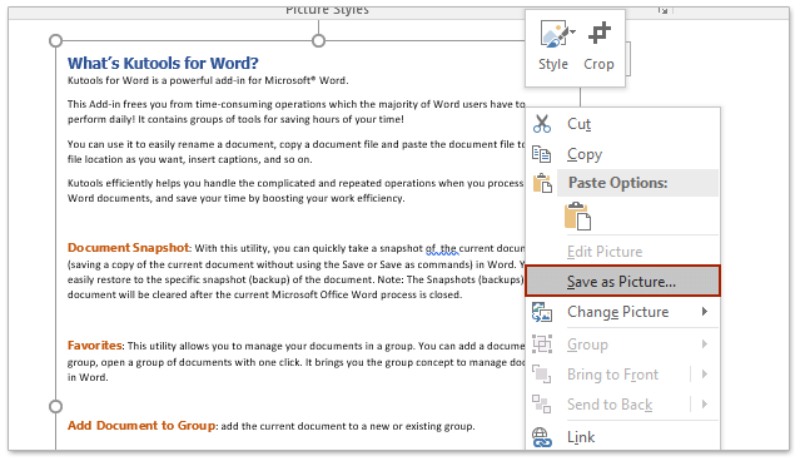
- Right-click the inserted screenshot and choose Save as Picture from the context menu.

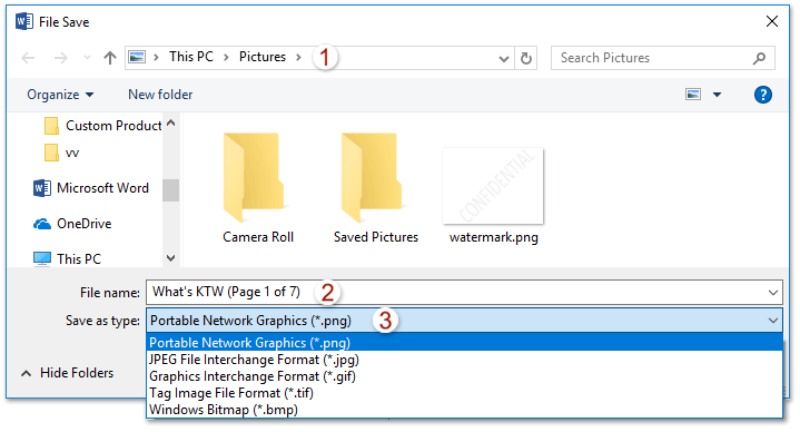
- In the File Save dialog box, specify the destination folder, name the image, select the image type from the drop-down list (e.g., PNG, JPEG), and click Save.

How to save Word document as image
Note: This method isn’t compatible with Word 2007 or earlier versions as they lack the Screenshot feature.


