How to set the most secure password for Excel files 2023
Setting a password for Excel files is an essential feature that helps protect your data and increase security in your work, especially for office users. Excel is one of the popular office software, along with Word, Powerpoint, etc., used to create important spreadsheets. Let’s explore how to set a password for Excel files quickly and easily within the content of this article on Buffcom.net.
Setting a password for Excel files using Save As
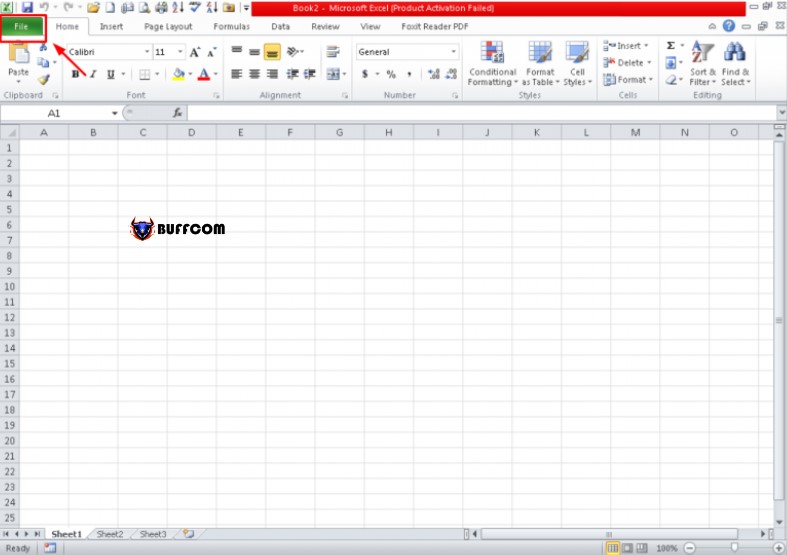
Step 1: Open the Excel file you want to set a password for, then select File on the top left of the screen.
How to set the most secure password for Excel files
Step 2: Select Save As.
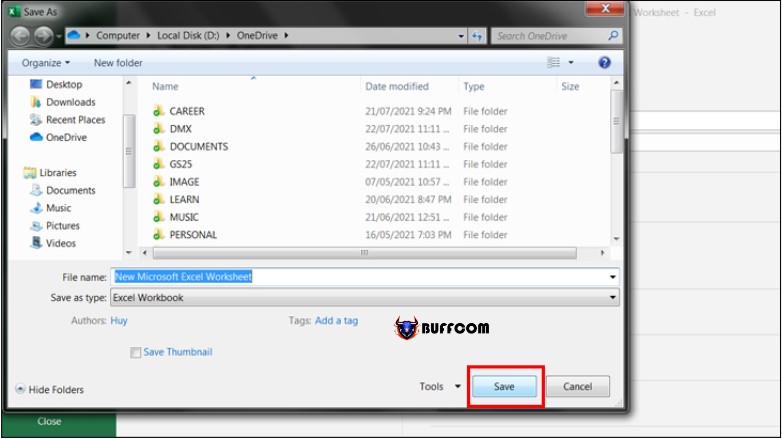
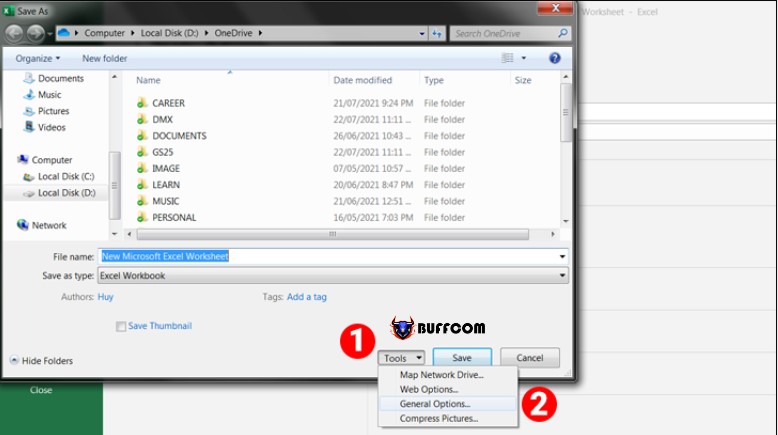
Step 3: In the Save As dialog box, select the location to save the Excel file and edit the file name if desired.
Step 4: Select Tools, then General Options.
How to set the most secure password for Excel files
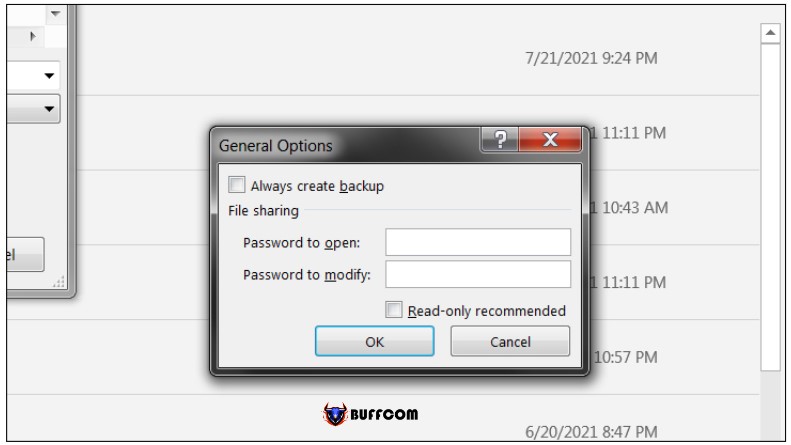
Step 5: Immediately, the General Options dialog box will appear, allowing you to set a password for the Excel file. You can choose one of two ways to set a password for the Excel file, or select both of them:
Password to open: This requires the correct password to be entered before users can view and edit the contents of the Excel file.
Password to modify: Users can still view (only view) the contents of the Excel file without entering a password. However, to edit or copy Excel data, the correct password is required.
How to set the most secure password for Excel files
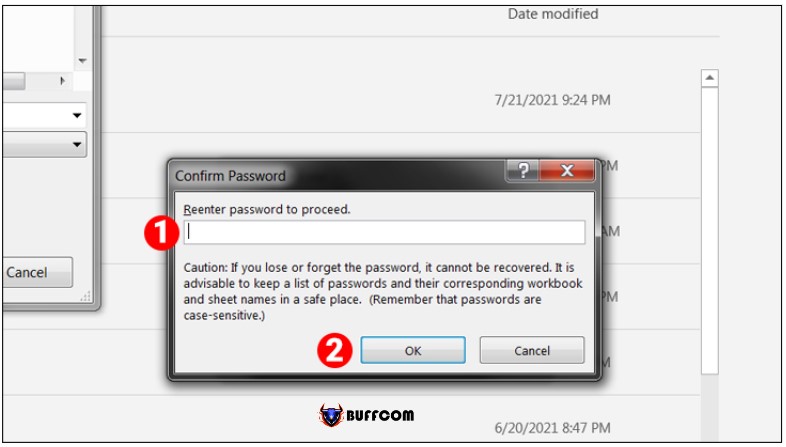
Step 6: Confirm the password for the Excel file you have just entered. If the user selects both password modes, they will need to confirm the password twice in the following order:
Password 1 confirmation: Password to open
Password 2 confirmation: Password to modify
How to set the most secure password for Excel files
Step 7: Select Save to save the password settings for the Excel file.
How to set a password for an Excel file using Protect Workbook
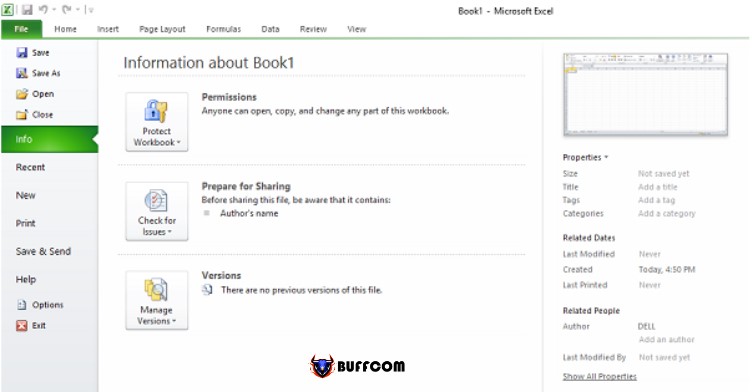
Step 1: Open the Excel file you want to password protect. Then select File on the top left of the screen.
Step 2: Select the Info tab. In the options displayed on the right-hand column, select Protect Workbook, and then select Encrypt with Password.
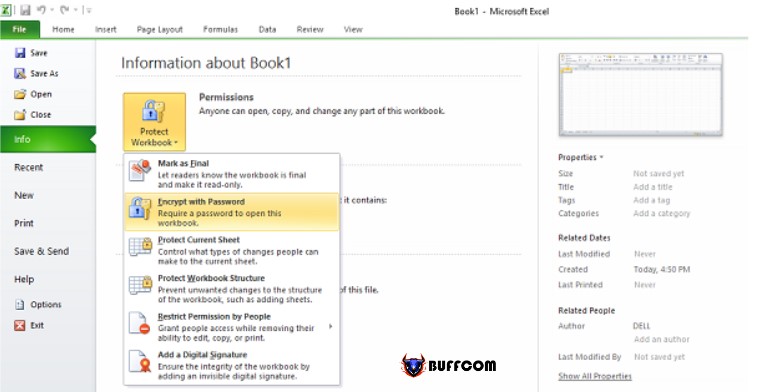
How to set the most secure password for Excel files
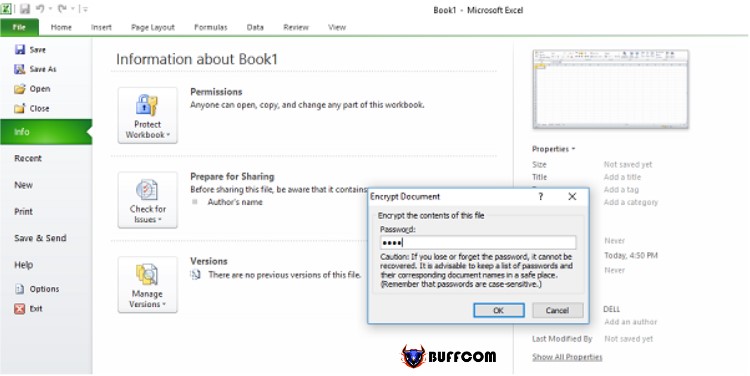
Step 3: Immediately, a window for setting the password for the Excel file will appear. Enter the password in the Password box, and then click OK.
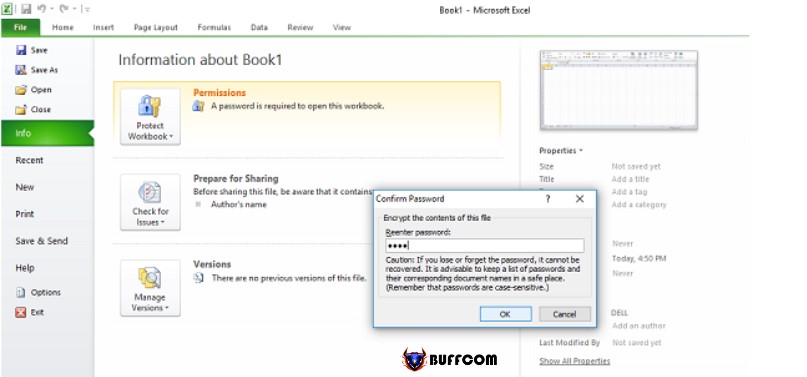
 Step 4: A window will appear requesting you to confirm the password. Re-enter the password you just set above. Finally, click OK to complete the process of setting a password for the Excel file.
How to set the most secure password for Excel files
The above are two popular ways to set a password for Excel files, which are easy to perform and should not be ignored by users. With a password, your work data files will be safely protected, avoiding unauthorized access. Wish you success in implementing this process. And don’t forget to visit the Buffcom.net website to update the latest and most useful news about office tricks.

