How To Share Wi-Fi On Windows 10 Laptop

Do you want to turn your Windows 10 laptop into a router to share Wi-Fi with other devices like smartphones, tablets, and more, but you’re unsure how to do it? You don’t need to look anywhere else. Let’s explore how to share Wi-Fi on a Windows 10 laptop with Buffcom.net!
Sharing Wi-Fi on Windows 10 using Mobile Hotspot
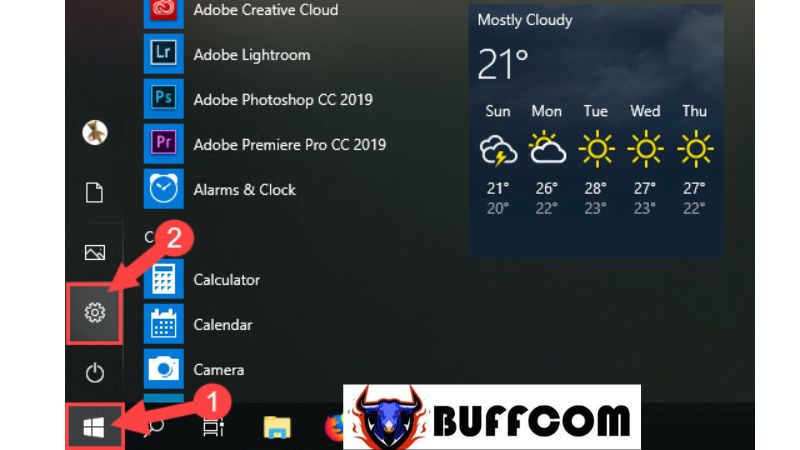
Step 1: Go to the Start Menu and select “Settings“.
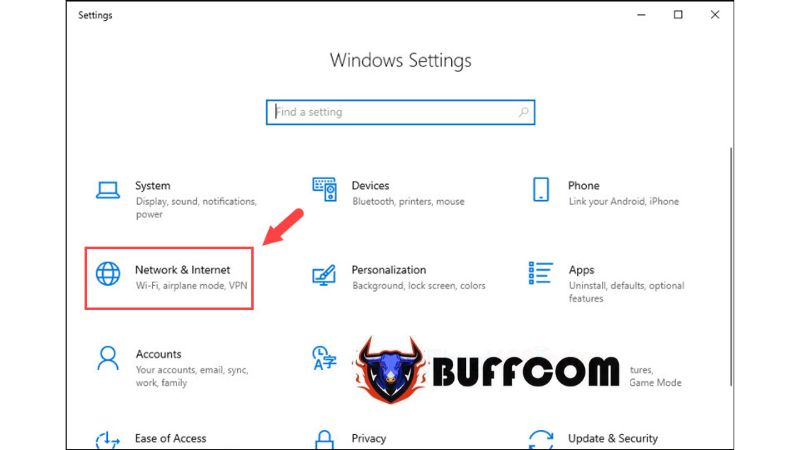
 Step 2: The Settings window will appear. Choose the “Network & Internet” option.
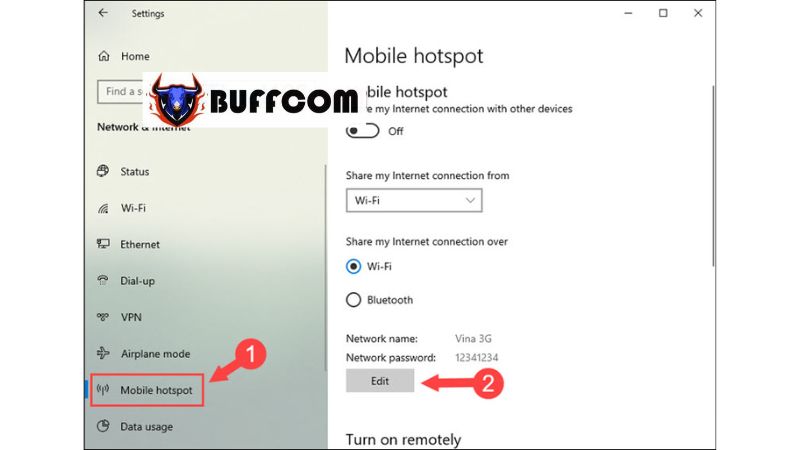
 Step 3: Then, select “Mobile Hotspot” and click on “Edit“.
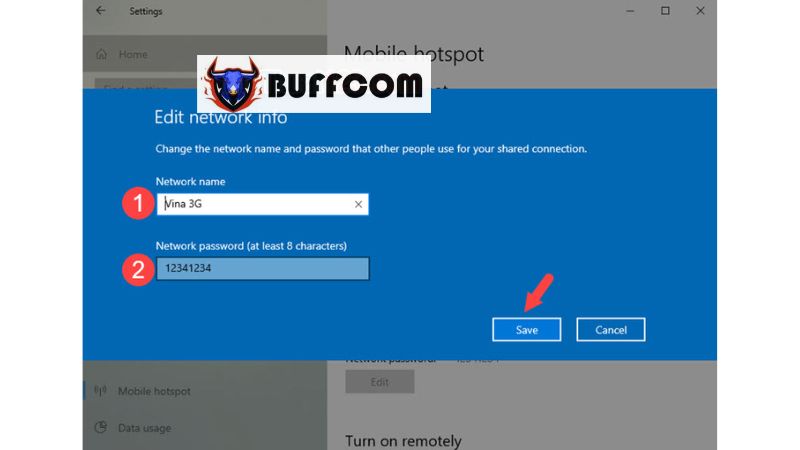
 Step 4: A configuration window will appear. Fill in the information in the two fields:
Network Name (1): Enter the Wi-Fi network name.
Network Password (2): Enter your Wi-Fi network password.
Afterward, click on “Save“.
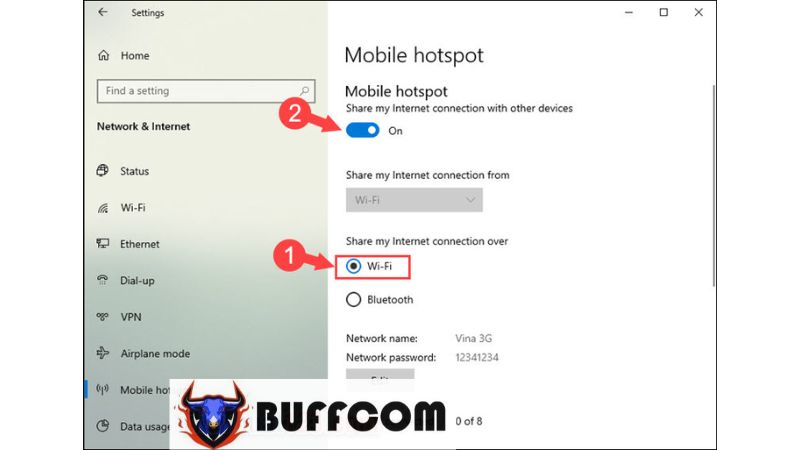
 Step 5: Go back to the previous settings and set up sharing the internet connection over Wi-Fi by enabling the “Wi-Fi” option under “Share my Internet connection over” (1). Then, start sharing the Wi-Fi by sliding the Mobile Hotspot switch (2) to On.
 That’s a simple way to easily share Wi-Fi on a Windows 10 laptop. We hope this article has been helpful to you. Thank you for reading, and if you’re interested in a genuine Windows key, contact Buffcom.net for assistance!


