How to Turn Off Track Changes in Word

How to Turn Off Track Changes in Word: To disable Track Changes in Word, open your document in the application, access the “Review” tab, and select Track Changes > Track Changes. If the button is grayed out, you will need to enter the password that the author used to lock the document.
Not all changes need to be tracked in your document. You can turn off the Track Changes feature in Microsoft Word even if your document is locked. We will show you how to do that as well as how to remove existing tracked changes and print your document with hidden tracked changes.
How to Stop Tracking Changes in Word
To begin turning off Track Changes so that your future edits in the document are not marked, launch the Word application and open your document.
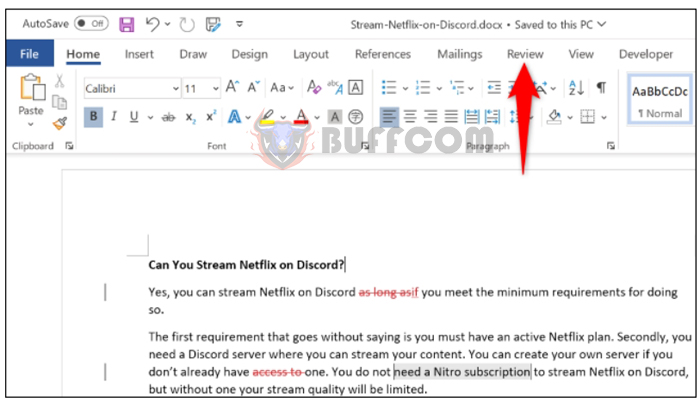
Once your document is open, on the Word ribbon at the top, select the “Review” tab.
Open the “Review” tab.
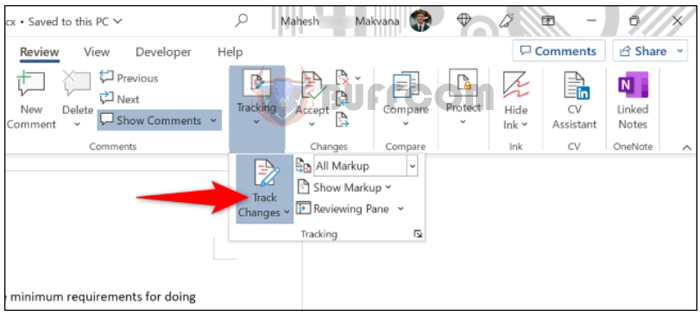
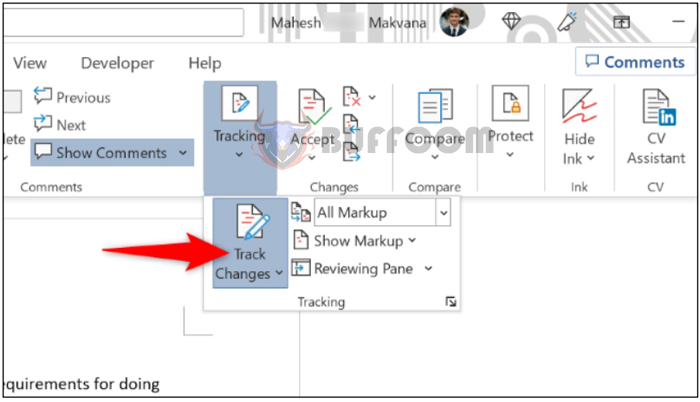
 On the “Review” tab, select Track Changes > Track Changes. This will disable the feature.
Select Track Changes > Track Changes.
 What to do if you can’t turn off Track Changes
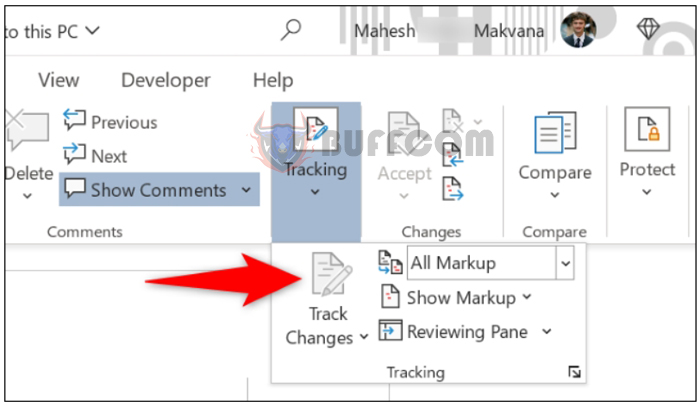
If “Track Changes” is grayed out and you are unable to click on it, then the author of your document has locked this feature. In this case, you will need the password (if one has been set) that was used to lock the feature to unlock it.
“The Track Changes” option is grayed out.
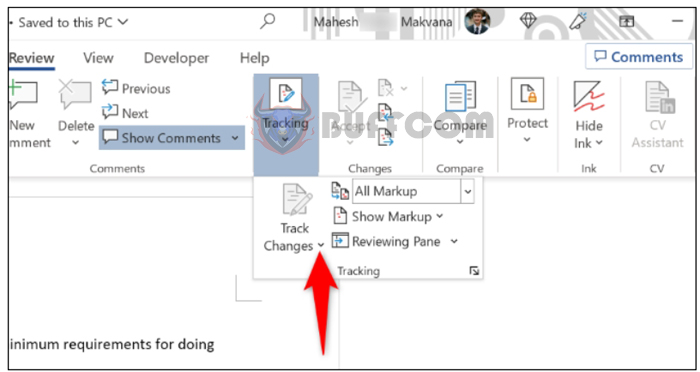
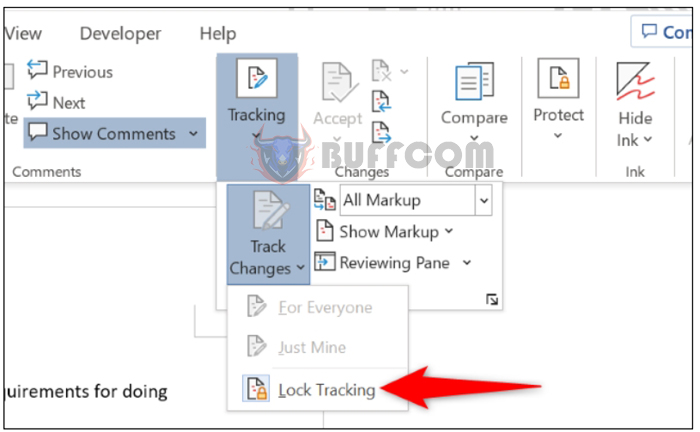
 Once you have obtained the password, in the “Review” tab of Word, click on “Track Changes” and select the dropdown arrow next to “Track Changes.”
In the dropdown menu, select “Lock Tracking.”
Select “Lock Tracking” in the menu.
 In the “Unlock Tracking” window, enter your password and select “OK.”
Enter the password and select “OK.”
To turn off this feature, select Track Changes > Track Changes.
Select Track Changes > Track Changes.
 And that’s it. The feature is now disabled.
You can confirm this by editing your document. You will find that Word no longer records and marks your changes.
How to Delete Existing Tracked Changes in Word
If you want to remove all existing tracked changes, you can accept or reject all those changes. You can do this by accessing the “Review” tab of Word and selecting Accept > Accept All Changes or Reject > Reject All Changes.
Accept or reject document changes.
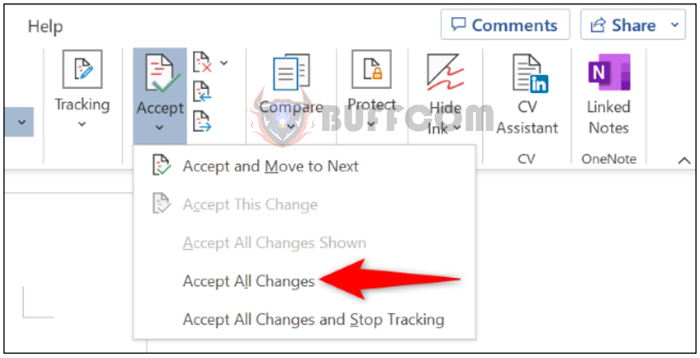 Please note that accepting all changes will make all proposed changes permanent, and rejecting all changes means all proposals will disappear. If you accidentally choose the wrong option, use Ctrl+Z to undo your mistake.
Printing a Word Document without Tracked Changes
If you want to keep your tracked changes but don’t want to see them when printing the document, configure your printing options as follows:
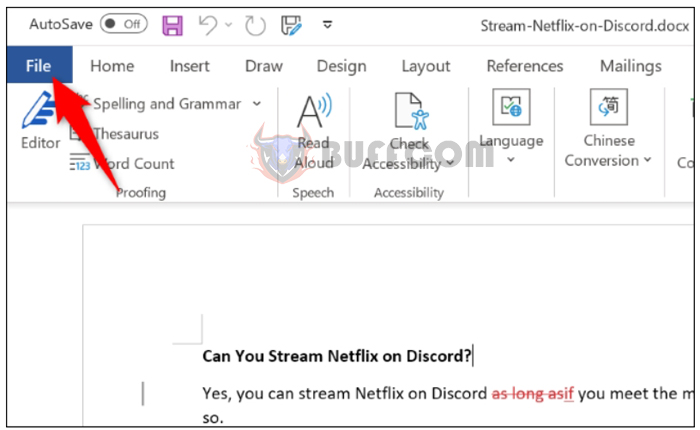
First, open your document with Word. Then, in the top-left corner of the application, click on “File.”
Select “File” in the top-left corner.
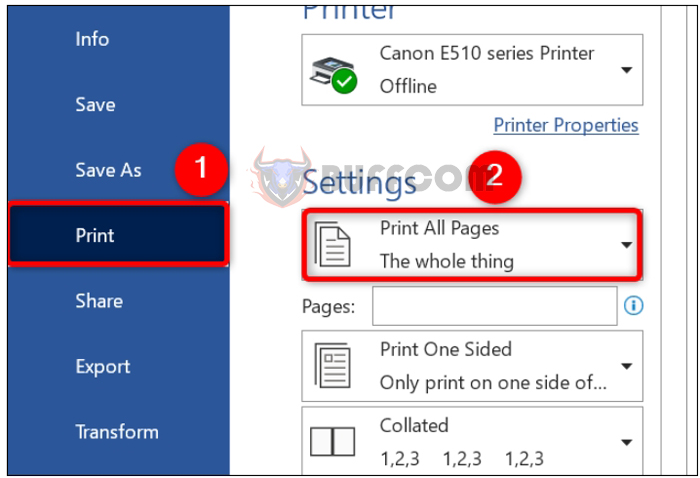
 On the left-hand sidebar, click on “Print.” Then, in the middle column, select “Print All Pages.”
Select Print > Print All Pages.
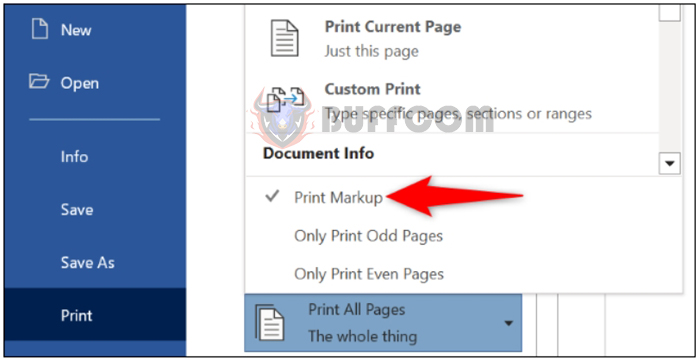
 In the dropdown menu, uncheck the “Print Markup” option.
Uncheck “Print Markup.”
How to Turn Off Track Changes in Word
Now you can print your document, and it will not include your tracked changes. You’re all set.


