How To View MAC Address On Windows 10
Unlike other numerical addresses, the MAC address (Media Access Control Address) is a globally unique identifier with only one code assigned to a network hardware such as Ethernet cards, wireless networks, etc. Due to this reason, many people often choose to block network data access using MAC addresses or use MAC addresses to connect to other computers or systems within the same local network.
However, the default MAC address does not appear on the computer, so you need to use different methods to check it. In this article, Buffcom.net will guide you on how to view the MAC address on Windows 10.
View MAC Address using Command Prompt
Command Prompt is a command-line interpreter in Windows that allows you to access all the information on your computer.
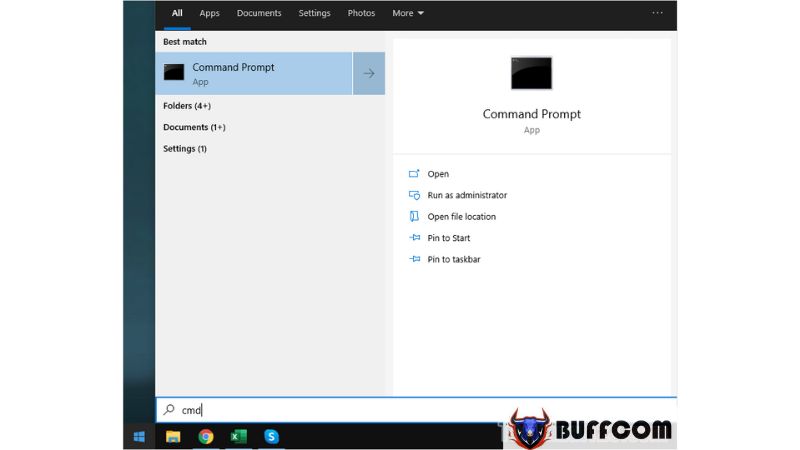
Step 1: First, open the Start menu and type “Command Prompt” to open it.
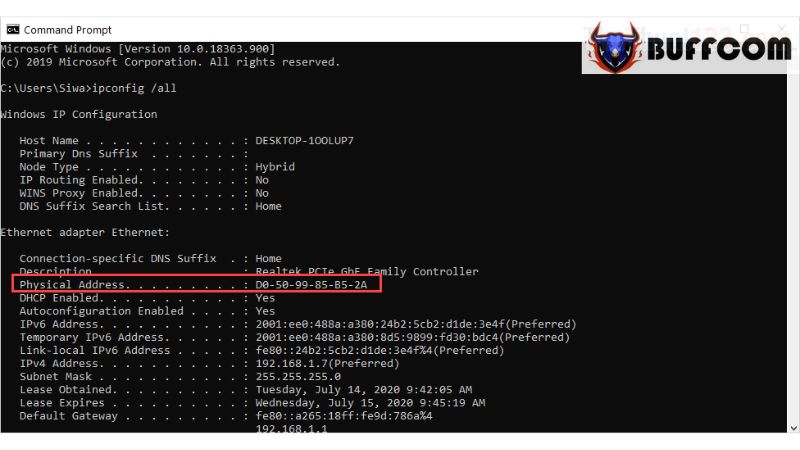
Step 2: Then, enter the following command and press Enter to run it:
Ipconfig /all
All network connection-related information will be displayed, including the MAC address. The MAC address is commonly referred to as the “Physical Address.”
 View MAC Address using Windows 10 Settings
The Settings tool in Windows 10 allows you to manage various parameters of your computer, including internet network connections.
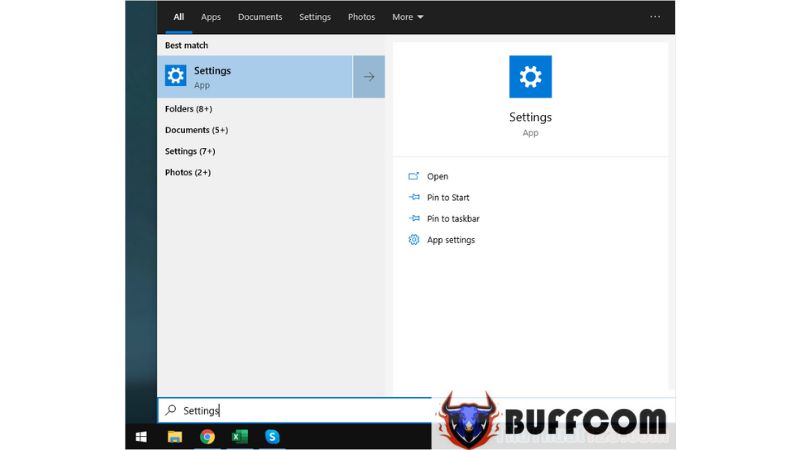
Step 1: First, open the Start menu and type “Settings” (or press Windows + I) to open it.
Step 2: Then, select the “Network & Internet” option to view network connection-related information.
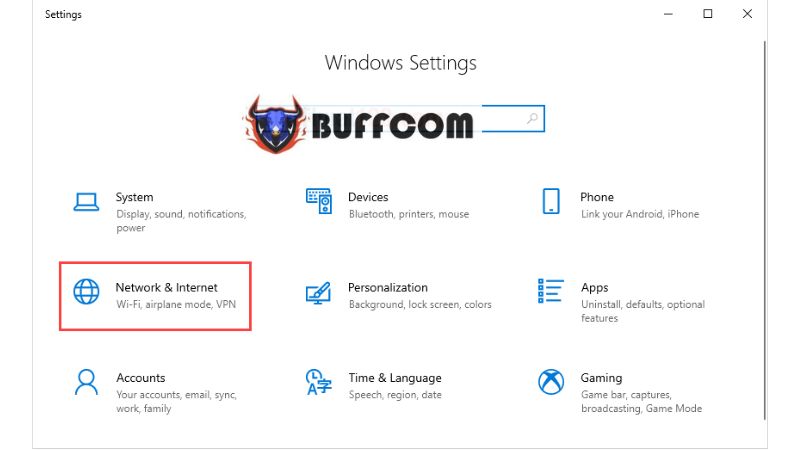
Step 3: Depending on your network connection, whether it’s LAN or Wi-Fi, choose the appropriate setting.
If you are using a wired LAN connection, select “Ethernet.” If you are using a wireless network connection, select “Wi-Fi.”
Once you have made the selection, choose “Network.”
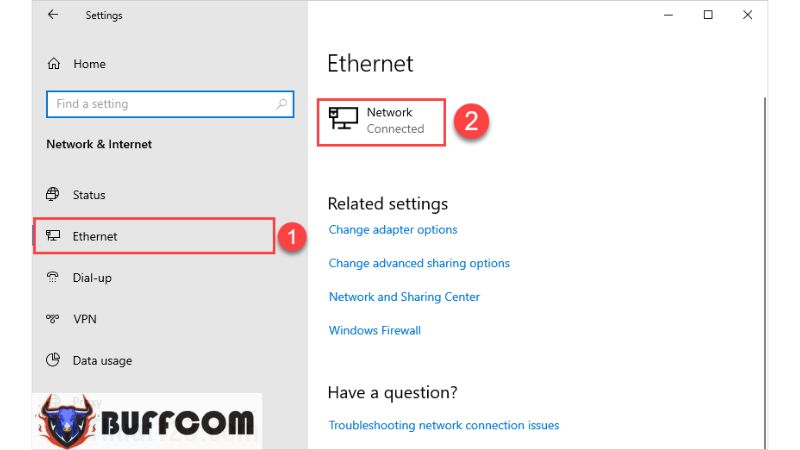
Step 4: Under the “Network” section, you will see the “Physical Address (MAC)” which is the MAC address of your computer.
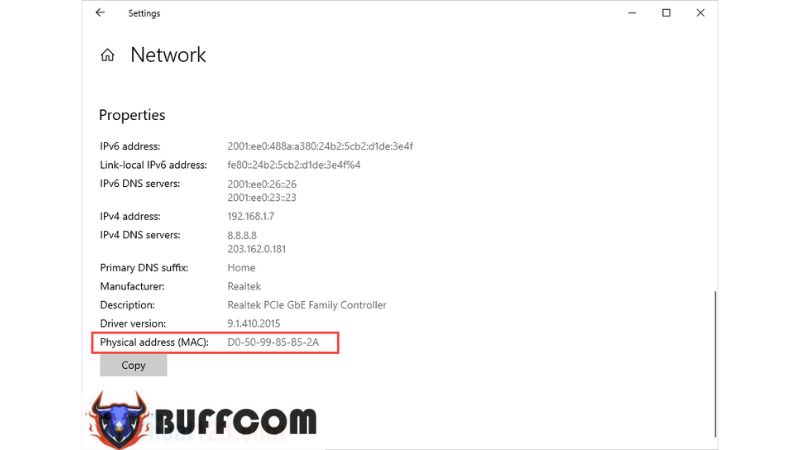 View MAC Address using Windows PowerShell
PowerShell is also a command-line shell similar to Command Prompt, but in the future, PowerShell may permanently replace Command Prompt.
Step 1: First, open the Start menu and type “PowerShell” to open it.
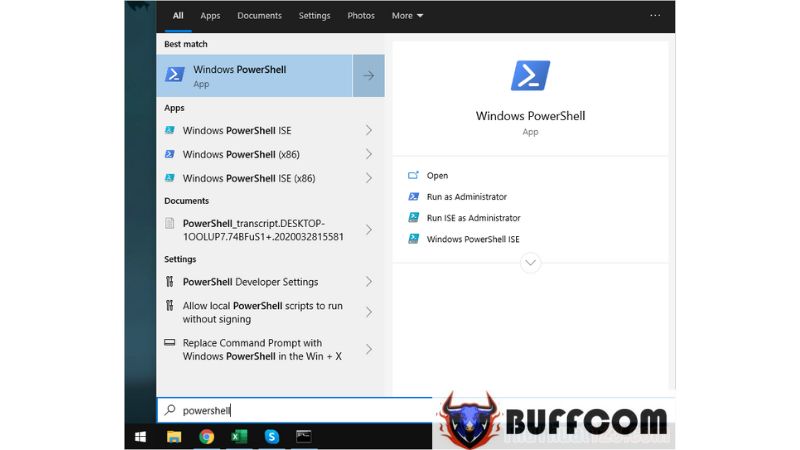
Step 2: When PowerShell opens, enter the following command and press Enter:
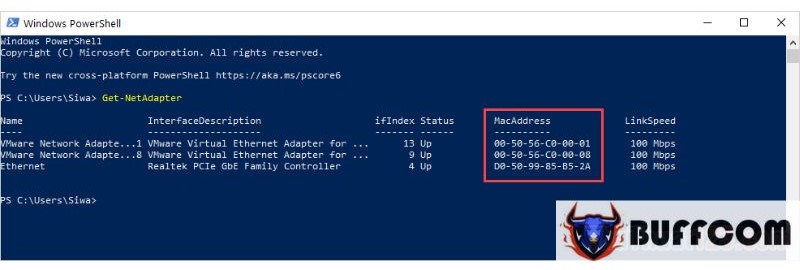
Get-NetAdapter
After running the command, you will see the “MacAddress,” which is the MAC address on your computer.
 View MAC Address using Control Panel
Control Panel is a management tool for various settings in Windows 10, and you can view network connections and MAC addresses through it.
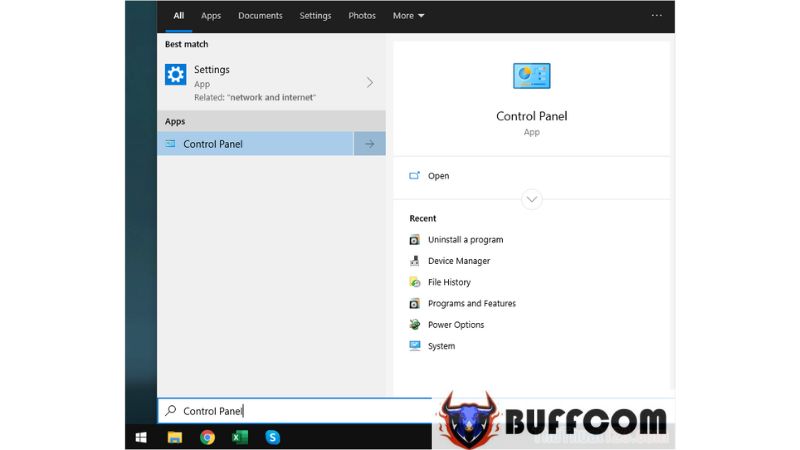
Step 1: First, open the Start menu and type “Control Panel” to open it.
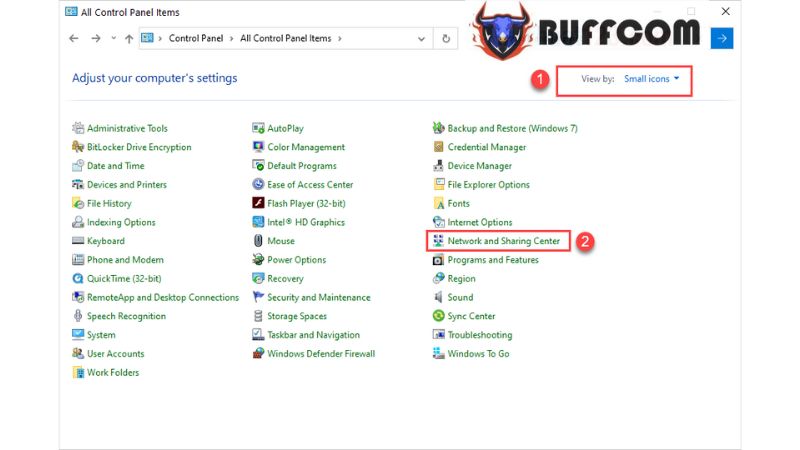
Step 2: Next, choose “View by: Small Icons” and select the “Network and Sharing Center” option.
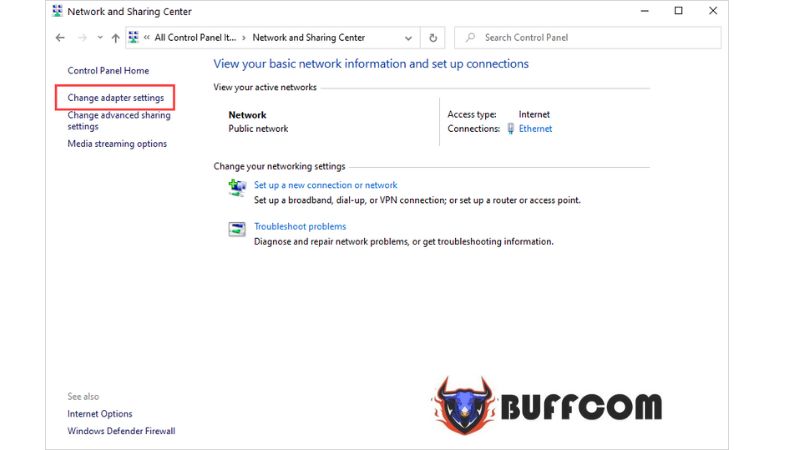
Step 3: Then, select the “Change adapter settings” option.
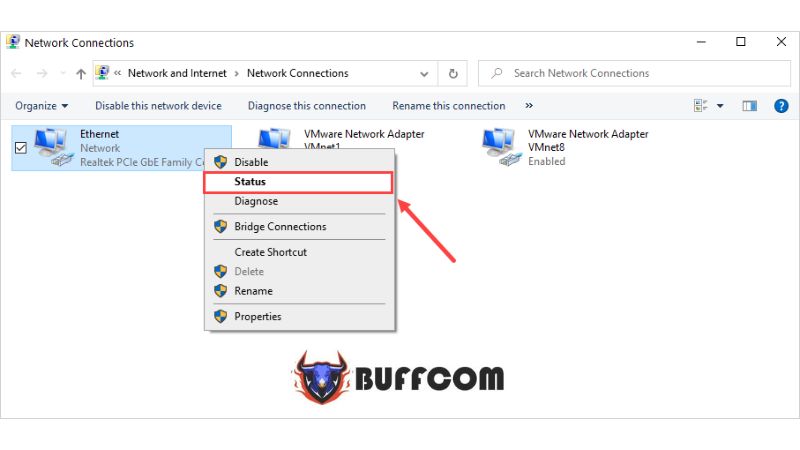
Step 4: Here, choose the appropriate network connection you are using and right-click to select “Status.”
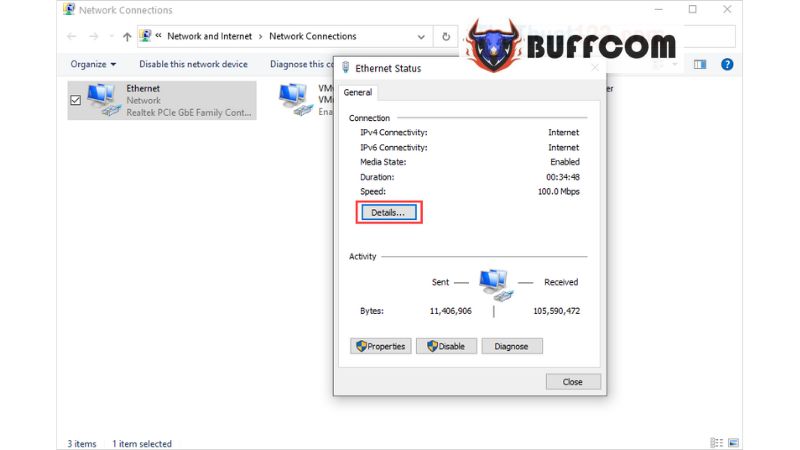
Step 5: When the Ethernet Status window appears, select “Details…”
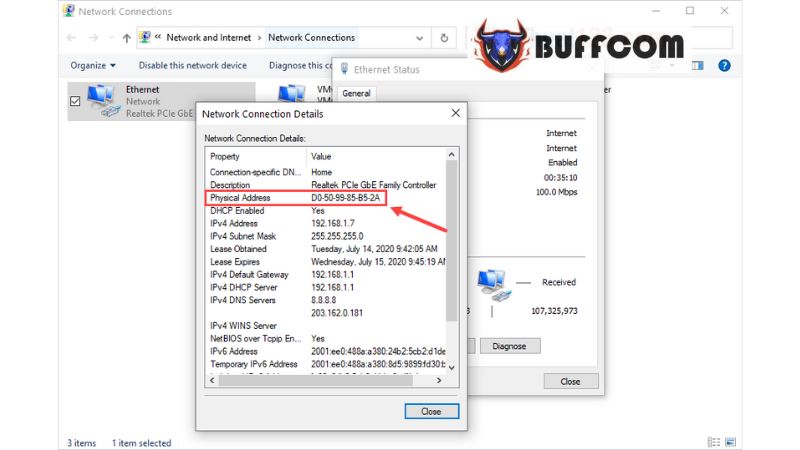
Step 6: You will now see the “Physical Address,” which is the MAC address on your computer.
 In this article, Buffcom.net has provided you with a quick and effective guide on how to view the MAC address on Windows 10. If you are interested in genuine Windows keys, please contact Buffcom.net for assistance!

