Security Measures for Windows 11 Workstation Environments

If you’re looking for the best security settings in Windows 11, you’ve come to the right place. In this article, we’ll show you how to change some of the key security settings in Windows 11 to help keep your computer safe from harm.
First, let’s talk about what kinds of things can happen if your computer isn’t properly secured. If you’re connected to the internet, there are a number of potential threats out there that could cause severe damage to your system. Viruses and malware are two of the most common types of threats, and they can wreak havoc on your computer if they’re not dealt with quickly and effectively.
1. Enable the Firewall on Your Windows 11
One of the first things you should do is make sure that your firewall is turned on. The firewall helps to protect your computer from unauthorized access, and it’s a great first line of defense against malware and other threats. follow these steps to enable the firewall on your Windows 11 PC.
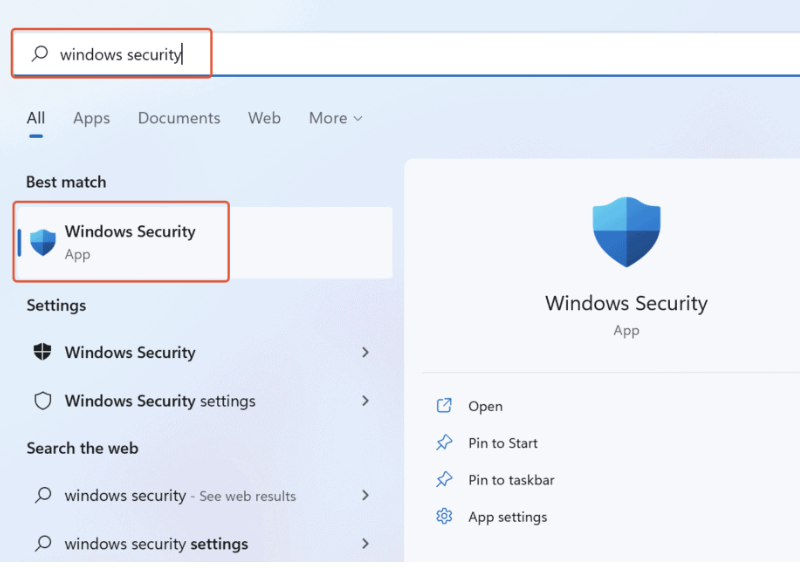
Click on ‘Windows‘ button, and search for ‘Windows Security‘. Open ‘Windows Security‘.
Open Windows Security
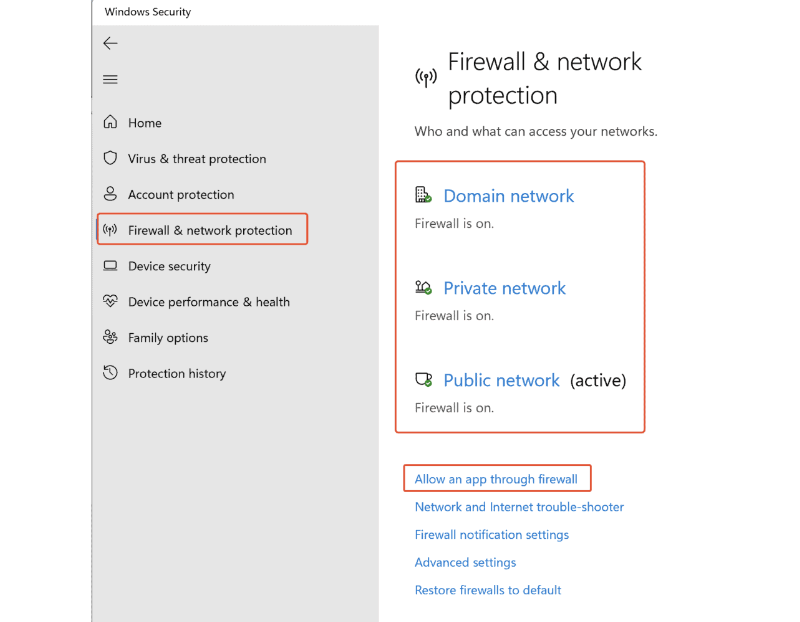
2. In ‘Windows Security’ window, select ‘Firewall & network protection’, Make sure the Firewall is on for ‘Domain network’, ‘Private network’, and ‘Public network’.
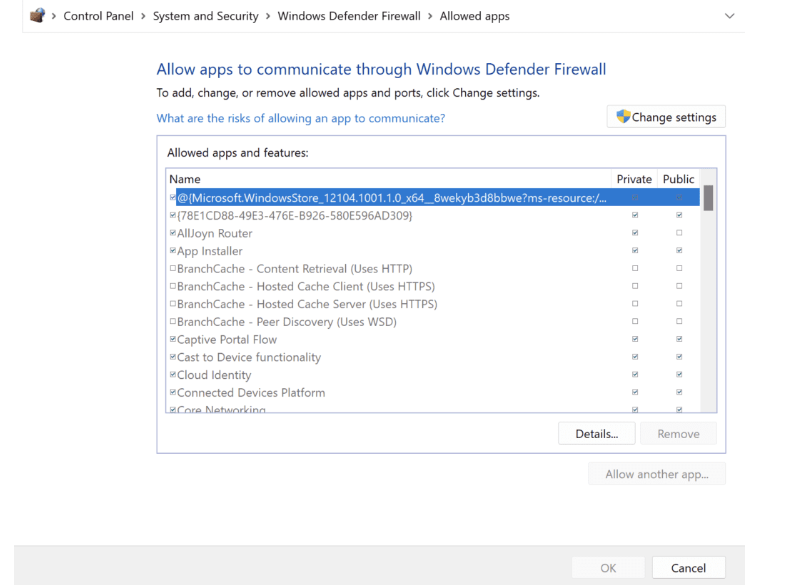
3. Click on ‘Allow an app through firewall‘ to manage applications to communicate with the internet.
2. Always Keep Your Operating System up to Date
Another vital security setting to change is the way that updates are installed on your computer. By default, Windows 11 will download and install updates automatically. However, you can change this so that you’re prompted to install updates manually. This is a good idea if you want to make sure that only critical updates are installed on your system, as it helps to reduce the chances of something going wrong.
To change this setting, go to the Control Panel and click on “System and Security.” Then, click on “Windows Update” and select the “Change settings” option. In the window that opens, select the “Never check for updates (not recommended)” option and click “OK.”
However, it is up to you to decide whether you want to keep the update settings to auto-fetch the updates or make it manual. Follow these steps to update your Windows 11.
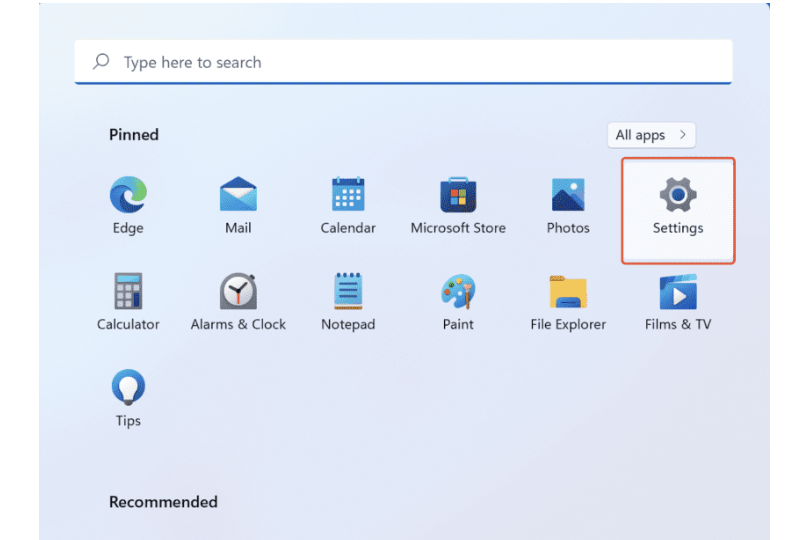
Click on ‘Windows’ –> Select ‘Settings’.
2. In the ‘Settings‘ window, select ‘Windows Update‘, Click on ‘Download now’ to download any available updates manually.
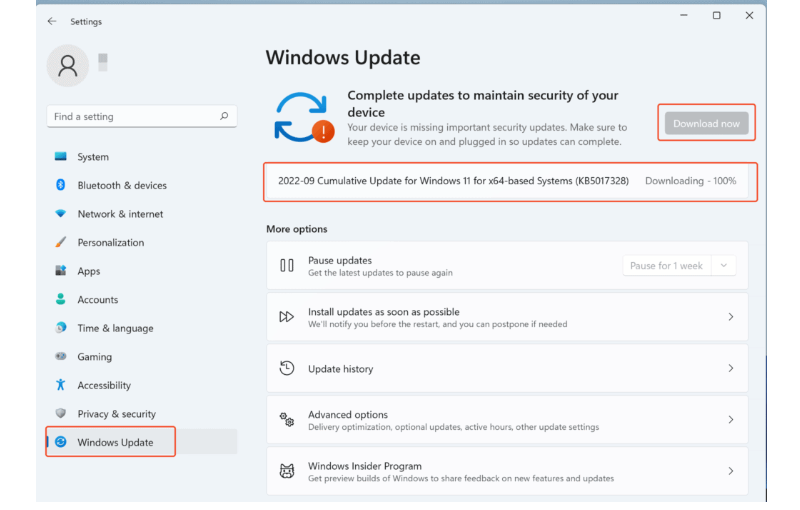
3. By default, windows updates will check automatically. However, ‘Check for updates’ will help to keep up to date with the available updates.
Click Check for updates

3. Disable Remote Desktop Connections in Windows 11
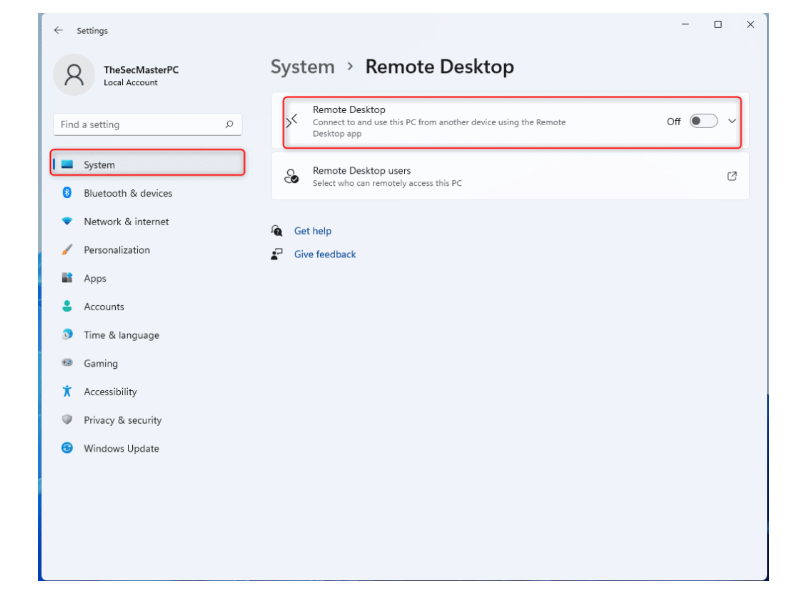
Another security setting that you should change is the way that remote desktop connections are handled. By default, Windows 11 allows people to connect to your computer remotely, which can be a security risk. If you don’t want to allow remote connections, it’s best to disable this feature.
To do this, go to Settings -> System -> Remote Desktop. Then toggle the switch to off.
Here are key Windows 11 security settings to adjust for enhanced protection. Implementing these measures will safeguard your computer.


