How to Set Password for Word File to Block Copying and Editing Effectively

Set Password for Word File, or setting passwords for Word files, is one of the daily tasks. Additionally, it is also a security measure to prevent the risk of copying, editing, and formatting important text files. So, how to set a password for a Word file? Buffcom.net will provide you with specific instructions as follows.
Set Password for Word File, Lock File to Protect Documents
The most effective way to secure documents is to set a password for them. To do this, you perform a series of operations including:
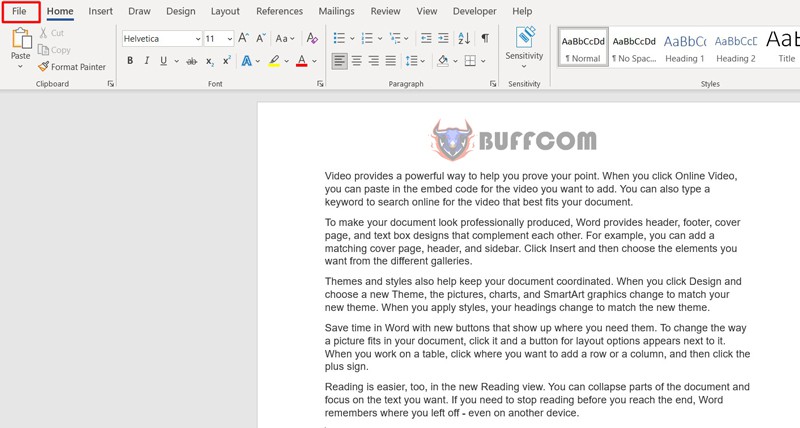
Step 1: Select File > Save As
Open the document that needs to be secured, click File, then select Save As to set a password for the Word file.
Set Password for Word File

Open the document that needs to be secured, click File, then select Save As to set a password for the Word file.
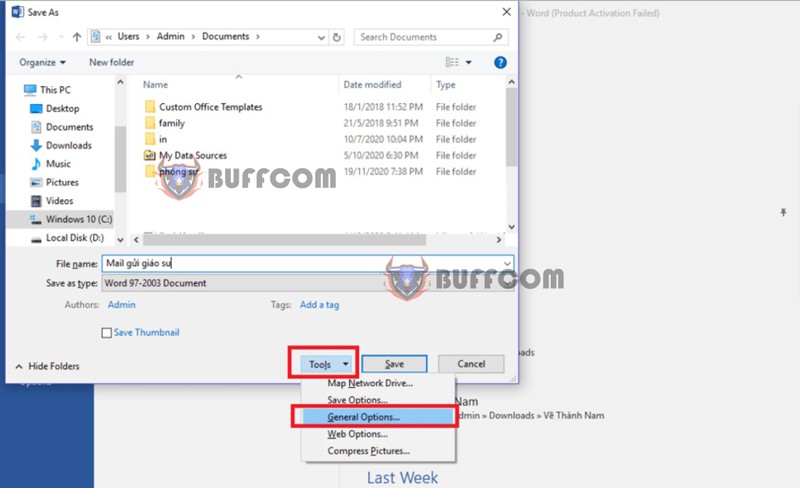
Step 2: Click on Tools > General Options
The Save As dialog box appears, you select the location to save the file and click on Tools, then select General Options… as shown.
Step 3: Set and Confirm Password for File
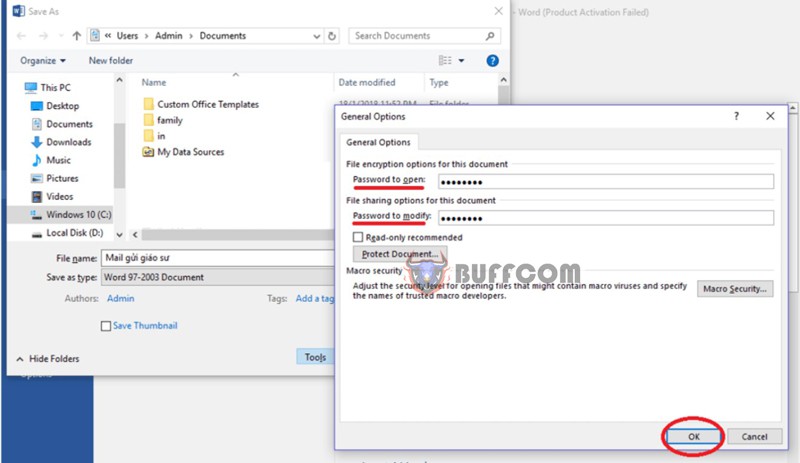
The system opens an interface to support setting a password for the Word file.
There are 2 types of passwords:
- Password to open: allows to open and view the document
- Password to modify: allows to edit the document
Depending on the desire to secure one’s documents, you set a password for the file. You can choose one or both, then click OK.
 A password confirmation request appears, you re-enter the password you just created and click OK.
Set Password for Word File
In case you create 2 passwords, this request will appear twice. You confirm Password to open and then Password to modify.
Step 4: Save the Document with the Password Set
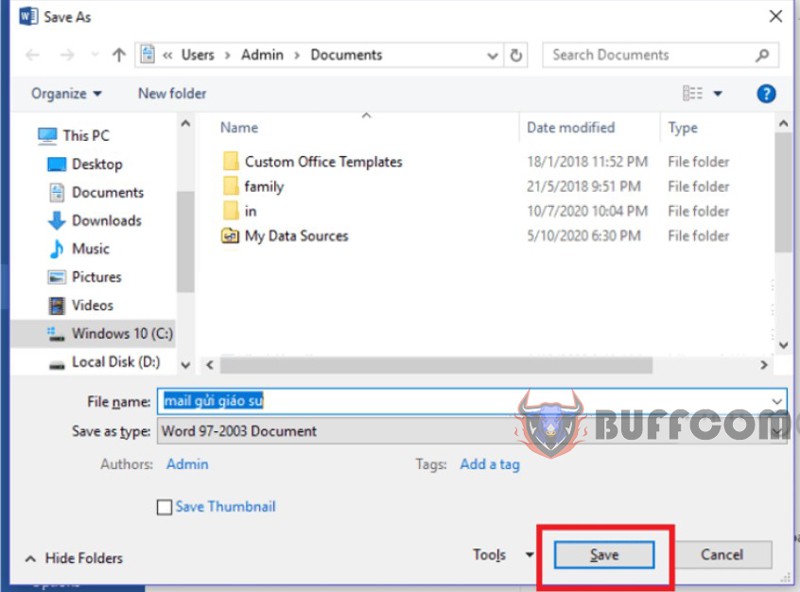
Click Save As to save the security settings for the document.
Set Password for Word File
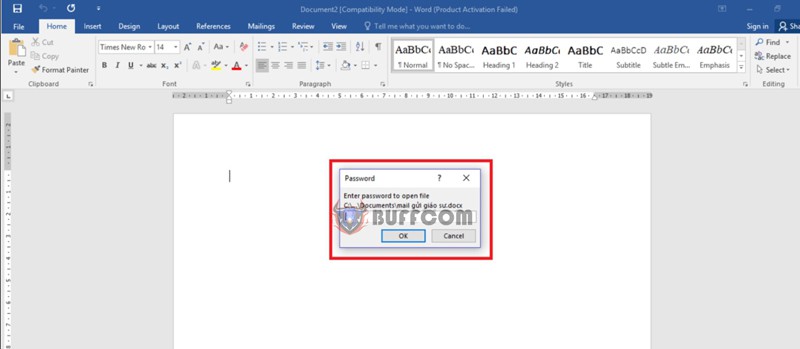
Now, when you open the Word file, you will receive a password request as shown.
Set Password for Word File
Turn on Document Protection Mode (Protect Document)
In addition to the above method, you can also turn on protection mode to secure your documents as follows:
Step 1: Open the Restrict Editing Panel
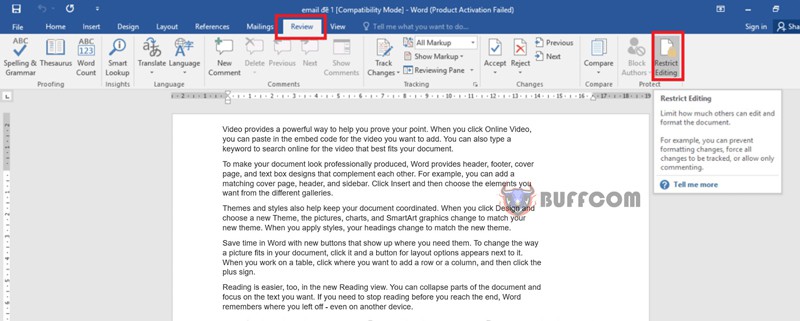
Open the document you want to protect, select Review, then select Restrict Editing. Set a password for the Word file.
Set Password for Word File
Step 2: Check the Box “Allow only this type of editing in the document”
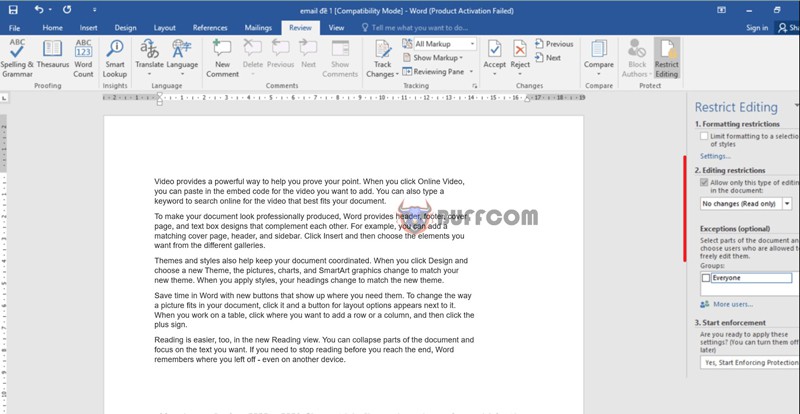
In Editing restrictions, check the box “Allow only this type of editing in the document” to limit the rights to edit and copy the content of the document. Set a password for the Word file.
Set Password for Word File
Step 3: Choose Permission Settings for the Document
Choose permission settings for the document according to the following commands:
- Tracked changes: allow changes to the document and leave a track record
- Comments: allow adding notes and comments to the text
- Filling in forms: allow changing form objects
- No changes (read-only): read-only
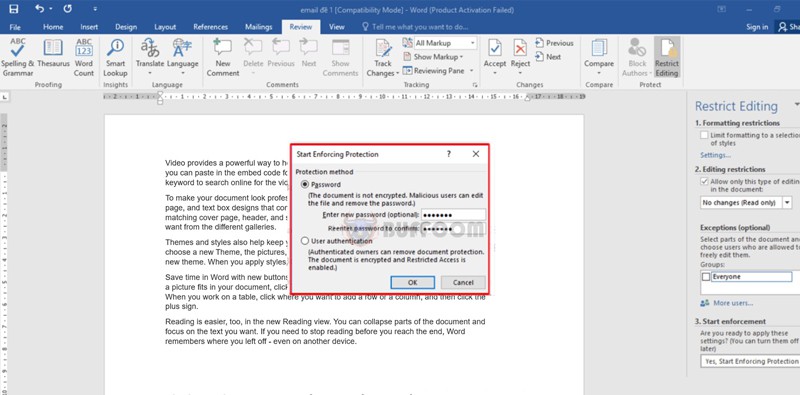
Step 4: Confirm Settings and Password
After selecting, click “Yes, Start Enforcing Protection” in the section below.
A new dialog box appears, where you enter and confirm the password to set up security, then press OK to finish. Set a password for the Word file.
Set Password for Word File
Summary of how to set a password for a Word file
These two methods are highly secure ways to protect your documents.
Quick steps to set a password for Word file:
Step 1: Select File > Save As
Step 2: Click on Tools > General Options
Step 3: Set and confirm the password for the file
Step 4: Save the password-protected document
In addition, if your job is closely related to office computing, there will be many issues that arise while working. To learn more new knowledge, follow Buffcom.net. To buy the appropriate office software for you, please contact Buffcom.net to choose the product you need.

