Sorting Data in Ascending, Descending, or Alphabetical Order
Sorting Data in Ascending, Descending, or Alphabetical Order: There are times when you need to sort data in ascending or descending order, sort names alphabetically, and so on. The only difference lies in the data type. If you are sorting by name, the data will be sorted alphabetically. That means the data type is Text. When you sort in order, the data type is usually numeric. Ultimately, the purpose is to serve for statistical analysis, comparison, or data lookup. The following article will guide you on various ways to sort data in Excel.
1. Sorting Data using Sort & Filter
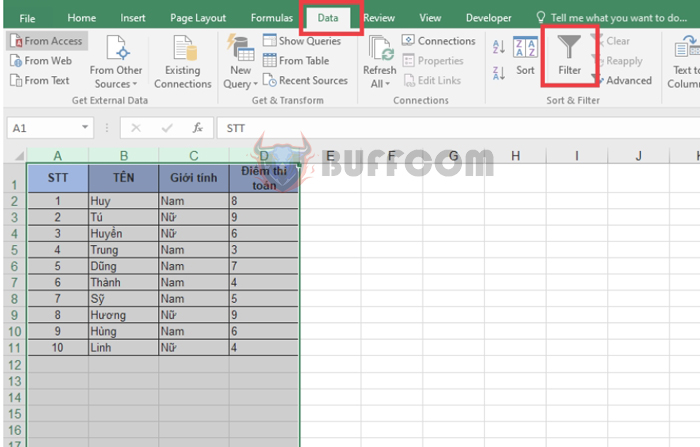
Step 1: First, select the columns containing the data you want to sort.
Then go to the Data tab => Under the Sort & Filter section, select Filter.
Now, the first cell in each column will display a Filter button for selection.
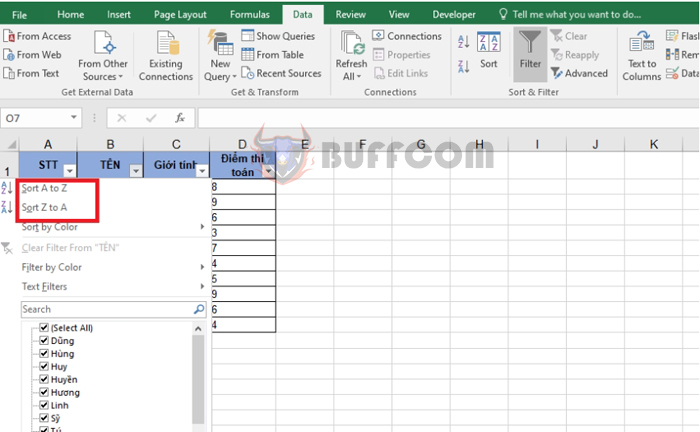
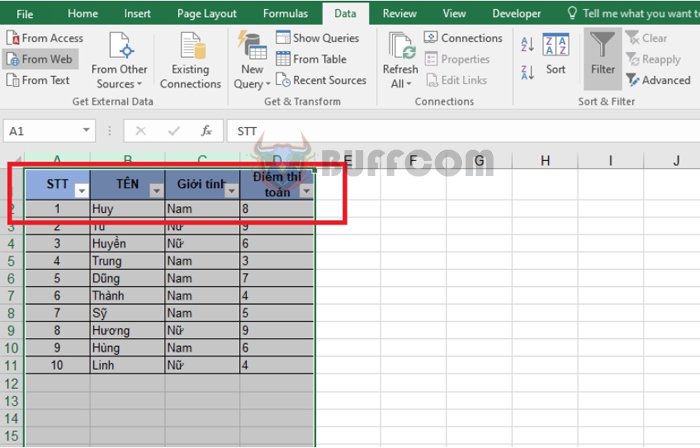 If you click on the Filter icon of a column containing characters, the following options will appear:
- Sort A to Z: Sorts in alphabetical order
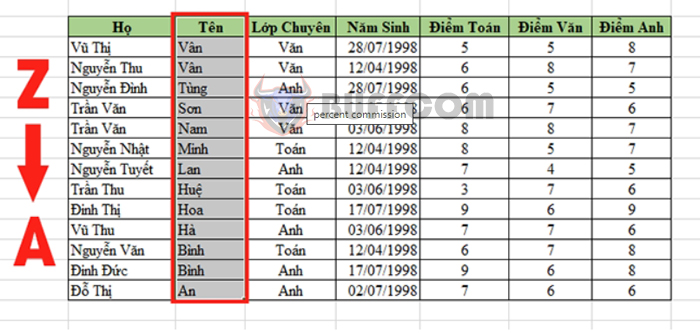
- Sort Z to A: Sorts in reverse alphabetical order
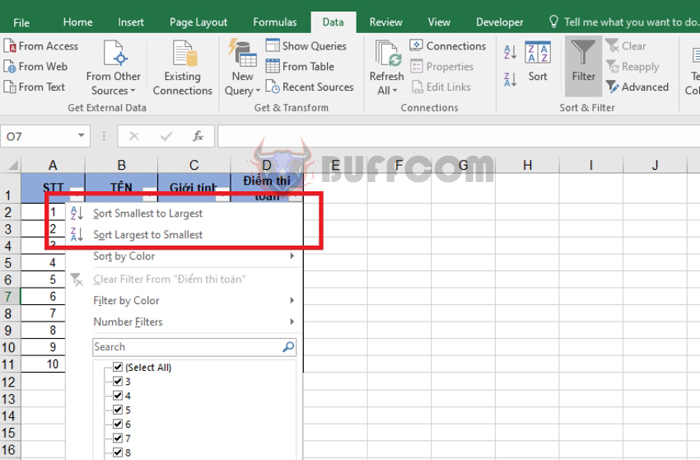
 If you click on the Filter icon of a column containing numbers, the following options will appear:
- Sort Smallest to Largest: Sorts numbers in ascending order
- Sort Largest to Smallest: Sorts numbers in descending order
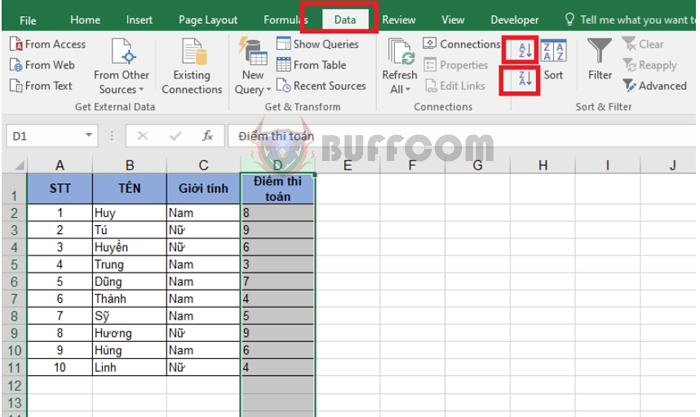
 If you only need to sort data in a single column, simply select that column => Go to the Data tab => Select one of the two icons under the Sort & Filter section:
- A to Z: Sorts in alphabetical order or ascending order for numbers
- Z to A: Sorts in reverse alphabetical order or descending order for numbers
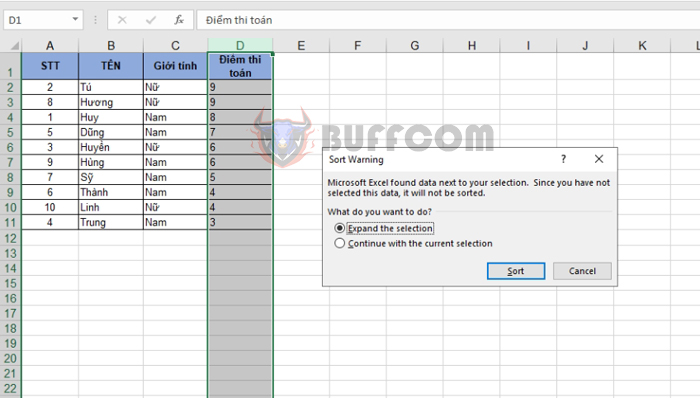
 Step 2: A Sort Warning dialog box will appear, asking how you want to sort the data:
- Expand the selection: This type of sorting will affect the data in other columns as well. Based on the sorting of the selected column, the data in other columns will be rearranged according to each corresponding row. This option is often preferred because the data in a table is usually interconnected horizontally, so when you change the sorting of one column, other columns should follow suit.
- Continue with the current selection: Only sorts the data within the selected column without affecting other columns.
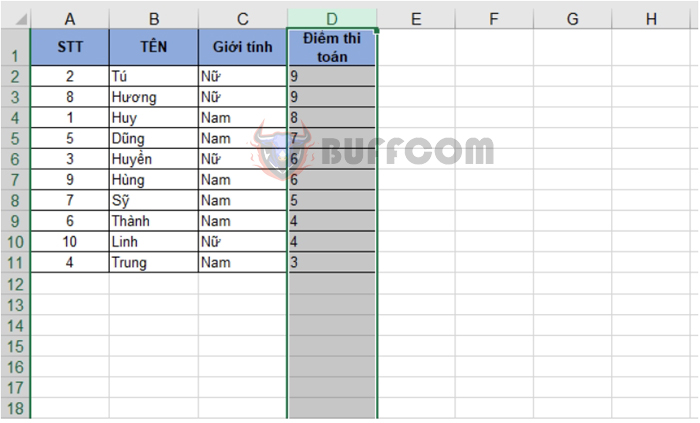
 As a result, you will get a sorted table as shown below:
 2. Advanced Sorting
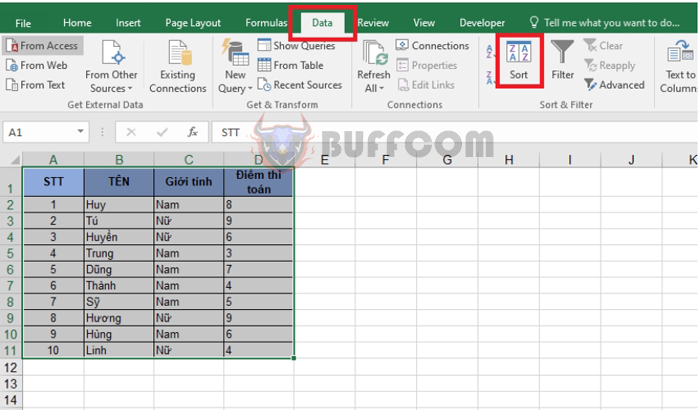
Step 1: Select the data table you want to sort.
Then go to the Data tab => Select the Sort icon.
Step 2: The Sort dialog box will appear.
Change the selection in the Column field to the column name you want to sort.
In the Order column, if you have selected a column with character (or text) data, you will have two options: A to Z (alphabetical order) or Z to A (reverse alphabetical order).
If you have selected a column with numeric data, you will have two options: Smallest to Largest or Largest to Smallest.
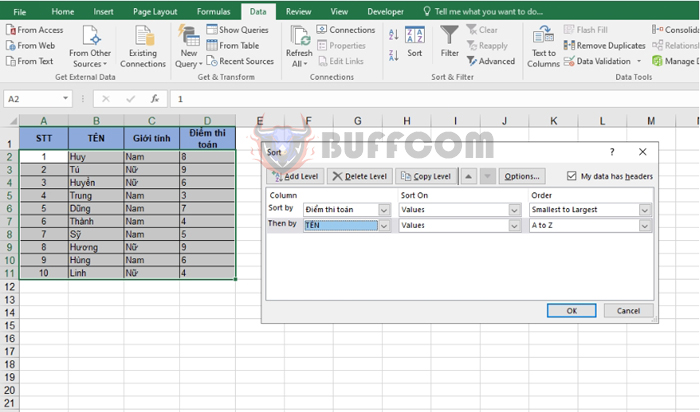
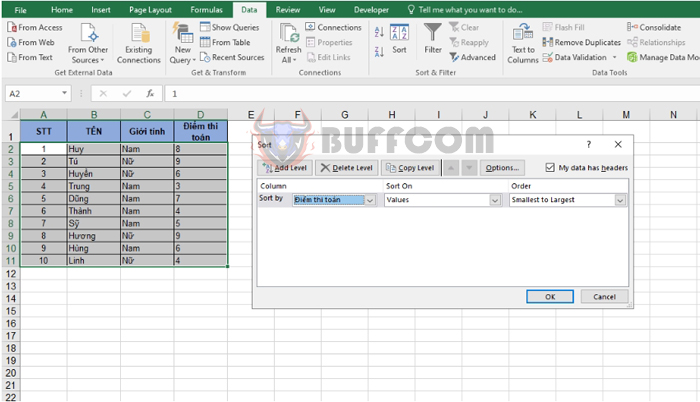 You can continue adding more sorting levels after the initial sort by clicking on Add Level.
Another row for sorting data will appear, and you can perform the same steps as above.
After sorting the data based on the settings of the first row, Excel will continue sorting based on the sorting criteria in the subsequent rows for clusters of similar data that are close to each other.
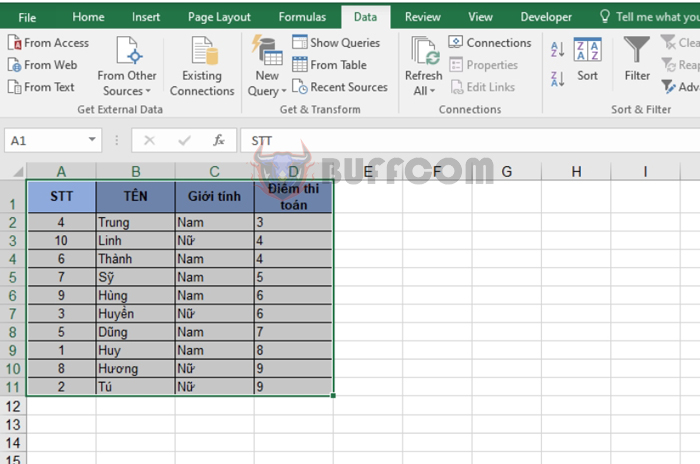
For example, in the image below, Excel will sort the list based on the Math scores of students. Then, among students with the same scores, Excel will further sort their names alphabetically.
After clicking OK, you will get the sorted result.
Sorting Data in Ascending, Descending, or Alphabetical Order
That’s it! The article has guided you on different ways to sort data in Excel. Good luck!

