TOP 5 ISO File Editing Software for Windows 10/ Windows 11
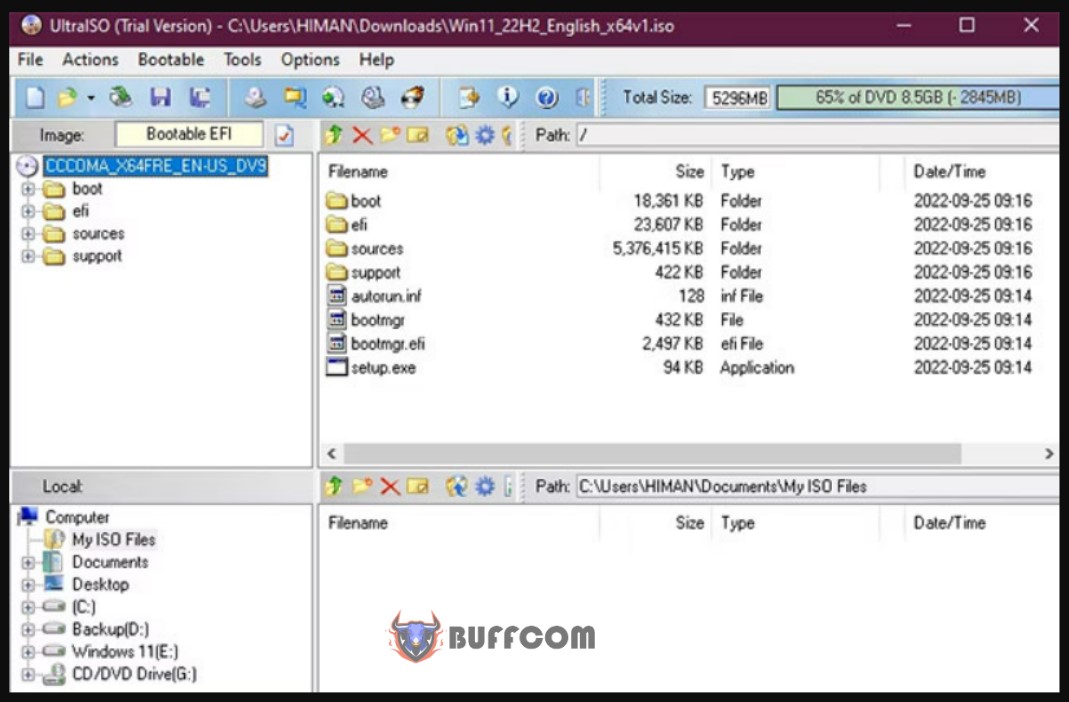
An ISO file is a massive compressed file commonly used to package operating system files and software installation files, such as Microsoft Office. People also use ISO files to share system backup images.
While ISO files can be easily mounted or accessed using the default Windows disc image burning tool, that’s not the best way for you if you want to edit the content of an ISO file. So how can you edit ISO files on Windows 10 and 11?
This guide includes some unique third-party tools that you can use to mount and edit ISO files easily.
1. Windows Disc Image Burner
Before checking out alternative options, see how you can edit an ISO file without installing any third-party software. To do that, you need to use a Windows utility called Windows Disc Image Burner.
Disc Image Burner lets you quickly burn any ISO file to a physical CD or DVD. Burning the disc means copying all the files available inside the ISO file to another location. In other words, extracting the ISO file so that you can read and access the files.
Follow these steps to use the traditional ISO file burning method:
- Launch File Explorer by simultaneously pressing the Win + E keys.
- Now, find the ISO file you need to edit.
- Right-click on your ISO file and choose Burn disc image.
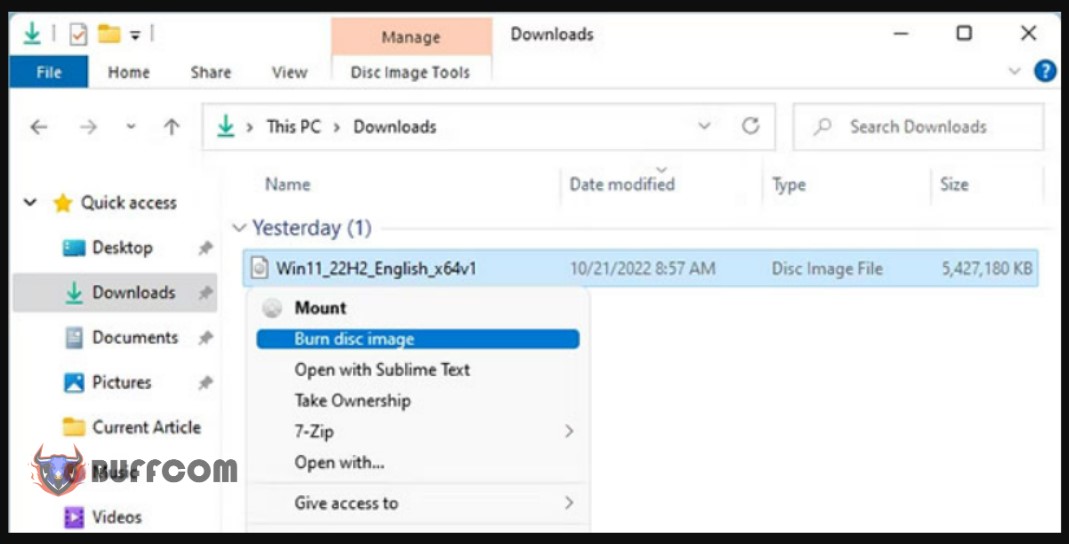
- Next, mark the Verify disc after burning checkbox and click OK to start burning the ISO file.
When your ISO file burning tool finishes correctly, it will check the disc for errors. Once everything is complete, you can begin editing the files. Although this approach is nearly perfect, sometimes it doesn’t work, and you may encounter errors like “the disk is write-protected.”
In this case, you should avoid using the default Windows tool and switch to an alternative tool.
2. PowerISO
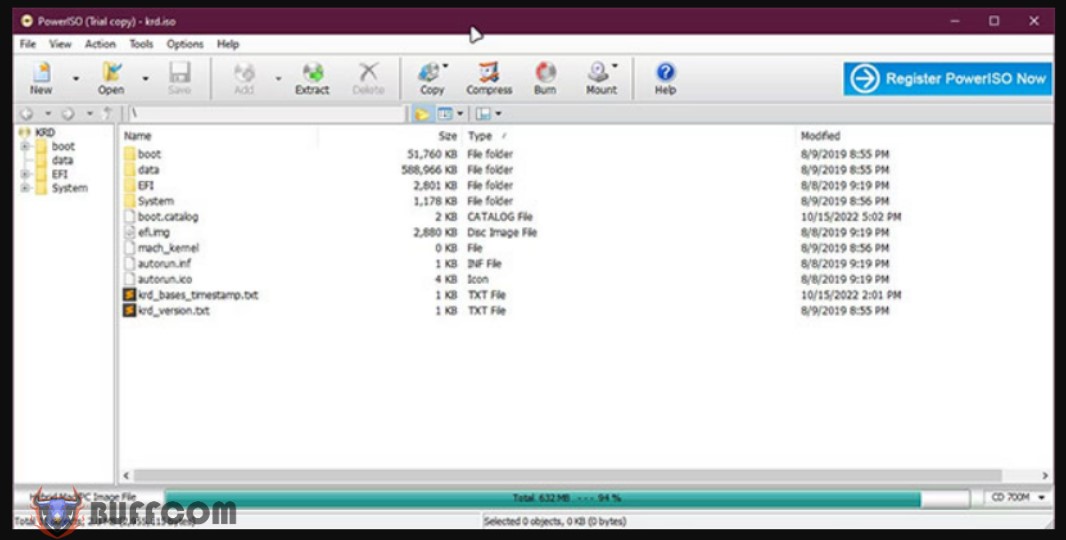
PowerISO is an all-in-one tool for all your Windows ISO needs. What users like best about PowerISO is that it not only allows you to edit ISO files but also enables you to burn the modified ISO onto a CD, DVD, or Blu-ray disc.
Furthermore, PowerISO also supports encrypting your modified ISOs, splitting images into different parts, compressing ISO files, and converting file formats such as ISO to .ZIP or .BIN.
To convert a BIN file using PowerISO, you first need to install it and then start editing the ISO file by double-clicking on it. If you want to copy the contents of an ISO file, click the Extract button at the top and select the desired folder.
Suppose you are using PowerISO to create a custom Windows ISO. In that case, you can also create a bootable USB with just a click. Additionally, using PowerISO is not limited to ISO files; it also supports batch conversion options for different audio files such as MP3, OGG, WAV, etc.
3. Rufus
Rufus is known for its ability to create a custom bootable USB from an operating system image in just one go. The simple yet feature-rich user interface of Rufus makes it the best for all your Windows or Linux installation needs.
Most people use Rufus only to create a bootable USB. However, you can also use it to edit ISO files.
Follow these steps to learn how to edit an ISO file using Rufus:
- Download and install the latest version of Rufus.
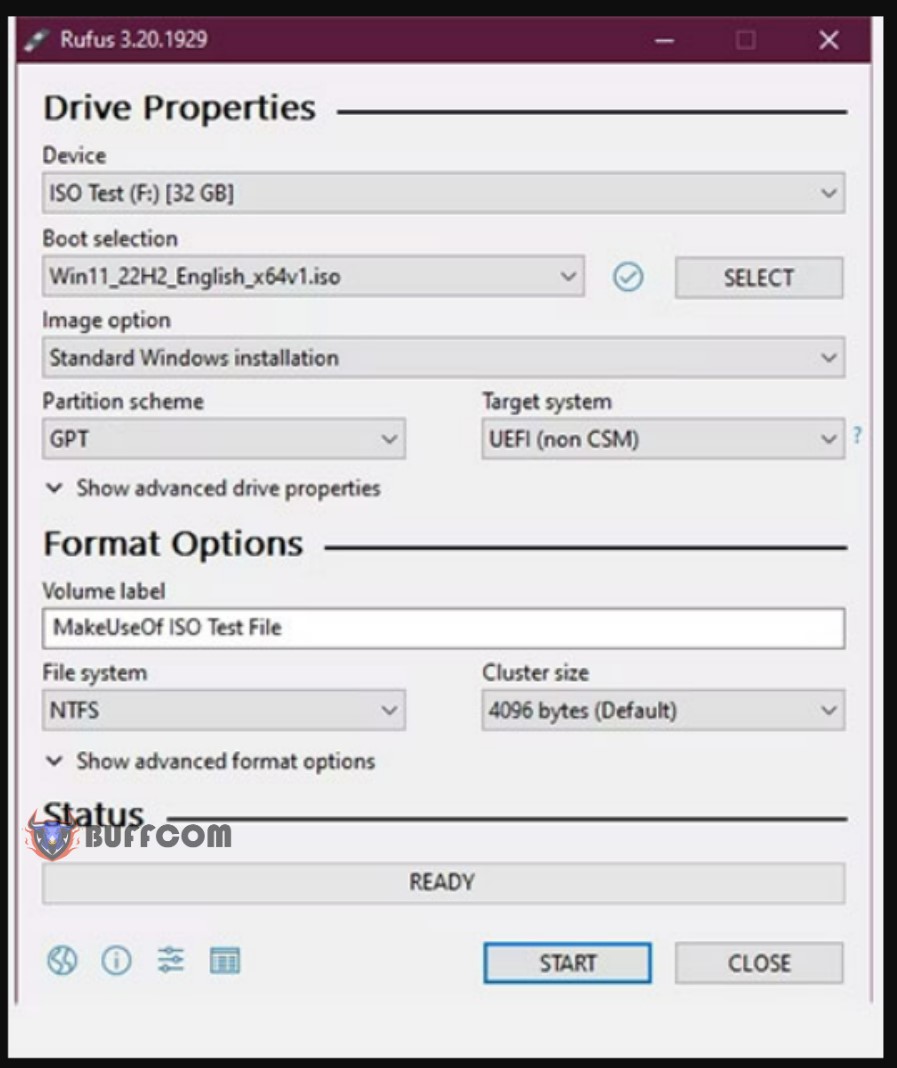
- Open it, and under Device, select the USB you want to save the ISO file content to.
- In Boot selection, click Select and choose the ISO file you want to edit.
- Now, select a Partition scheme. If you don’t know what each partition scheme does, check out the MBR and GPT differences article for an overview.
- In the Volume label text box, change the name of your drive, and then click START. You must wait for Rufus to mount the file content into your chosen USB.
- Launch File Explorer and navigate to your USB.
- You can freely make many changes as you wish in the same folder
4. UltraISO

If you’re looking for a tool to edit, merge, mount, and convert your ISO files, then UltraISO might be the best choice for you. Compared to other options on the market, UltraISO has a slight edge over its competitors.
But why should you use UltraISO when Windows provides you with an option to mount any ISO by default? There are many reasons to use UltraISO for ISO purposes. It provides a two-panel tab to easily manage the structure of your ISO and copy/paste files without switching to file explorer. Moreover, there are more things to do with UltraISO than just mounting an ISO file.
The best thing is that you can handle nearly all types of image files in UltraISO. Additionally, you can also convert them to standard ISO format. It also supports compressing and encrypting ISO contents.
Furthermore, you can even check the ISO for any corruption or other errors through Tools > Check CD/DVD Disk in UltraISO. Although this is a perfect tool for tech enthusiasts, it may not be an ideal choice for newcomers due to its advanced user interface, which can cause confusion.
5. WinCDEmu
WinCDEmu is a lightweight open-source tool to mount any ISO file on Windows. You can also turn a whole folder or USB into an ISO file instead of mounting it.
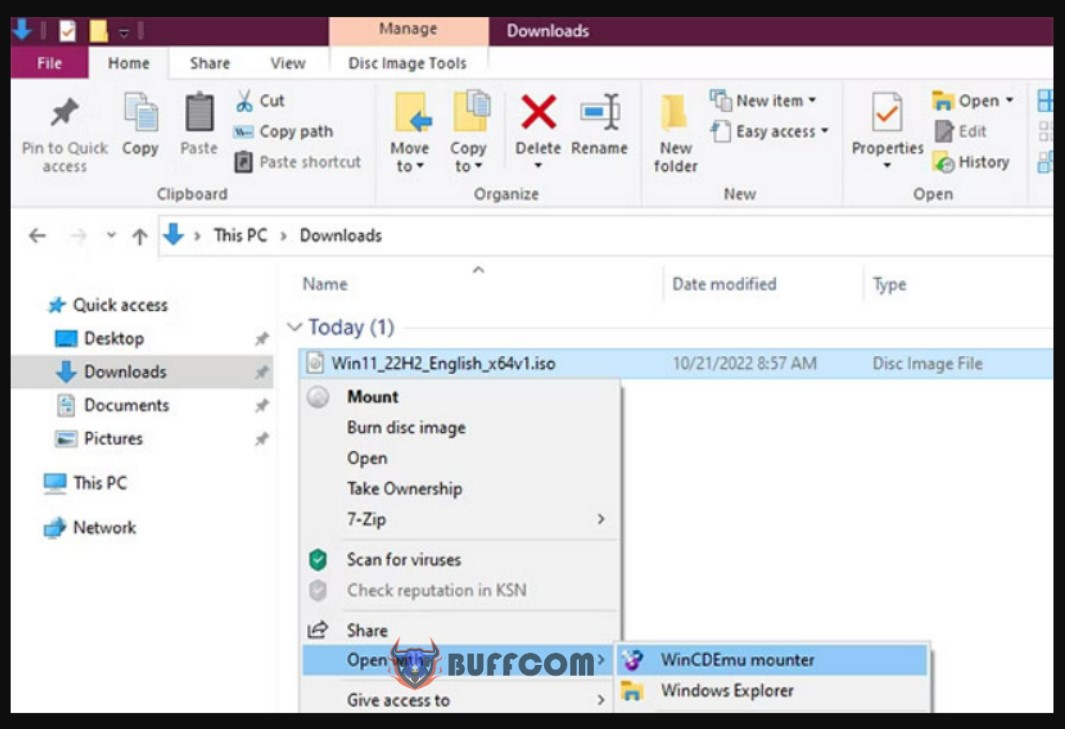 To use WinCDEmu, you need to double-click on the ISO file or right-click on any ISO file and then click Open with > WinCDEmu mounter. Next, choose a single drive letter, and it will extract all the packaged files in your ISO file into that drive. Once you have finished editing the files, simply right-click on the mounted drive and select Create ISO image from the context menu that appears.
Unfortunately, WinCDEmu does not provide a dedicated in-app interface for editing ISOs. Therefore, you need to do everything in the File Explorer itself.
Although WinCDEmu supports some ISO needs, the article advises against using it if you’re a tech-savvy person looking for a more flexible program. The reason for including this option in the article is because of its simplicity and ease of use, which may attract newcomers.


