Troubleshooting Tips for Windows 11 Home Users
In such a situation, the best option to troubleshoot Windows 11 issues might be to apply a systematic approach to the troubleshooting process. There are sequential troubleshooting steps that you can use as a desktop administrator for most Windows 11 issues. While these steps do not guarantee that they will resolve every possible issue, they tend to address many Windows 11 problems.
Step 1: Run Windows Update
Your first step is to run Windows Update. In recent years, Windows Update has been known for applying security patches to the Windows system. Although Windows Update does address security issues, that is not its sole purpose. Microsoft regularly releases bug fixes that you can apply through this utility. Applying all available updates might make the issue disappear.
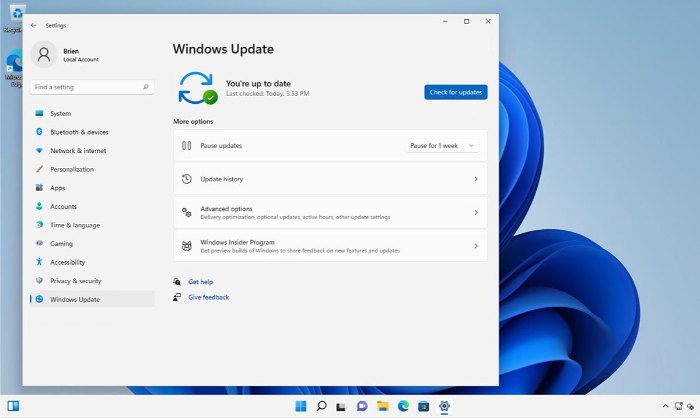
To check for available updates, click on Settings. When the Settings screen appears, select the Windows Update tab. Finally, click on the Download Now button.
 Step 2: Ensure Sufficient Storage on PC
If running Windows Update doesn’t resolve the issue, your next step is to verify that the PC has enough disk space. Previously, Windows would be unable to install updates if the system was running out of disk space. However, more recently, Microsoft has allocated dedicated disk space for Windows Update to use. Therefore, a Windows 11 PC might run low on storage even if it allows you to install updates without issues.
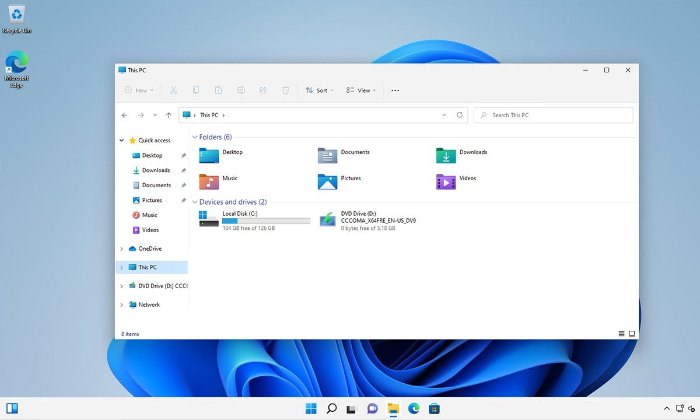
To check available disk space, open File Explorer and click on This PC. Windows will display the available disk space on the C: drive of the system.
There is no strict rule about the minimum free disk space you must have for Windows 11 to function normally. Generally, you should have at least a few gigabytes of free disk space. If the PC has less than 10 GB of free space, you should free up additional disk space.
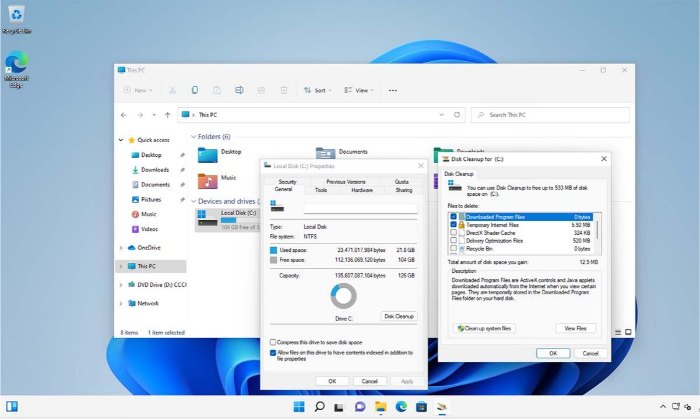
The easiest way to do this is to right-click on the C: drive and select Properties from the context menu. This will display the drive’s properties. Ensure you select the General tab and then click on the Disk Cleanup button. This action will open the Disk Cleanup window.
 Step 3: Run File System Checker
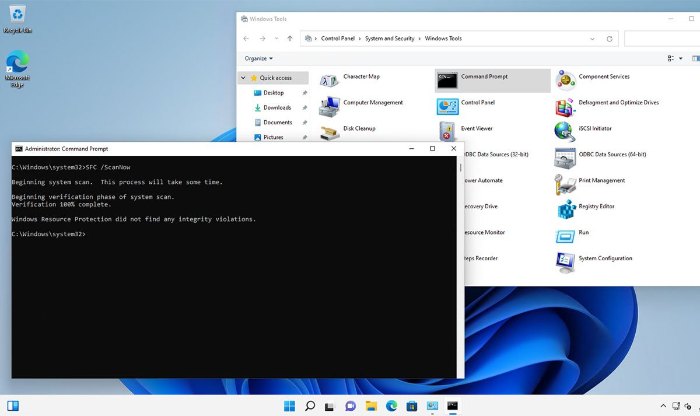
The next thing you should do if the issue persists is to run the File System Checker. This is a command-line tool that verifies the integrity of all Windows system files. If one or more system files are corrupt or if some files have the wrong version, it could lead to Windows encountering issues.
To run the File System Checker, click on Start, then All Apps. Next, click on Windows Tools. When the Windows Tools screen opens, right-click on the Command Prompt icon and choose the Run as Administrator option from the context menu. This will open an elevated Command Prompt window. You can run the File System Checker by entering the following command:
SFC /ScanNow
If issues are found, the File System Checker will display any corrupted files and attempt to fix them.
 Step 4: Run Troubleshooters
If Windows troubleshooters do not fix the issue, another viable option is to run troubleshooters. Windows 11 contains several built-in troubleshooters that can automatically fix various system issues.
To access Windows troubleshooters, click on the Settings icon. When the Settings page opens, select the System tab. Then scroll through the list of options until you find the Troubleshoot option. Click on Troubleshoot to open the Troubleshoot page. While there are some basic Windows troubleshooting options listed on that page, it’s best to skip those options and instead click on Additional Troubleshooters. This action will take you to a screen containing a long list of built-in troubleshooters.
At this point, you need to scroll through the list of troubleshooters to find the troubleshooter that best matches the issue your PC is experiencing. When you find a troubleshooter that seems relevant, click on the corresponding Run button. This action will initiate the troubleshooter. Each troubleshooter works a little differently, but generally, the troubleshooters use a wizard-style interface and guide you through the repair process and diagnosis almost automatically.
 Step 5: System Restore
If the Windows troubleshooters do not fix the issue, another feasible option is to restore the entire system back to an earlier point. While this option works well, you can only use it if System Protection is enabled.
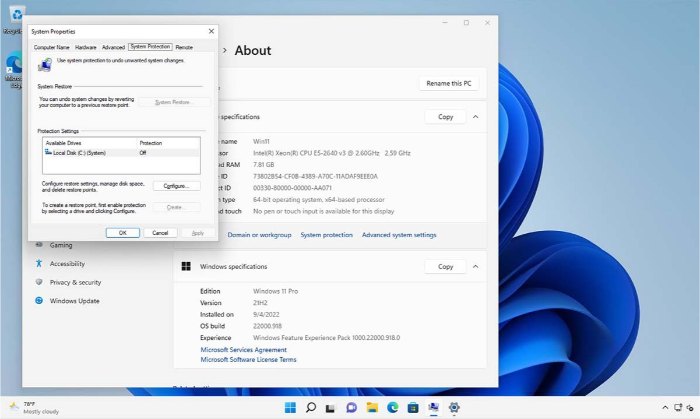
To determine if System Protection is enabled, right-click on the Start button and click on System. When the System window appears, click on Advanced System Settings. This action will open the System Properties page. Select the System Protection tab and ensure that System Protection is set to On. By default, it is turned off, so someone would have to intentionally enable this feature.
On the System Protection tab, there is a System Restore button near the top of the window. This button is grayed out because System Protection is currently turned off. However, if System Protection is turned on, and at least one restore point exists, you can use the System Restore button to restore your system to a previous point. Of course, you will need this restore point at a time when the PC was working normally. System Restore is not meant to function as a true backup, but it gives you the ability to perform a restoration to a specific point in time for Windows 11.
Troubleshooting Tips for Windows 11 Home Users
Step 6: Reset the Entire PC
A final option you can use to fix the issue is to reset the PC. Although this option almost always succeeds, it should be used as a last resort because it has a destructive nature. When you reset the PC, Windows 11 will reinstall from scratch. At a minimum, this means you will also have to reinstall all the applications. This action could also delete data from the PC. Therefore, you should make sure to back up your data before attempting to reset the PC.
To reset Windows 11, click on Settings, then select the System tab. Now, click on the Recovery option, then click on the Reset PC button.
When you click on the Reset PC button, you will see a screen asking whether you want to keep your files but remove everything else or if you want to erase everything from the PC.

