4 essential Excel spreadsheet editing operations you should know by heart

4 essential Excel spreadsheet editing operations you should know by heart: There are many useful features in Excel that not everyone knows about. The operations to edit a spreadsheet seem simple but are crucial for those who work with Excel regularly. This article will guide you through 4 spreadsheet editing operations in Excel. Let’s follow along.
1. Inserting rows and columns in an Excel spreadsheet
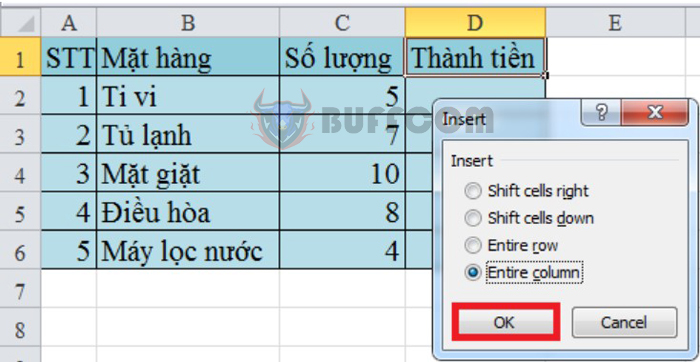
In the Excel interface, you first need to select the column you want to insert. For example, if you want to insert a column before the selected column, right-click and select Insert. Then, select the Entire column option to insert a column.
4 essential Excel spreadsheet editing operations you should know by heart
After clicking OK, the new column will be on the left side of the selected column.

4 essential Excel spreadsheet editing operations you should know by heart
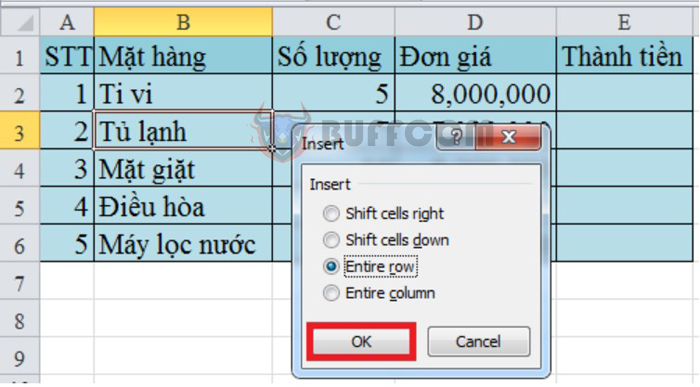
To insert a row below the selected row, click on the row and select Insert. Then, select the Entire row option to insert a row above the selected row.
4 essential Excel spreadsheet editing operations you should know by heart
Click OK to finish. You will now have a new row above the previously selected row as shown below:

4 essential Excel spreadsheet editing operations you should know by heart
2. Deleting rows and columns in an Excel spreadsheet
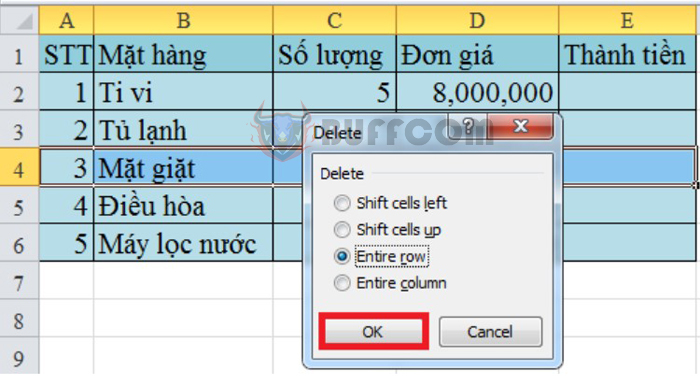
Deleting a column or row in an Excel spreadsheet is just as easy as adding a column or row. You just need to select a value in the row or column you want to delete and right-click, then select Delete. Depending on the purpose, you can choose Entire column to delete a column or Entire row to delete a row.
4 essential Excel spreadsheet editing operations you should know by heart
After clicking OK, the selected column or row will disappear.
3. Merging cells in an Excel spreadsheet
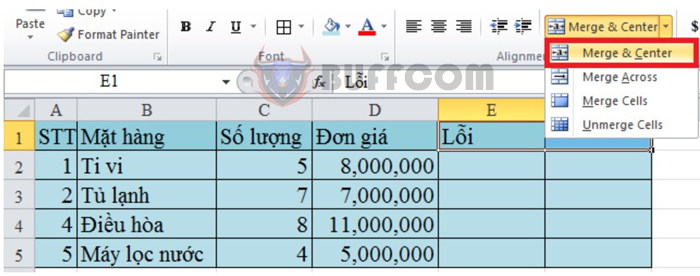
Merging cells is very simple because Excel has a specific feature called Merge & Center. You need to select the cells you want to merge and then click on Merge & Center. Then, you will see several options on the screen to perform the merge. In this example, we choose Merge & Center above. This will help align the text in the center after merging.
4 essential Excel spreadsheet editing operations you should know by heart
Then, the two cells in the spreadsheet will be merged into one cell as shown below:

4 essential Excel spreadsheet editing operations you should know by heart
4. Center align text in Excel cell
Aligning text is a common and essential task in Excel as text can be off-centered while entering data. To fix this, you can use one of the two methods below.
Method 1: Use Alignment in the toolbar
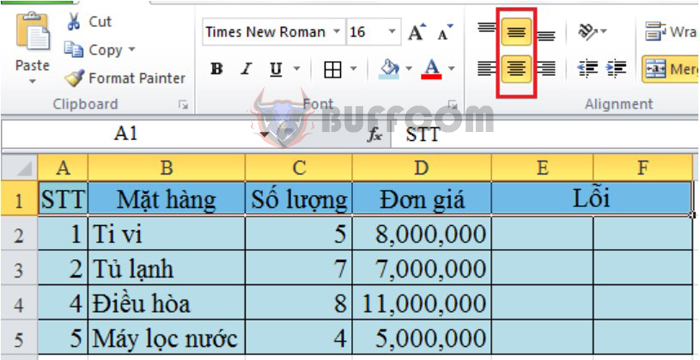
To perform this, select the cell(s) you want to center align, then look for the Alignment section in the toolbar. Click on the Middle Align icon as shown below. This will help you center align the text in the cell(s).
The result will be the text centered as shown below.
4 essential Excel spreadsheet editing operations you should know by heart
Method 2: Use Format Cells
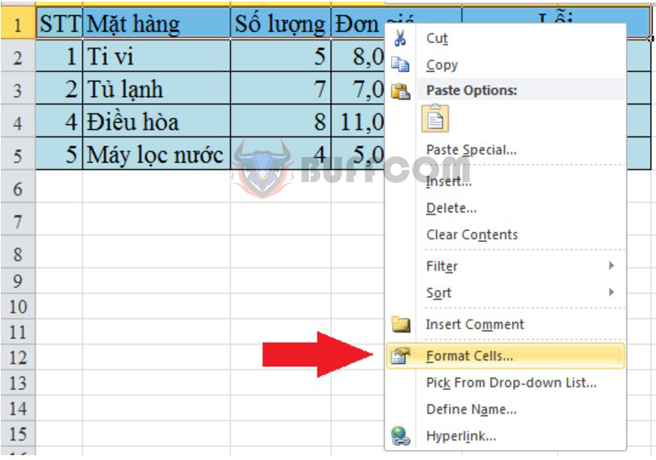
When using this method, you need to select the cell(s) you want to adjust the text position, right-click, and select Format Cells.
4 essential Excel spreadsheet editing operations you should know by heart
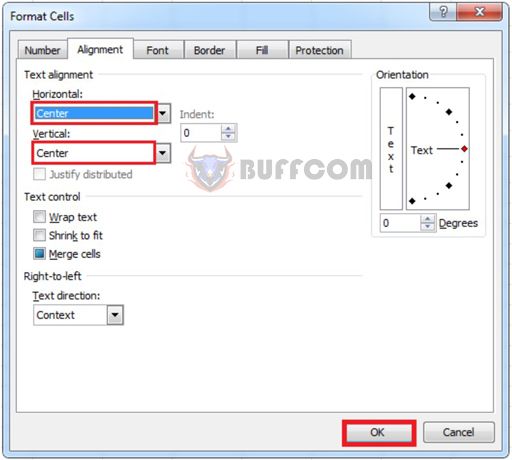
Immediately, the Format Cells dialog box will appear, and you choose the Alignment tab. Under Horizontal and Vertical, find and select Center. Then click OK, and the result will be the text centered in the cell(s).
4 essential Excel spreadsheet editing operations you should know by heart
Above are the four basic Excel spreadsheet editing operations that you should know. We hope this article provides useful information for you when working with Excel spreadsheets. Good luck with your work!


