5 Ways To Insert Columns In Excel

Are you working with a spreadsheet and need to add one or more columns in Excel? This article will guide you through 5 quick and easy ways to insert columns in Excel.
Insert 1 Column in Excel using Shortcut Keys
This is the fastest and easiest way to insert a column in Excel.
Step 1: Select the Entire Column to the Right of where you want to Insert a Column.
There are several ways to select the entire column, such as clicking on the column letter (A, B, C…) or clicking on the top row of the column and pressing the Shift + Ctrl + down arrow ⇓ key combination. Another tip for selecting the entire column is to click on any cell in the column you want to select -> press the Ctrl + Space (space bar) key combination.
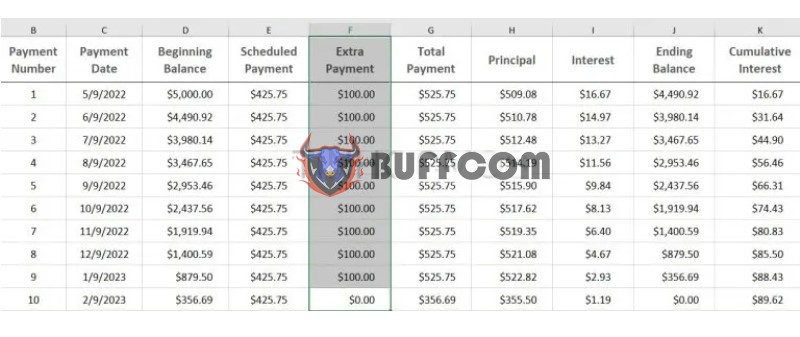 Step 2: Press the Ctrl + Shift + + Key Combination
Tip: If you are not really familiar with keyboard shortcuts, you can right-click on the selected column and choose Insert -> Column.
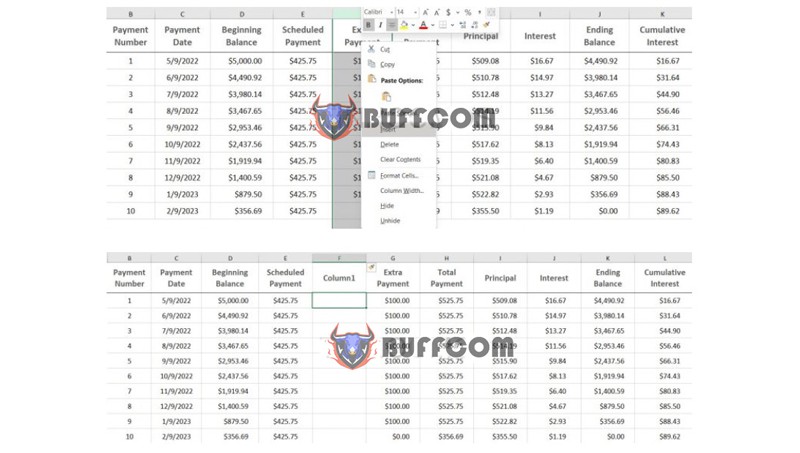 The new column will appear to the left of the column you selected. With just 2 simple steps, you can insert a column in Excel in less than 3 seconds.
Insert Multiple Columns in Excel
If you want to insert 2 or more columns (adjacent columns), do you have to repeat the select column -> insert column operation multiple times as above? Fortunately, Excel allows you to insert multiple columns in Excel with just 1 operation. Instead of selecting 1 column as instructed above, select the corresponding number of columns you want to insert.
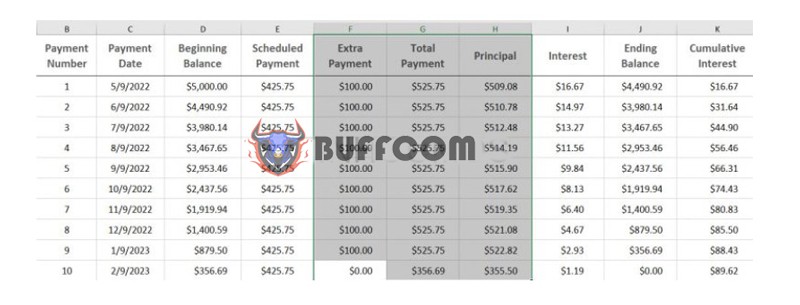 Tip: To select multiple columns, in addition to the 2 popular column selection methods, you can select some adjacent cells in a row and press Ctrl + Space to select the entire column containing those cells.
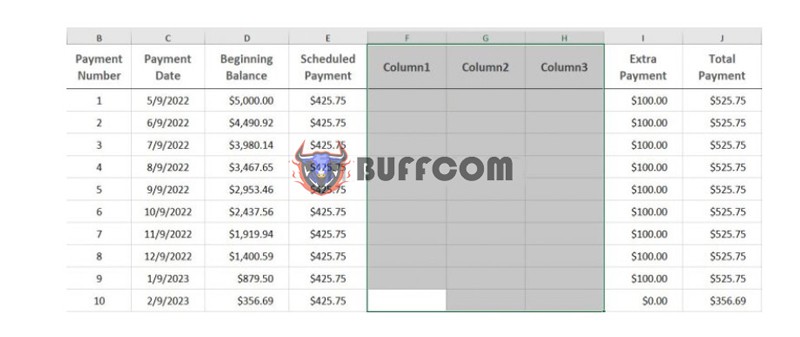
Then, perform the same step 2: use the Ctrl + Shift + + keyboard shortcut or right-click on the selected column -> Insert -> Column.
Excel will immediately insert the corresponding number of columns to the left of the selected columns.
 Insert Multiple Non-Adjacent Columns in Excel
Excel allows you to select multiple non-adjacent columns and use the column insertion shortcut to insert new columns to the left of them.
Step 1: Select Non-Adjacent Columns
You can select the columns located to the right of where you want to insert new columns by clicking on the column letter names while holding down the Ctrl key.
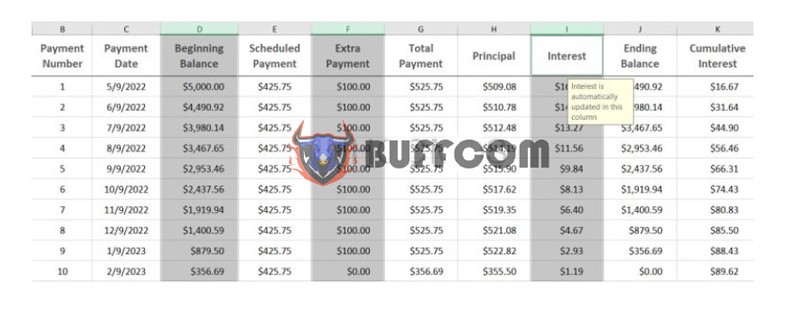 Step 2: Do the Same as the Above Methods
Press Ctrl + Shift + + (plus sign on the main keyboard) to insert multiple new columns at once. The newly inserted columns will appear to the left of the selected columns.
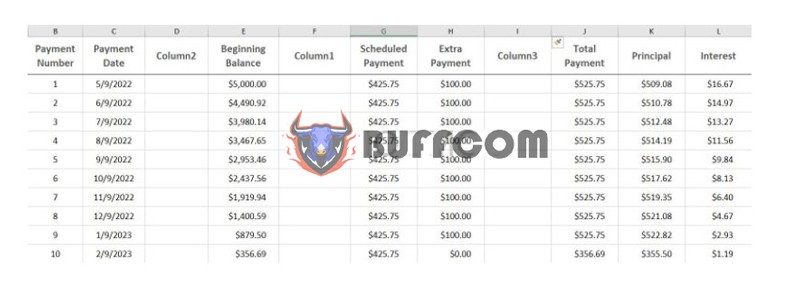 Inserting Columns into a Formatted List as an Excel Table
If your worksheet is formatted as an Excel table, you can select the necessary columns, then right-click on the column next to where you want to insert new columns and choose Insert -> Insert Table Columns to the Right to insert columns to the right or Insert Table Columns to the Left to insert columns to the left.
Advanced: Inserting Columns in Excel Using VBA
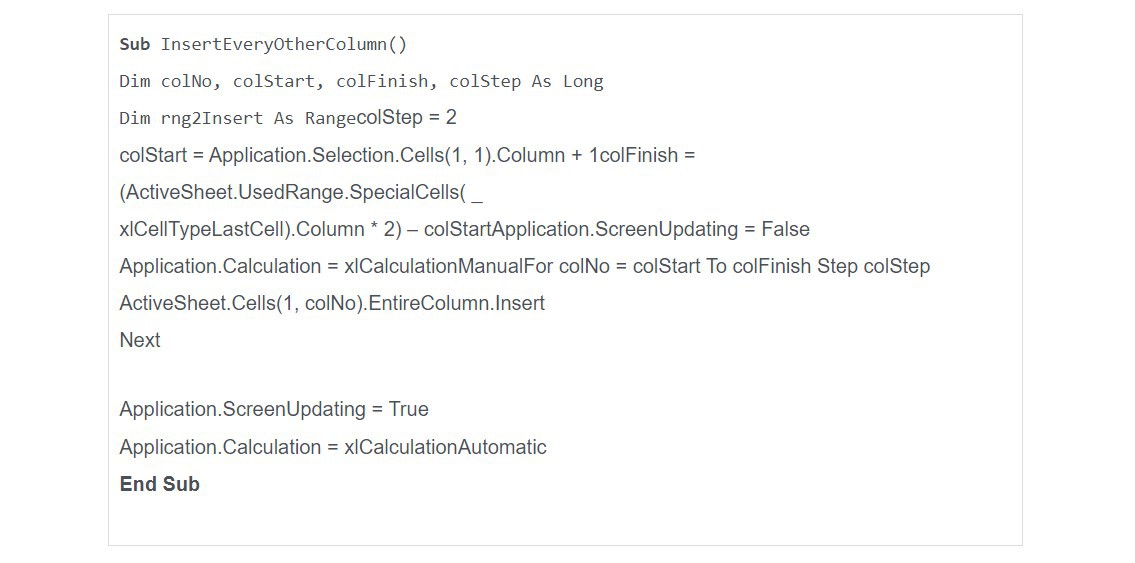
If you frequently need to insert new columns and want to automate this process, or simply have a passion for VBA and want to “increase the difficulty level of the game,” try the VBA code below:
 Conclusion on Inserting Columns in Excel
Through this article, Buffcom.net hopes that you have learned various methods for inserting columns in Excel and can use them flexibly depending on your needs. Good luck to you all!
In addition, if you are interested in licensed office software, please contact Buffcom.net for advice!


