7 Things You Didn’t Know You Could Do with PowerPoint Animations

7 Things You Didn’t Know You Could Do with PowerPoint Animations: Animations have their benefits in entertaining PowerPoint presentations. But you might not have seen what you want, unsure how to use different triggers, or not realized you can add sound. We’re here to help with some lesser-known animation options.
Discover Additional Animation Options
When you go to the Animation tab in PowerPoint, you’ll see a collection of beautiful effects on the ribbon. Perhaps you’ve browsed through and previewed some, but none impressed you. Guess what? There’s more!
Select the arrow at the bottom right corner of the Animation pane.
 When the drop-down opens, scroll down to the bottom. You’ll find options for Add Entrance Effect, Add Emphasis Effect, Add Exit Effect, and Add Motion Path.
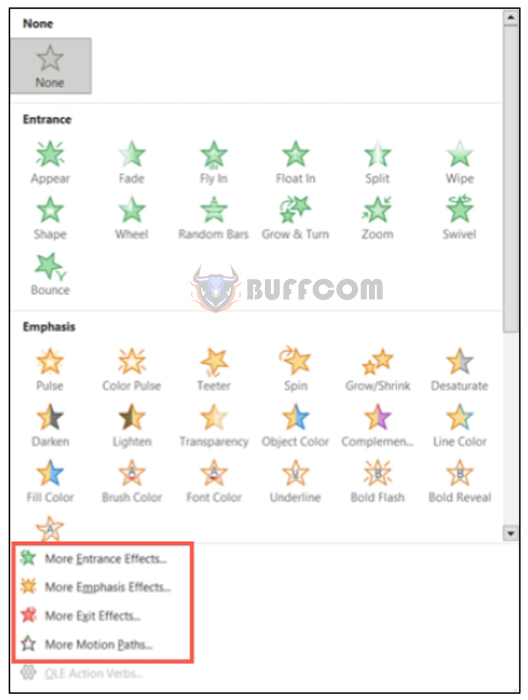 When you choose one of these options, you’ll see many more animations than those displayed in the Animation pane on the ribbon. For example, with Add Entrance Effect, you’ll find around 40 animations compared to the handful you see in the Animation pane.
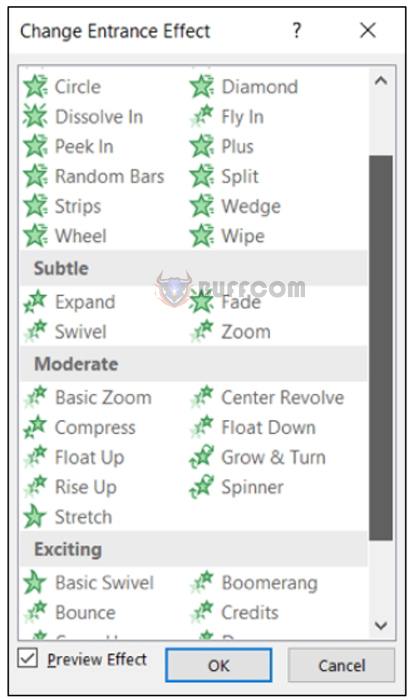 You can also use the box at the bottom to preview the effect. Then, when you select an animation from the list, you’ll see how it looks before applying and saving it. When you find the one you want, click “OK.”
Change Direction or Sequence
For some animations, you can choose the direction or sequence. This small adjustment can have a significant impact on how your elements are displayed.
For example, if you select the “Fly In” animation, you can choose from eight different directions, or for the “Fly In Shape” animation, you can choose whether the shape flies in or flies out, then select from four different shapes.
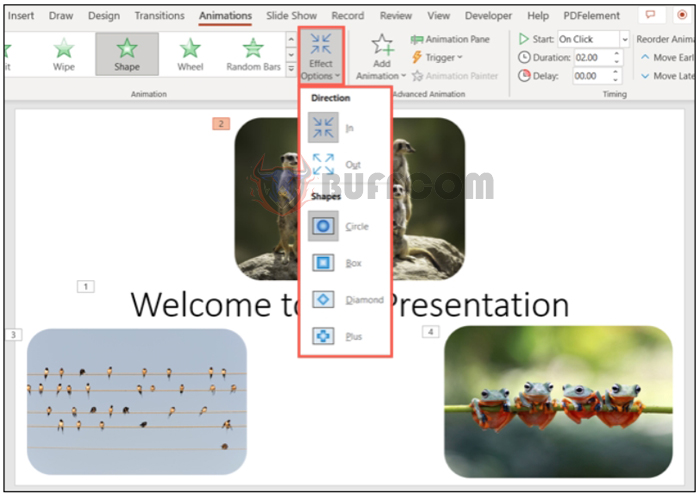
Select the animation, go to the Animation tab, and open the drop-down menu “Effect Options.” Then, choose the direction or sequence you want to use for a more unique effect.
Add Sound to Animations
You may already know that you can add sound to your PowerPoint slideshow, but did you realize you can add sound to animations too? You can play applause, drum rolls, typewriter sounds, or explosions between other audio effects.
Select the animation and choose “Animation Pane” on the Animation tab to open the side panel.
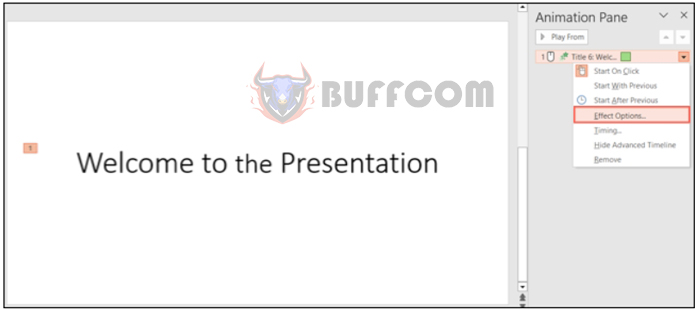
 Click the arrow on the right side of the animation and choose “Effect Options.”
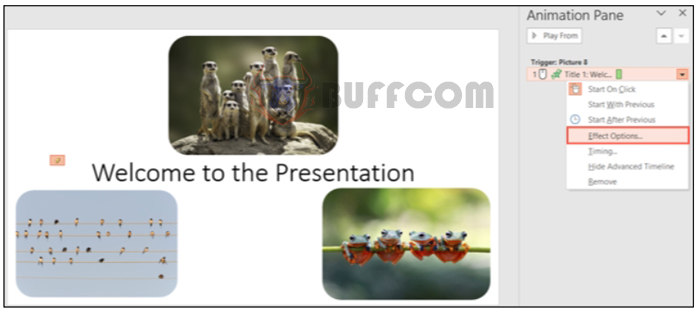 Go to the Timing tab in the small window and use the drop-down box for “Sound” to pick the one you want. You can click the speaker icon on the right to adjust the volume if desired.
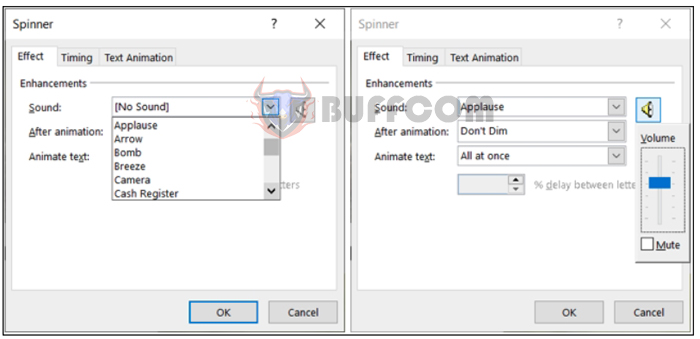 Then, click “OK” to apply the sound to the animation.
Create Text Effects with a Word or Letter
A nifty animation feature you may want to apply to text. If you want to create an effect for each word or letter at a time, this can make for an excellent effect.
Select the text box you want to animate and apply the animation you desire. Open the Animation pane, click the arrow next to the animation, and choose “Effect Options.”
 Go to the Effect tab and select “By Word” or “By Letter” in the drop-down box for “Animate Text.” Then, click “OK.”
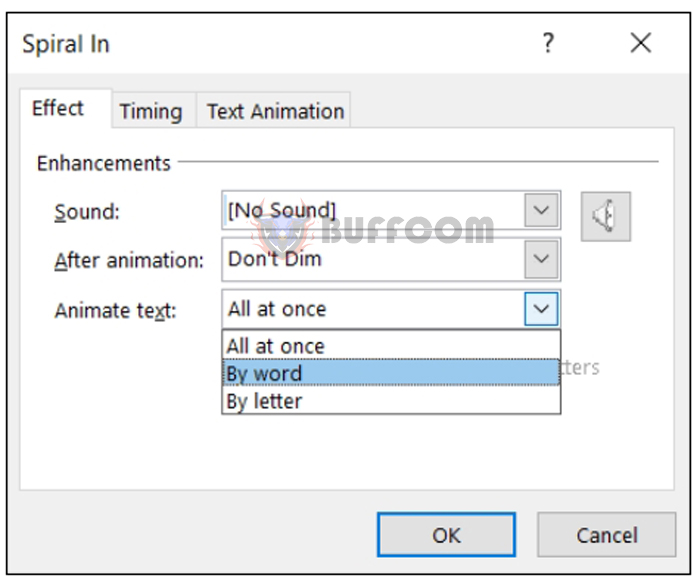 When you play the presentation, you’ll see each word or letter flying in, spinning, or fading according to the animation you selected.
Repeat an Animation
Do you want your animation to loop multiple times or until you switch to the next slide? This is one of the hidden animation features in PowerPoint.
Open the Animation pane using the button on the Animation tab. In the side panel, select the arrow on the right side of the animation and choose “Timing.”
In the small window that opens, select a number from the drop-down list for “Repeat.” You can choose options like 2, 3, 4, 5, or 10, or select “Until Next Click” or “Until End of Slide” depending on the type of effect you want.
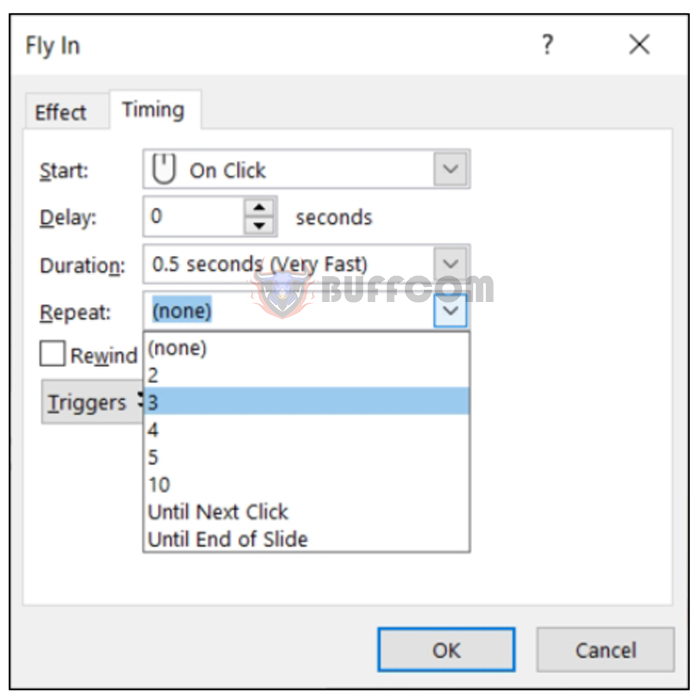 When you activate the animation, you’ll see it repeat.
Animate Multiple Objects Simultaneously
If you have several elements on a slide that you want to mimic each other, you can create dynamic effects for multiple items simultaneously. You can use this for text boxes, shapes, images, or icons.
To select all slide elements, use the Ctrl+A shortcut on Windows or Command+A on Mac. To select specific items, click the first element, hold Ctrl on Windows or Command on Mac, then click each additional item.
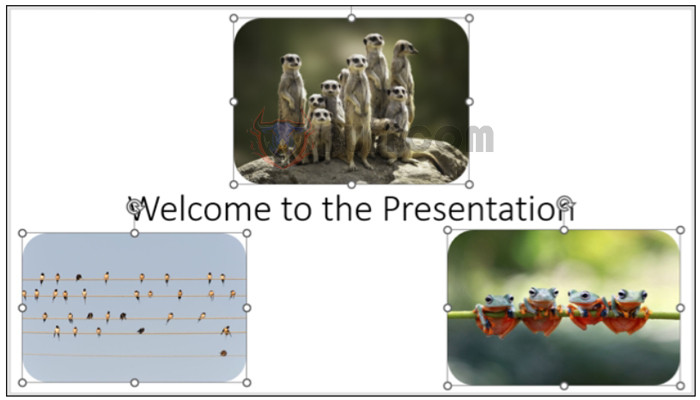 Once you’ve selected your elements, apply the animation you want. You can adjust the Effect Options just like any other animation, and the changes will apply to the entire group as you’ll see in the Animation pane.
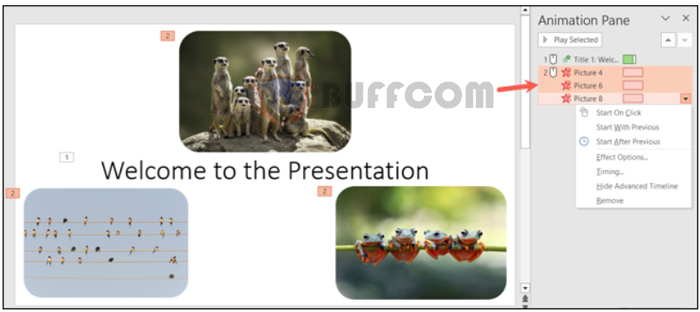 Use Different Triggers
If you’re running an automated presentation, such as at a kiosk, your animations will play automatically. But if you want to display each item with a mouse click, you can actually choose which item will trigger the animation.
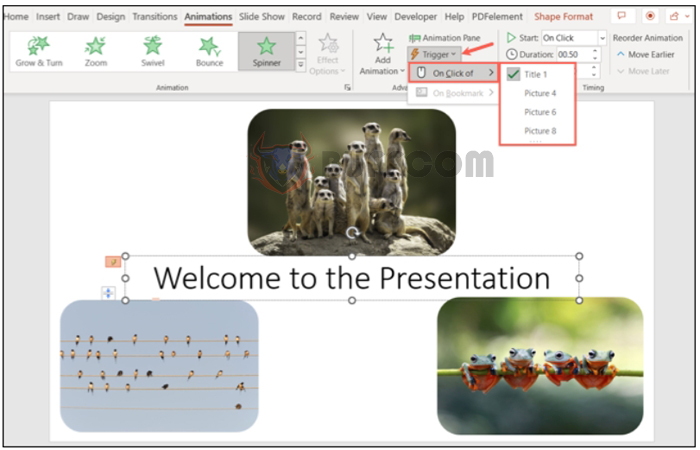 For example, you might have several slide elements like a title, text, image, and shape. You can select one of these specific items as the animation trigger.
7 Things You Didn’t Know You Could Do with PowerPoint Animations
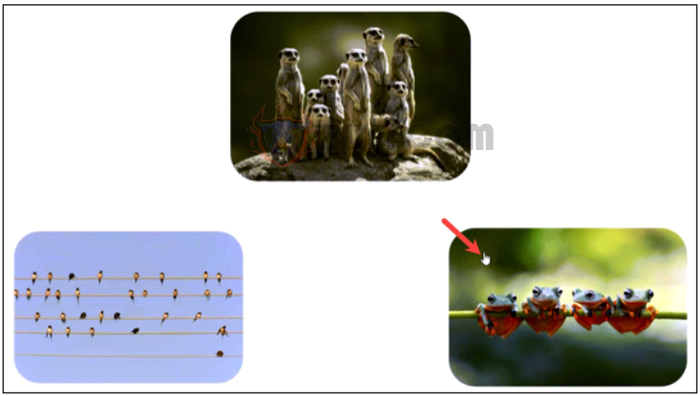
Select the animation and go to the Animation tab, then open the Trigger drop-down. Move to “On Click Of” and choose the component you want from the pop-up menu.
When p


