How to limit the working area in Excel
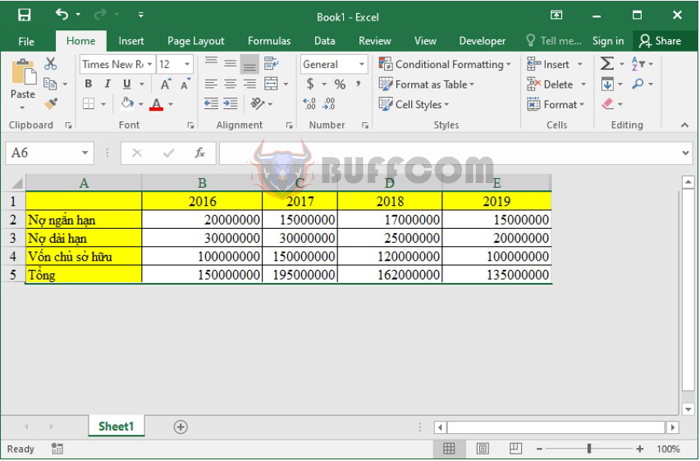
How to limit the working area in Excel: Is the working space in Excel too large that you have to scroll far away from the current working area? There are several ways to limit the working area in Excel, which helps you focus on a specific working area and prevent the worksheet from drifting into other areas. This is also useful when you want to allow other people to view only a certain range of rows or columns in the worksheet. Let’s find out how to limit the working area in Excel in the following article.
Limit the scroll bar within the working area
By default, you can drag the scroll bar in the Excel interface far away. This may cause the data you are working on to drift away and be hidden from the Excel display. To limit the scroll bar to your working area, follow these instructions:
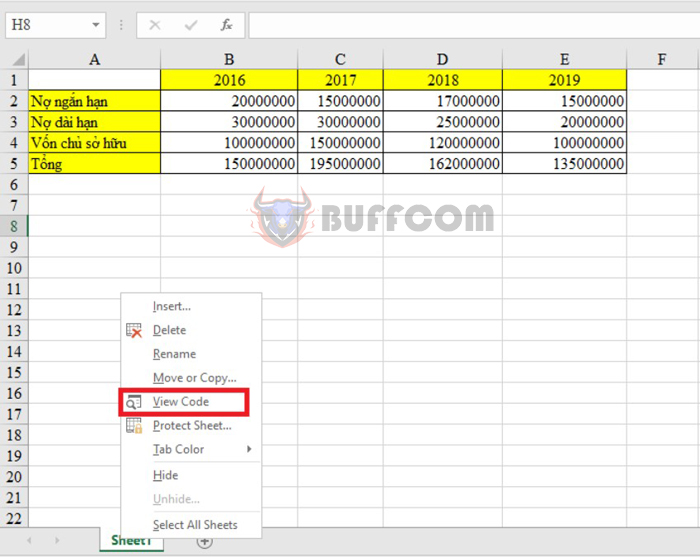
Step 1: In the worksheet that contains your working area, right-click on the current Sheet. Then select View Code from the displayed list. At this point, the Microsoft Visual Basic for Applications window will appear.
How to limit the working area in Excel
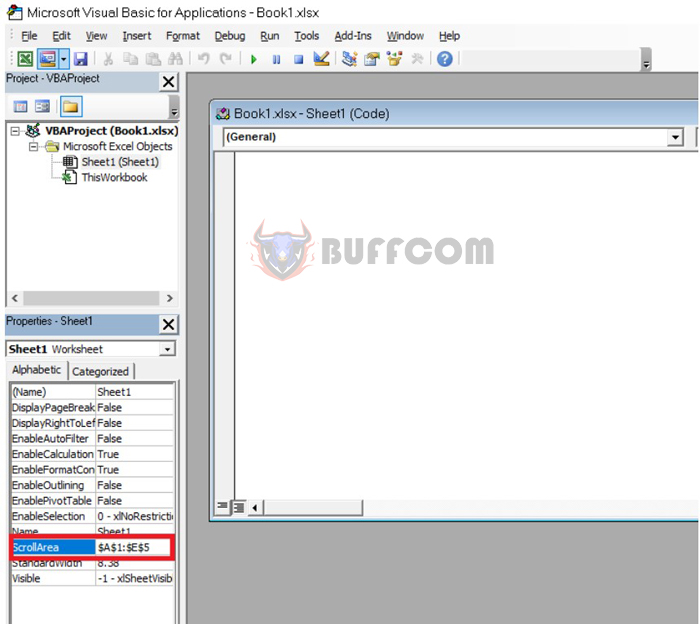
Step 2: In the Microsoft Visual Basic for Applications window, enter the working area you want to limit in the ScrollArea section on the left. The range to be limited includes column names and row names.
In the example below, the desired range to be limited is the range A1:E5. After entering it, the range you just entered will automatically change to a fixed array $A$1:$E$5.
How to limit the working area in Excel
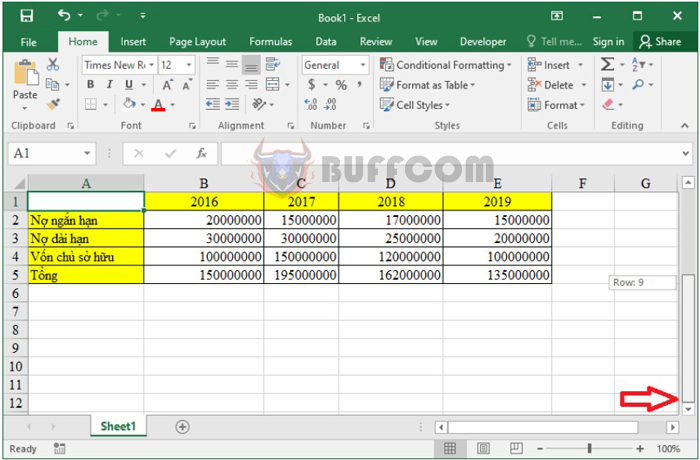
Then close this window and return to the Excel interface. Try dragging the scroll bar to check. Now, the scroll bar moves, but even if it moves to the end, it will not exceed the data area you selected above.
How to limit the working area in Excel
Hide areas outside the working area
In addition to limiting the scroll bar as described above, you can also limit your working area by hiding areas outside it. To do this, follow these steps:
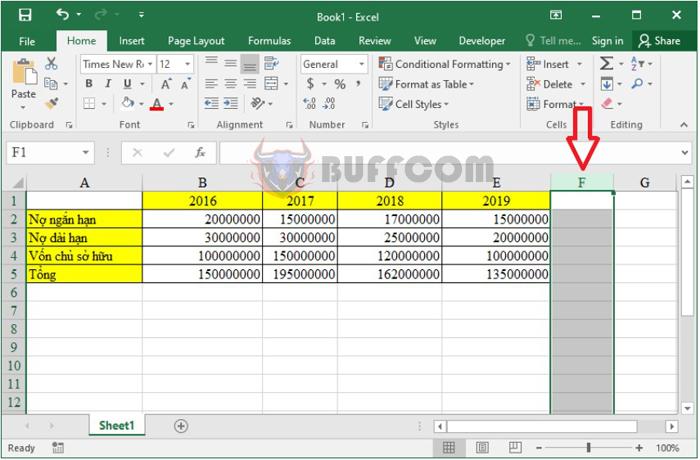
Step 1: Select the column immediately to the right of the working area.
How to limit the working area in Excel
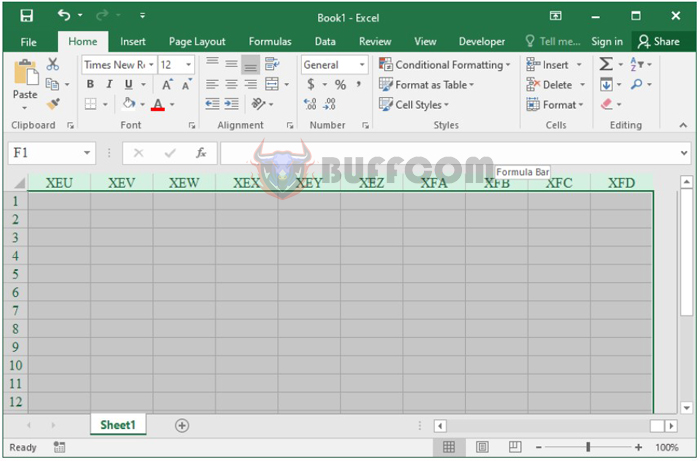
Step 2: Press the Ctrl + Shift + → (right arrow key on the keyboard) combination to highlight the entire column of data to the right of the working area.
How to limit the working area in Excel
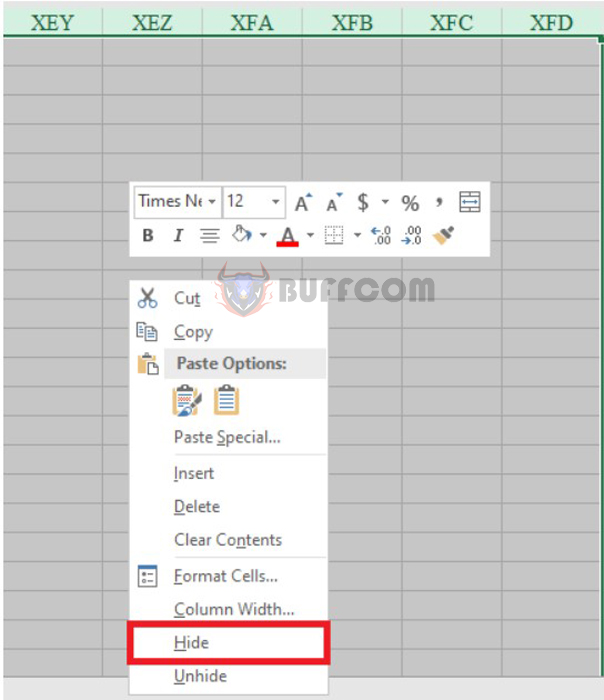
Step 3: Right-click on the highlighted area and select Hide from the drop-down menu. At this point, all columns to the right of the data area will be hidden.
How to limit the working area in Excel
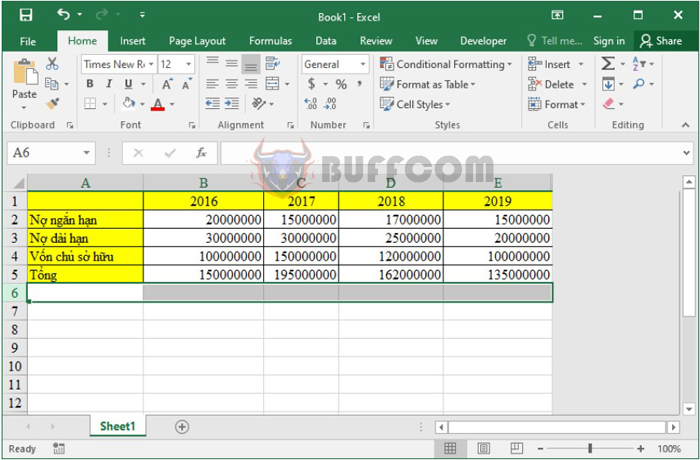
Step 4: Continue to hide the rows below the working area. Similar to hiding columns, select the row directly below the working area you want to limit.
How to limit the working area in Excel
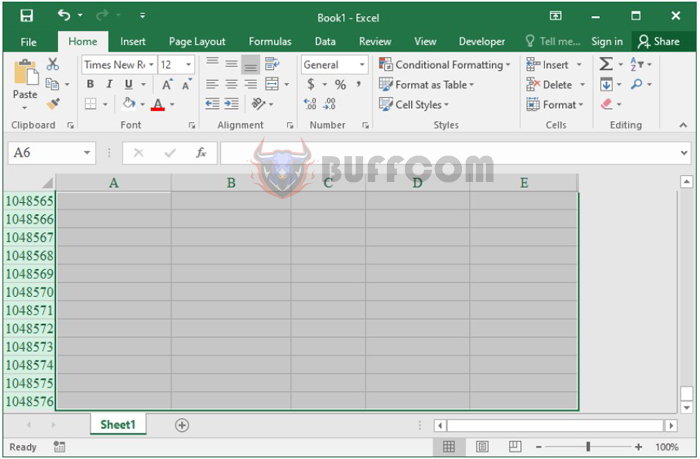
Then use the Ctrl + Shift + ↓ (down arrow on the keyboard) shortcut to highlight all the rows below the working area.
How to limit the working area in Excel
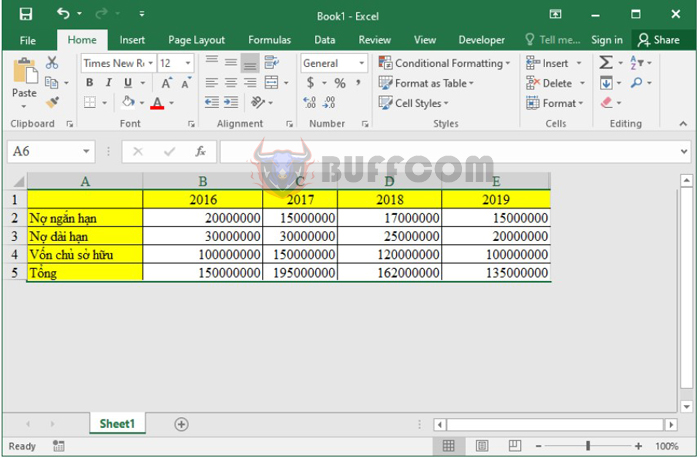
Next, right-click and select Hide to hide the selected rows. At this point, you have completed the process of hiding rows and columns outside of your working area. The result will be displayed as follows:
How to limit the working area in Excel
This is a guide on how to limit the working area in Excel. We invite readers to refer to and apply it in their work. We wish you success.


