How to change fonts in Microsoft Excel

How to change fonts in Microsoft Excel: When you receive an Excel file from someone else or download it from the internet, you may encounter font errors. This is because the file has used different input methods/code tables (usually VNI or TCVN3) or different fonts that are not available on your computer. So if you don’t have that font, how can you read the document? Don’t worry, follow the steps below to change the font and fix this issue.
1. Change fonts in Excel
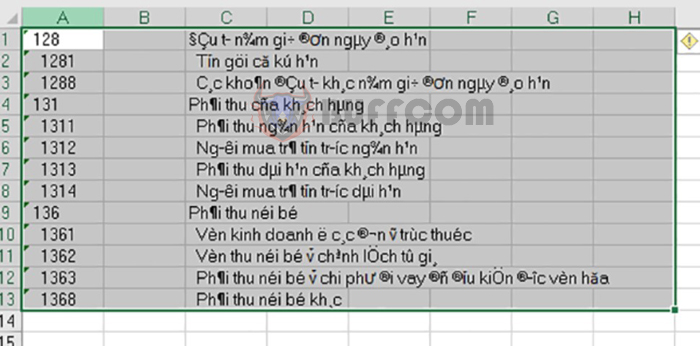
Step 1: To change the font in Excel, first, you need to open the Excel file with the font error. Then, select the entire range of data with font errors, right-click, and select Copy. Alternatively, you can use the Ctrl + C keyboard shortcut to copy the data.
How to change fonts in Microsoft Excel
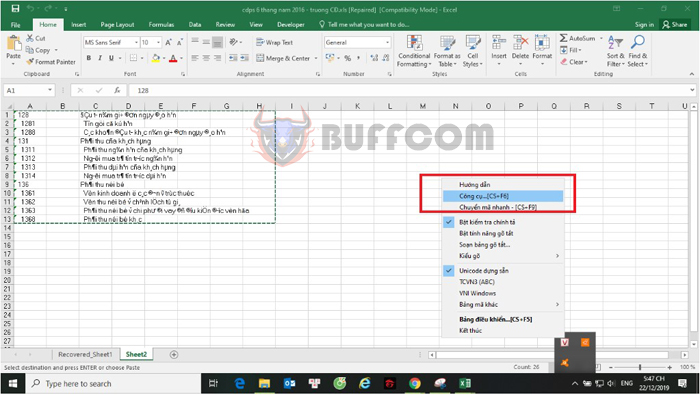
Step 2: Next, right-click on the Unikey icon on the toolbar. The scroll bar appears, and you choose Tools… [CS+F6]. Alternatively, you can use the Ctrl + Shift + F6 keyboard shortcut to open the Unikey Toolkit.
How to change fonts in Microsoft Excel
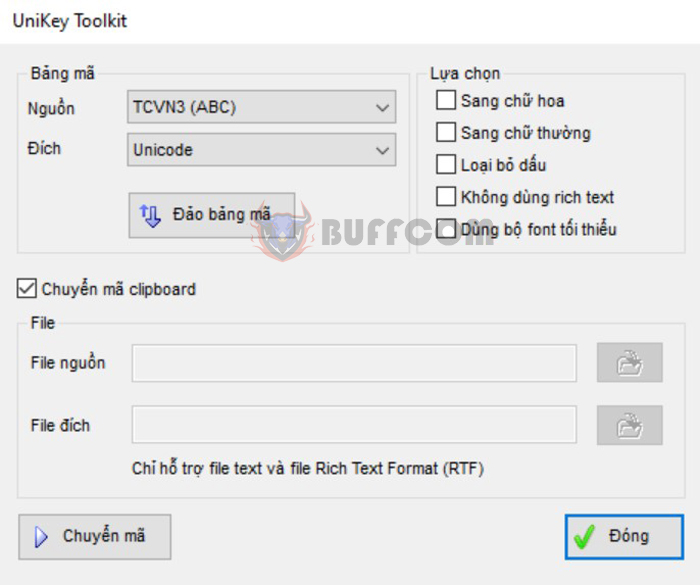
Step 3: At this point, the Unikey Toolkit dialog box appears. In the Source section, select TCVN3 (ABC). In the Destination section, select Unicode. Finally, click Convert.
How to change fonts in Microsoft Excel
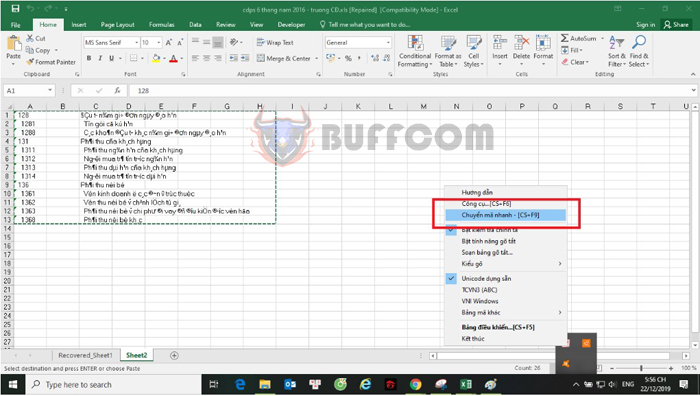
Or you can also right-click on the Unikey icon on the toolbar. Then select Quick Convert – [CS + F9] or press the Ctrl + Shift + F9 keyboard shortcut to quickly convert.
How to change fonts in Microsoft Excel
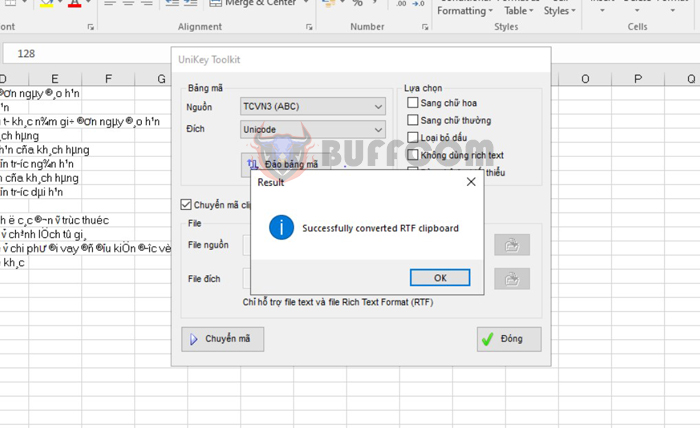
Step 4: If the Successfully converted RTF clipboard message appears, it means we have successfully converted the code. Select OK.
How to change fonts in Microsoft Excel
Step 5: Now you need to open a new word processing page. Then, right-click and select Paste to paste the converted text with the font into it. Alternatively, you can use the Ctrl + V keyboard shortcut to quickly paste the text. That’s all we need to do to successfully change the font.

How to change fonts in Microsoft Excel
2. Change default font in Excel
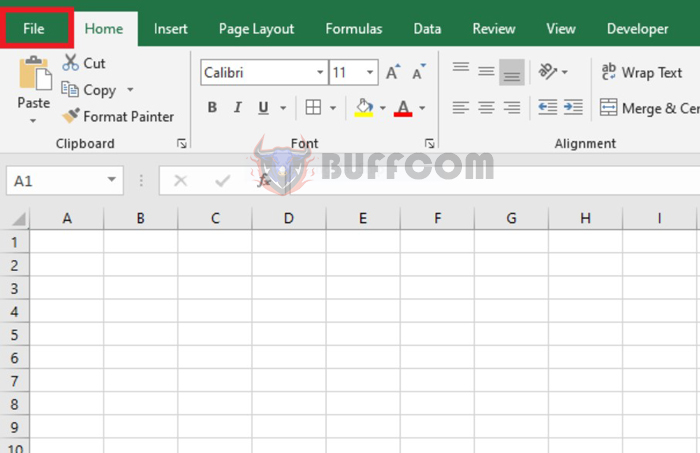
Step 1: To change the default font in Excel, first, open any Excel file. Then, select the File tab on the toolbar.
How to change fonts in Microsoft Excel
Step 2: At this point, on the File interface, select More => Options.

How to change fonts in Microsoft Excel
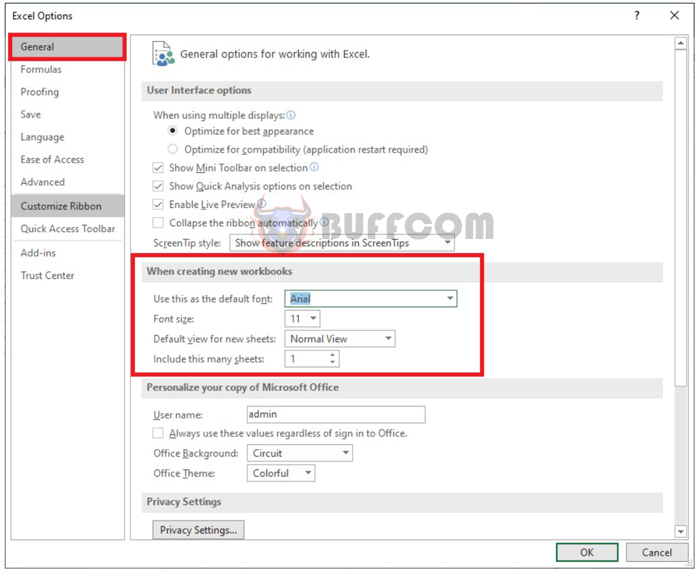
Step 3: At this point, the Excel Options window appears. Select the General tab on the left-hand menu. Then scroll down to the When creating new workbooks section. Here you can change the default font in Excel in the Use this as the default font box. Besides, you can also set the default font size in the Font size box. Finally, click OK to save the settings. That’s all you need to do to set the default font successfully. From now on, each time you open a new Excel file, the default font will be the font you have chosen.
How to change fonts in Microsoft Excel
In summary, the article has guided you on how to change fonts in Excel. Hopefully, this article will be helpful to you in your work. Good luck!


