Tips for aligning print margins quickly in Excel
Tips for aligning print margins quickly in Excel: Aligning margins in Excel is essential to make our data look better and have a standardized format before printing. However, many people are used to manually adjusting margins, forgetting the quick and easy way to set margins in Excel. This article will guide you on how to align print margins in Excel quickly and easily.
Step 1: Select print area
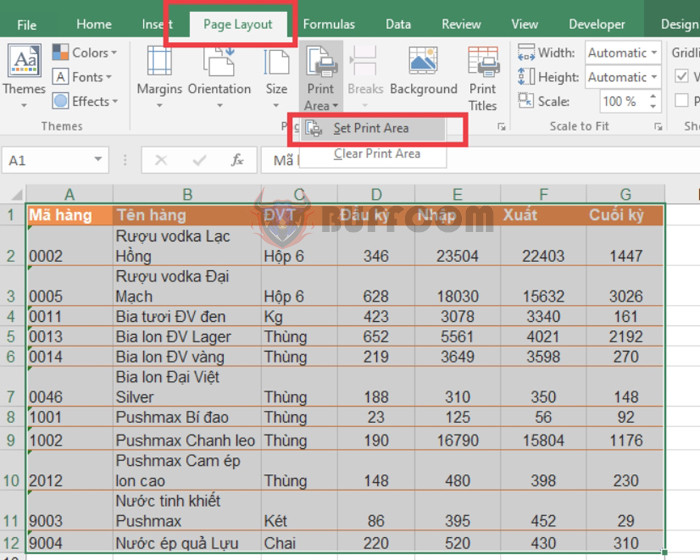
Before aligning print margins, we need to select the print area using Print Area. Firstly, highlight the area you want to print. Then select the Page Layout tab => click on the Print Area icon => Set Print Area.
Tips for aligning print margins quickly in Excel
Step 2: Open Page Setup
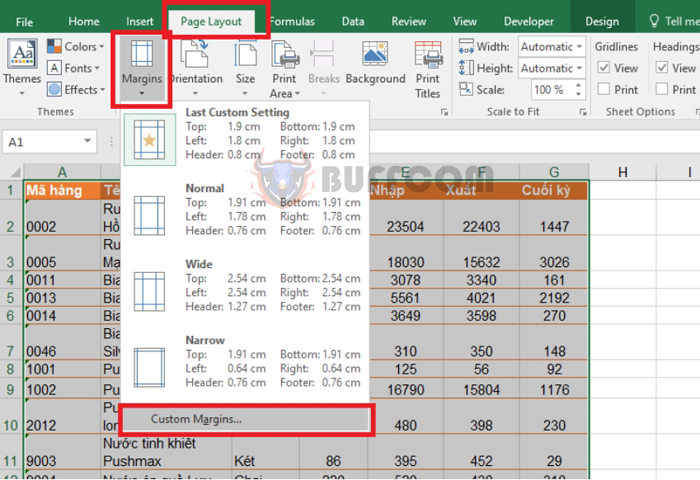
After selecting the print area, we can proceed to align the print margins. By selecting the Page Layout tab => Margins -> Custom Margins.
 Alternatively, you can select the Page Layout tab and click on the arrow icon at the bottom right of the Page Setup section.
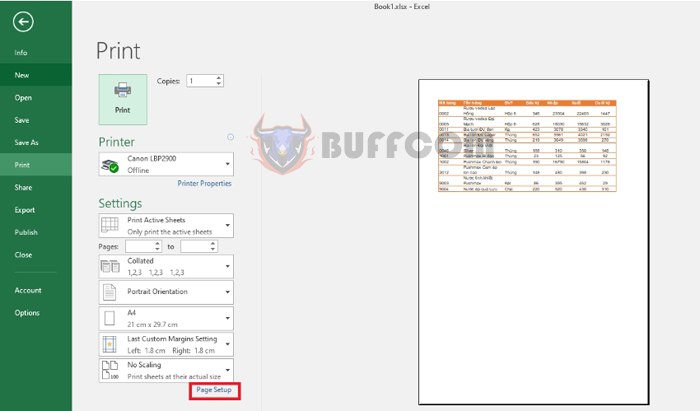
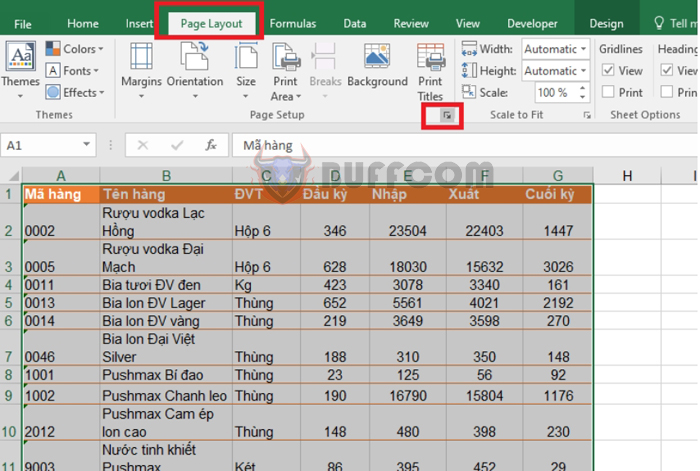 Or, you can also press the Ctrl + P key combination and then select Page Setup.
 Step 3: Align margins
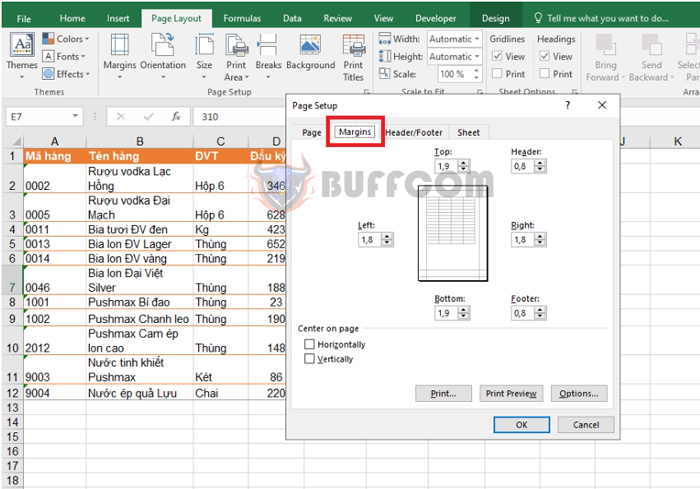
Once the Page Setup dialog box appears, select the Margins tab. Then, format the margins in the sections: Left, Right, Top, Bottom, Header, Footer as desired. Finally, click OK to save changes.
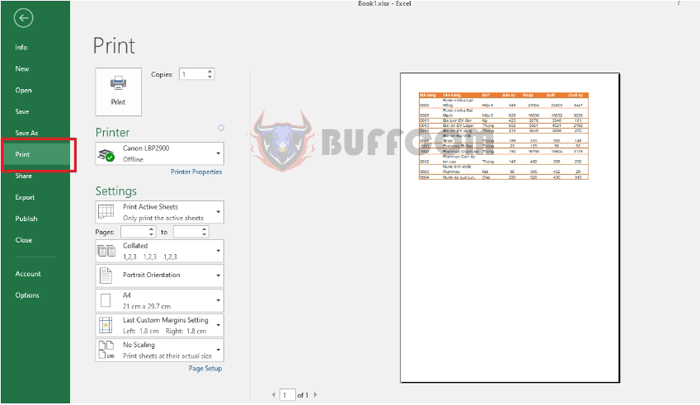
 To check if the margins have been aligned properly, you can press the Ctrl + P key combination or select the File tab => Print to preview the aligned print page.
Tips for aligning print margins quickly in Excel
Therefore, this article has guided you on how to align print margins in Excel. Good luck!

