Step-by-Step Guide: Resetting Virtual Memory on Windows 11
Is your Windows 11 PC experiencing sluggishness and unresponsiveness? It’s possible that your virtual memory is overloaded. Virtual memory plays a vital role in your computer’s performance, but when it becomes full, it can lead to system slowdowns or even crashes. The good news is that you can easily reset virtual memory on Windows 11 by following a few simple steps.
In this guide, we will walk you through the process of resetting virtual memory on Windows 11, enabling your computer to operate more smoothly and efficiently. Let’s get started and enhance your PC’s performance.
Understanding Virtual Memory on Windows PCs
Virtual memory acts as an additional storage space that your computer utilizes when it exhausts its regular storage (RAM) while running programs or applications. It serves as a space on your hard drive that your computer treats as if it were extra memory. When your computer requires more memory than it currently has, it transfers some of the data that is not in immediate use from the RAM to the virtual memory on the hard drive. This enables your computer to simultaneously run multiple programs and handle tasks more efficiently.
While virtual memory is essential for seamless program execution, it can also impact performance. When the RAM is depleted, it resorts to using the hard drive for storing data, resulting in significant slowdowns. In summary, although virtual memory is beneficial, it can affect your computer’s speed and efficiency.
Now, let’s dive into the steps for resetting virtual memory on Windows 11.
Resetting Virtual Memory on Windows 11 – Using System Properties
To reset the virtual memory on your Windows 11 computer, you can follow these steps:
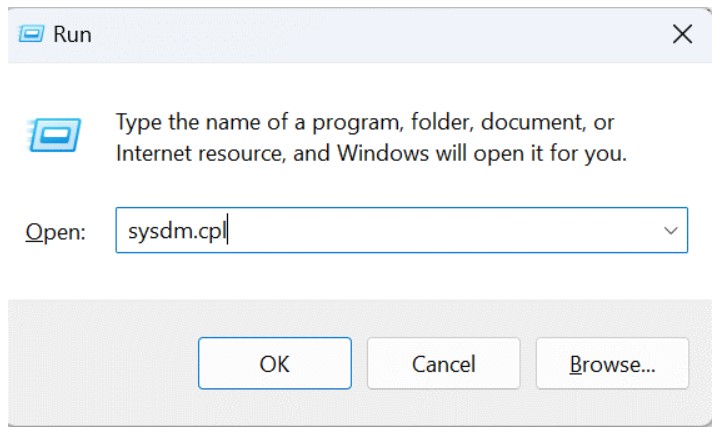
- Press the Windows key and the R key simultaneously to open the RUN dialog box.
- Type “sysdm.cpl” in the box and press Enter.
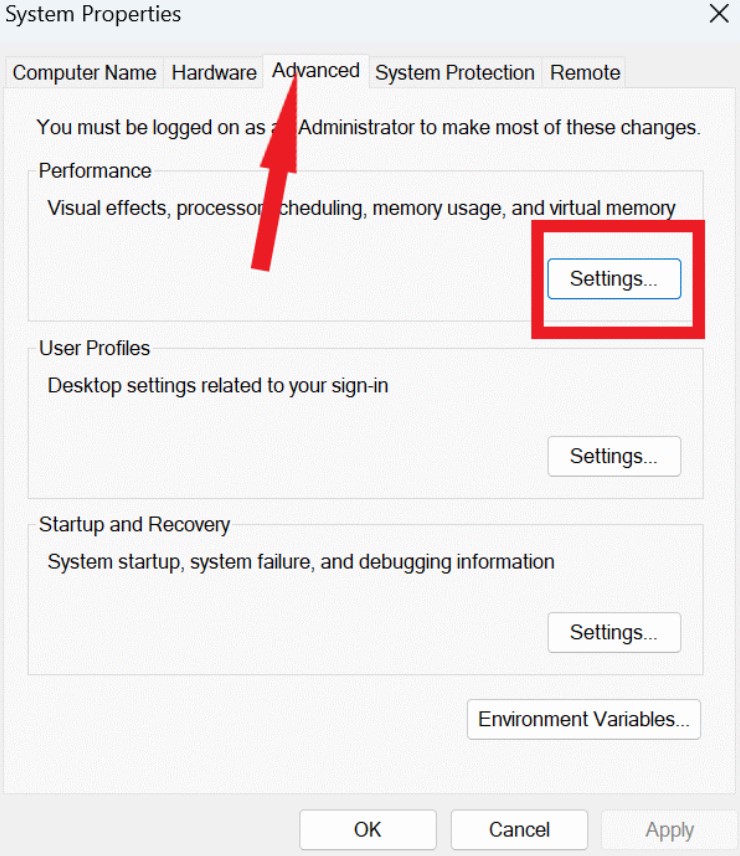
- The System Properties window will appear. Click on the “Advanced” tab at the top.
- Under the “Performance” section, click on “Settings.”
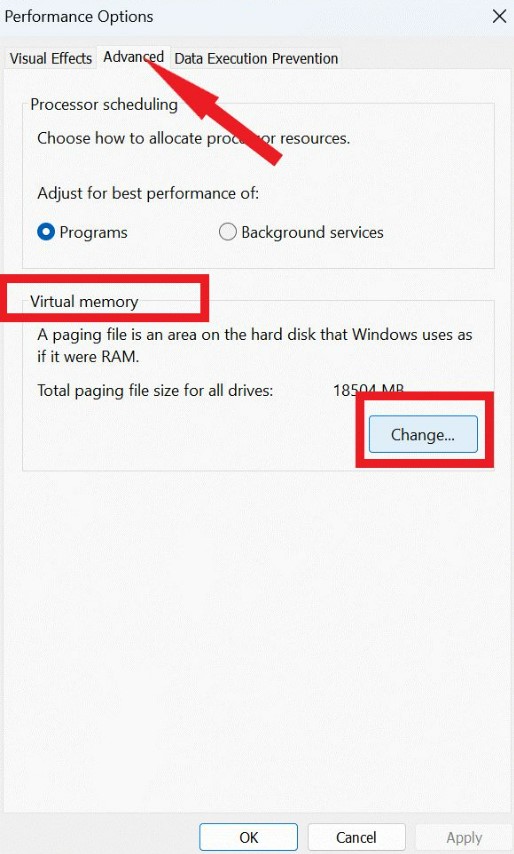
- In the Performance Options window, click on the “Advanced” tab.
- Under the Virtual Memory section, click on “Change.”
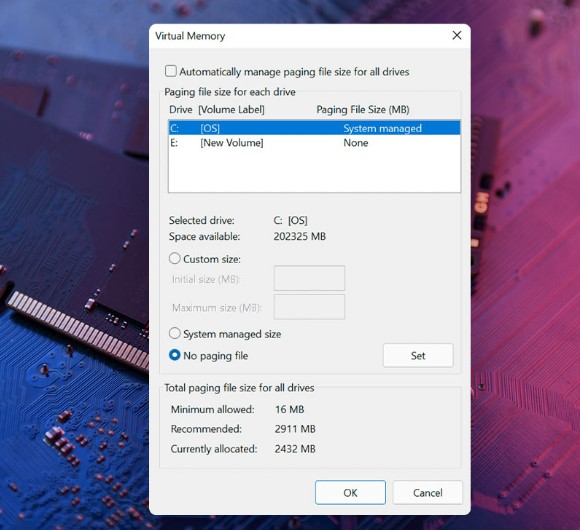
- Uncheck the box that says “Automatically manage paging file size for all drives.” Select the drive where you want to reset the virtual memory. Usually, this is the drive where Windows is installed.
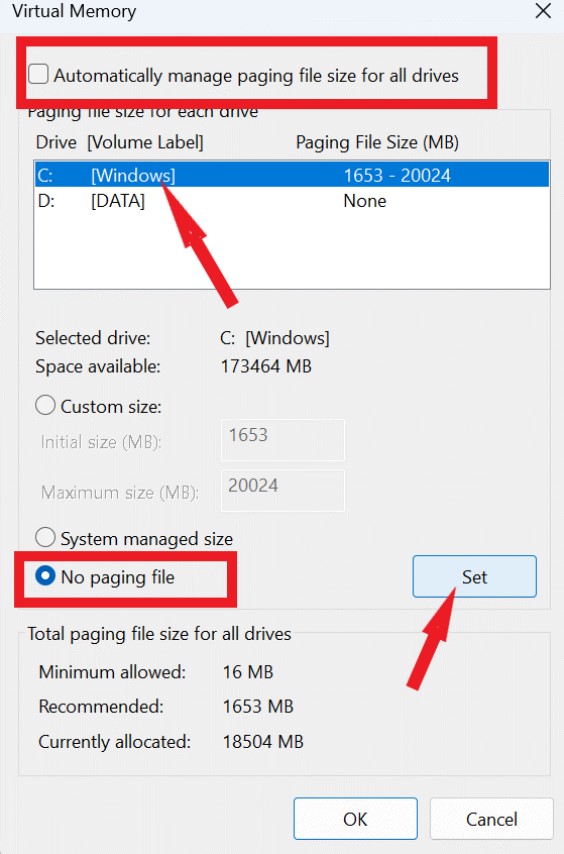
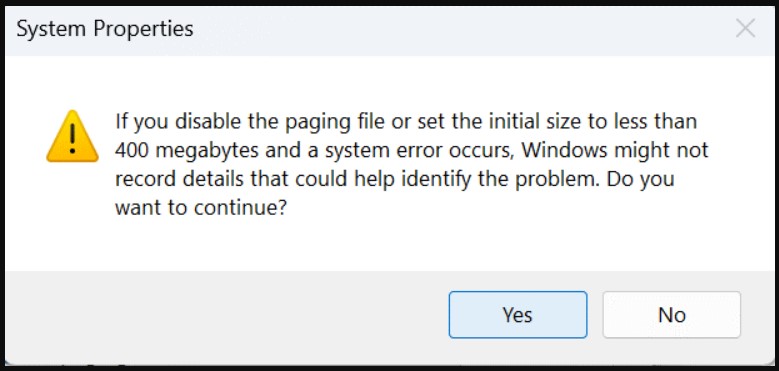
- Choose the “No paging file” option, and if a warning message appears, click “Yes.”
- Finally, click on “OK” to save the changes you’ve made. After completing these steps, close all windows and restart your computer. The changes to the virtual memory settings should now take effect.
By resetting the virtual memory, you can enhance your computer’s performance by freeing up space and reducing the load on your RAM. Follow these steps to easily reset the virtual memory on your Windows 11 computer and optimize its speed and efficiency.


