What Is BitLocker? How To Enable And Disable BitLocker In Windows 10
To secure your drives and data on Windows 10, we often use folder encryption software or try to hide files. However, there is a way to protect your drives with a password and encryption without relying on such software, and that is BitLocker.
Let’s explore how to enable or disable BitLocker in Windows 10 in the following article.
What is BitLocker?
BitLocker is a security and data encryption method that helps protect our data on computers from unauthorized access. The BitLocker tool is built-in and free on Windows, and once this data encryption method is set up, our computer continues to operate normally.
BitLocker has been released on various Windows versions, specifically:
- Windows Vista and Windows 7 (Enterprise, Ultimate versions)
- Windows 8 (Pro, Enterprise versions)
- Windows 8.1 (Pro, Enterprise versions)
- Windows 10 (Pro, Enterprise, Education versions)
To use BitLocker, our computer’s chip must support Trusted Platform Module 1.2.
Check if your computer supports TPM (Trusted Platform Module)
If your machine doesn’t support TPM or doesn’t grant BitLocker the required TPM permission, your computer will display an error like the one shown below when you try to enable BitLocker.
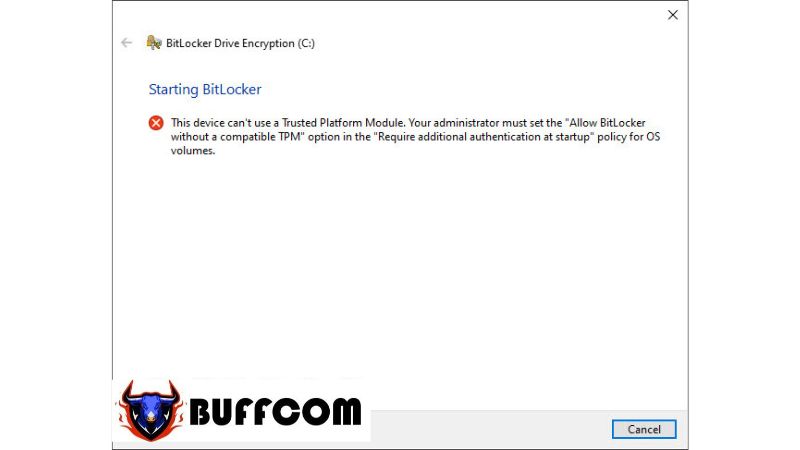
We can fix this issue as follows:
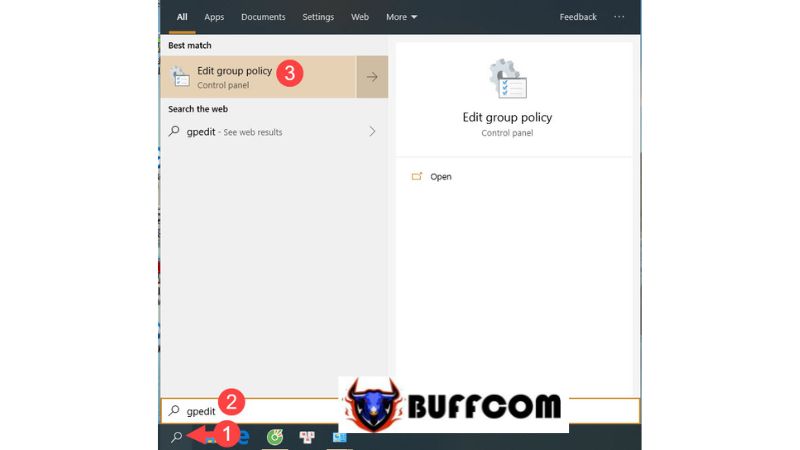
Step 1: Click on the search box in Windows (1) and search for “gpedit” (2). Select the first result (3). Alternatively, you can use the Windows + R key combination to open the Run dialog box, then type “gpedit.msc” and press Enter.
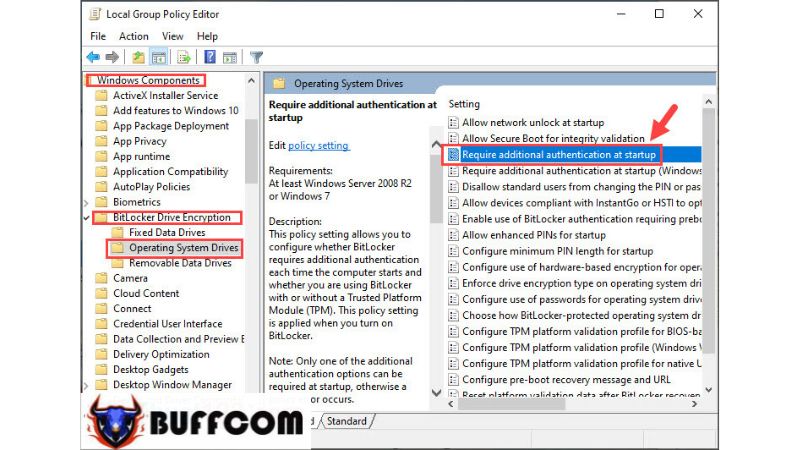
 Step 2: Navigate to the following path: Computer Configuration => Administrative Templates => Windows Components => BitLocker Drive Encryption => Operating System Drives => Require additional authentication at startup.
 Step 3: Select Enable (1) to activate the setting. Then, check the box for Allow BitLocker without a compatible TPM (2). Finally, click Apply (3) and OK (4) to save the changes.
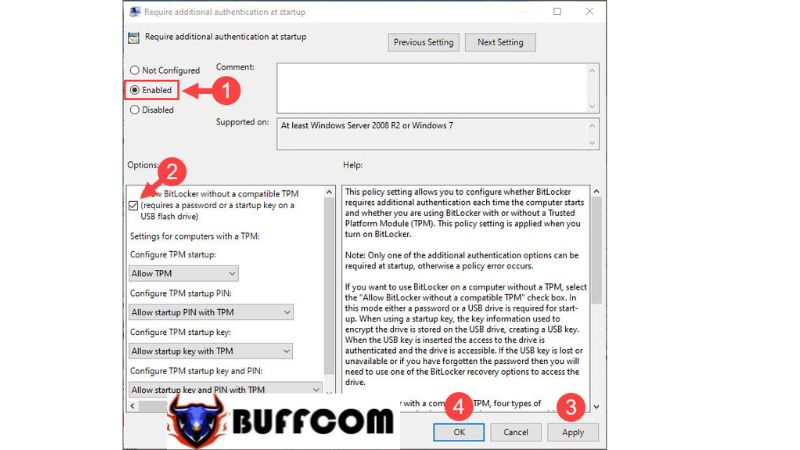 Once these steps are completed, you can install BitLocker without any obstacles.
How to enable BitLocker in Windows 10
Step 1: Right-click on the drive you want to encrypt with BitLocker and select “Turn on BitLocker.”
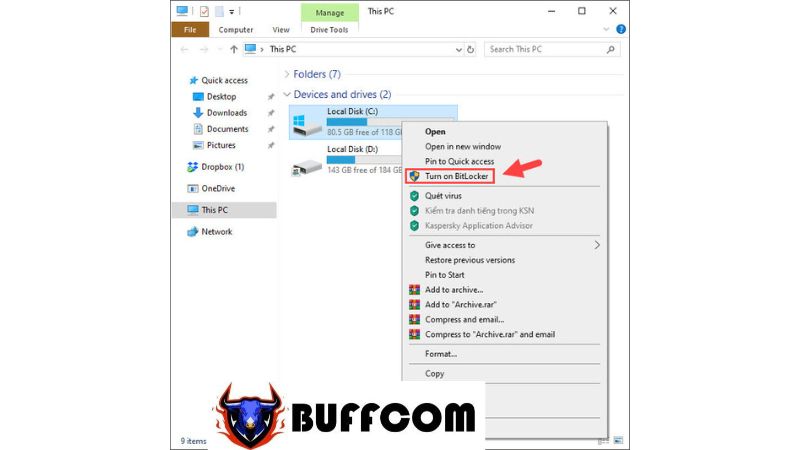
Step 2: The BitLocker wizard will prompt you to review the prerequisites and encryption settings. Click Next to proceed.
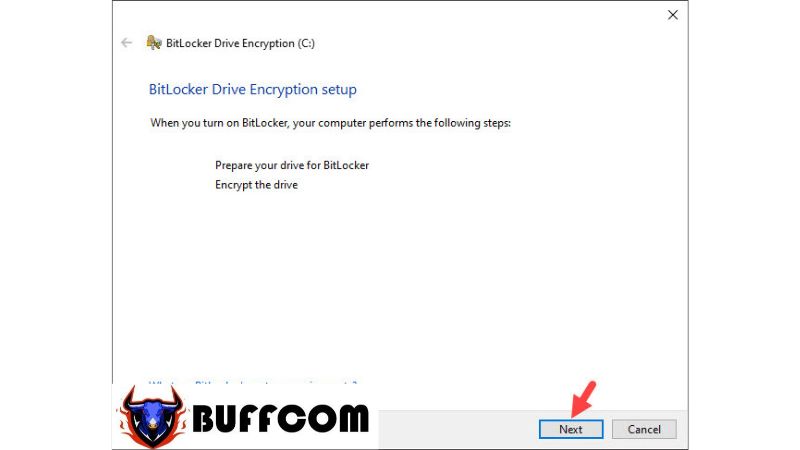 Step 3: Continue clicking Next to proceed to the next step.
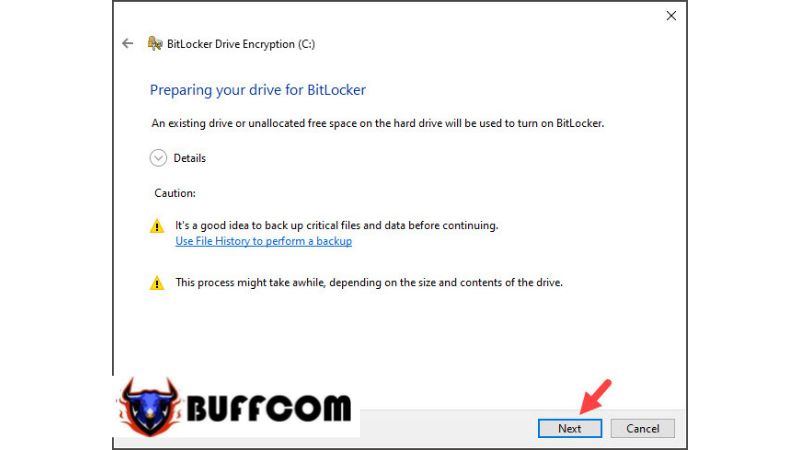 Step 4: Click Next to move on to the next step.
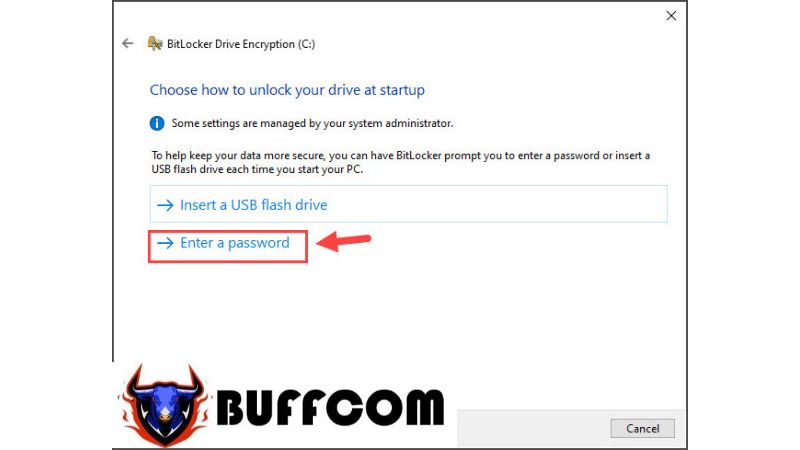
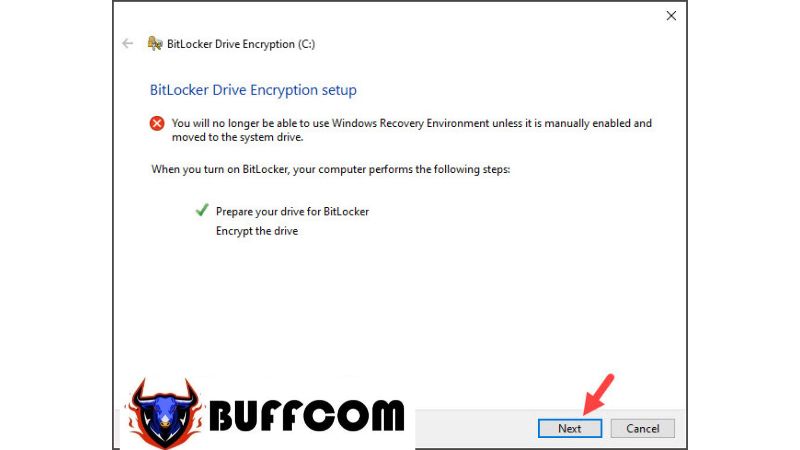 Step 5: BitLocker will ask you to choose whether to create a password to unlock BitLocker or use a USB drive. In this article, we will choose “Enter a password” to continue.
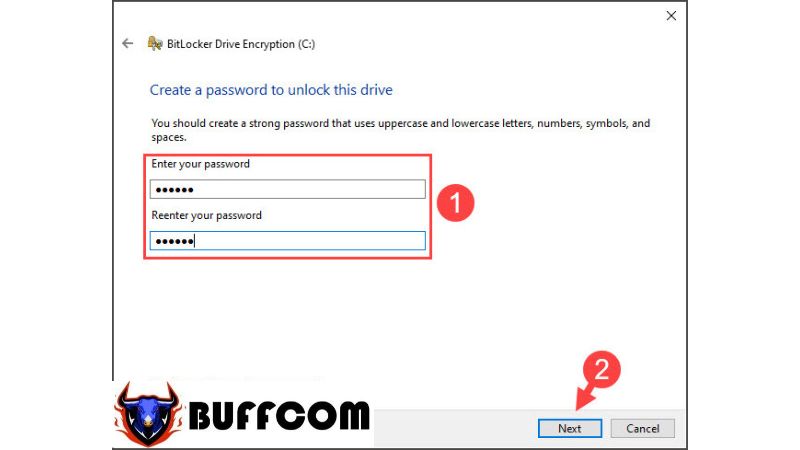
 Step 6: Create a password in the “Enter your password” field and re-enter the password in the “Reenter your password” field. Then, click Next to continue.
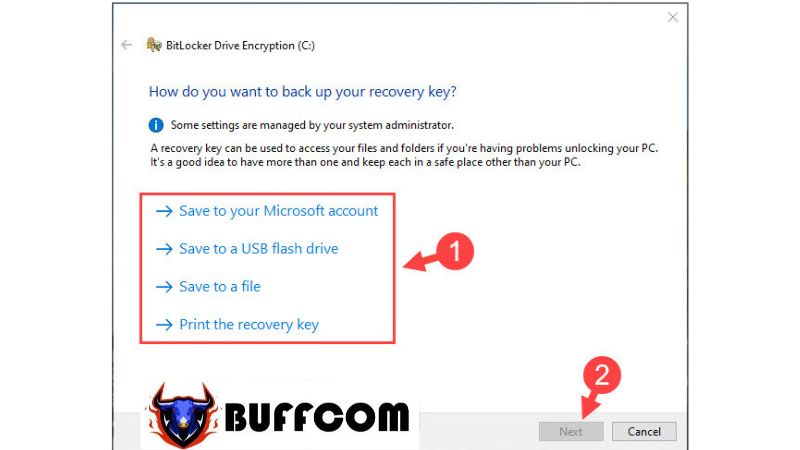
 Step 7: Choose one of the options to save the BitLocker recovery key in case you forget the password.
Save to your Microsoft account: Save it to your Microsoft account by creating a note and storing it in your Microsoft account.
Save to a USB flash drive: Save the BitLocker key to a USB drive.
Save to a file: Save the recovery key as a file.
Print the recovery key: Print or save the recovery key as a PDF.
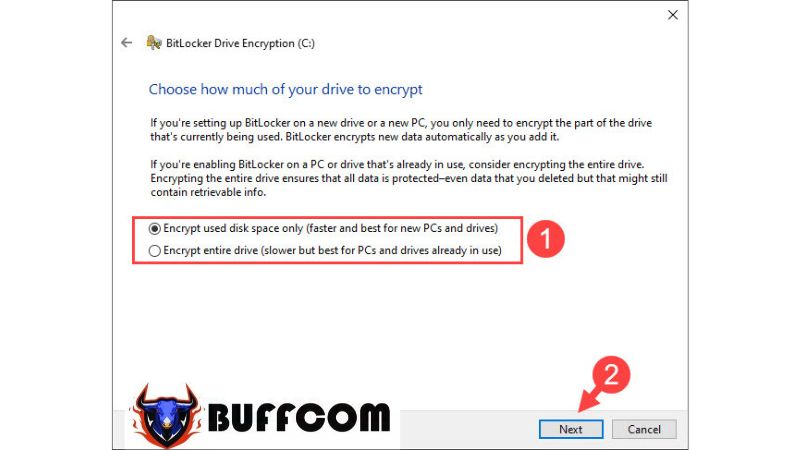
 Step 8: You can choose to encrypt a portion of the drive (Encrypt used disk space only) or the entire hard drive (Encrypt entire drive). Encrypting a portion of the drive is faster and suitable for newly installed machines with less data. The second encryption option takes longer but provides complete protection for your hard drive. After selecting the encryption type, click Next to continue.
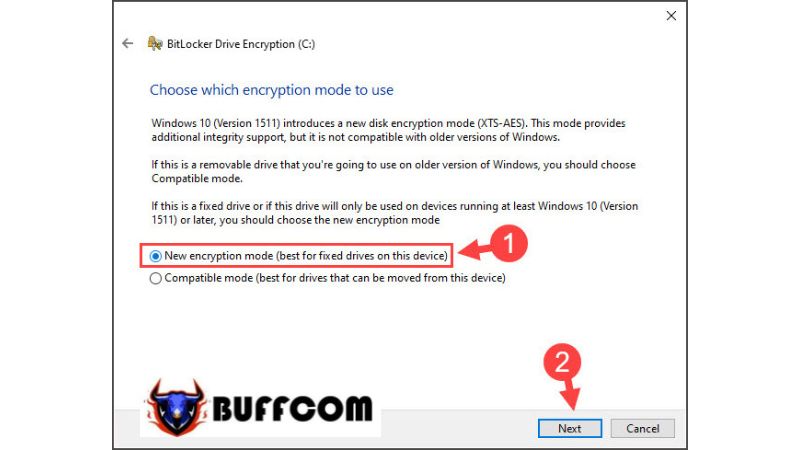
 Step 9: Select the corresponding security method. If you have Windows 10 version 1511 or later, it is recommended to choose the New encryption mode to avoid security vulnerabilities. Then, click Next to continue.
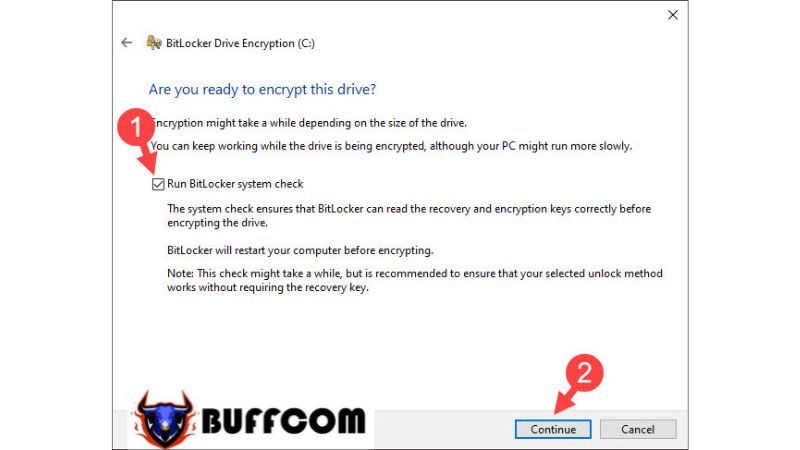
 Step 10: Check the box for Run BitLocker system check and select Continue.
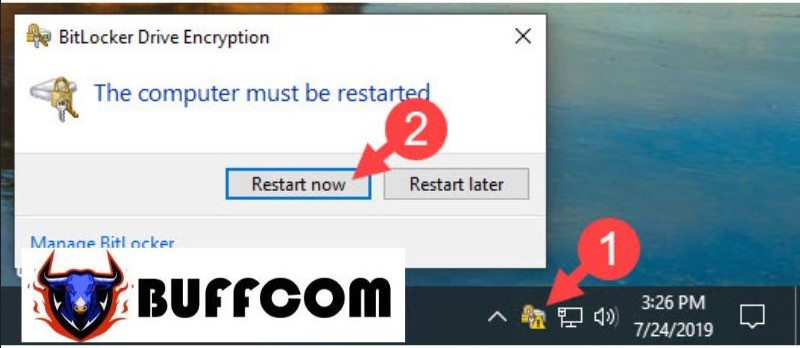
 Step 11: You will see the BitLocker icon on the Taskbar at the top of the screen. Click on it and select Restart now.
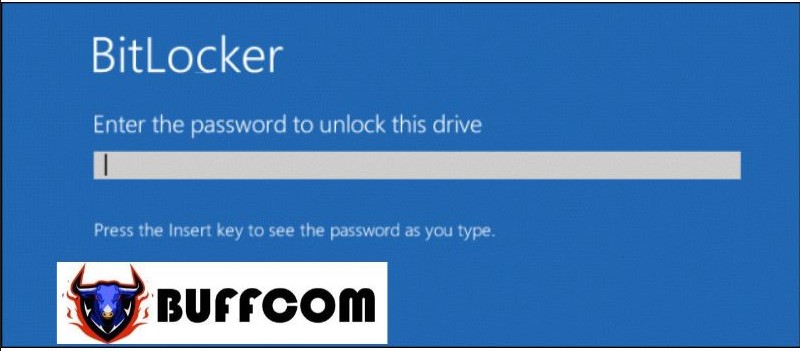
 Step 12: After restarting, your computer will prompt you to enter the BitLocker password as shown in the successful message below.
 How to disable BitLocker in Windows 10
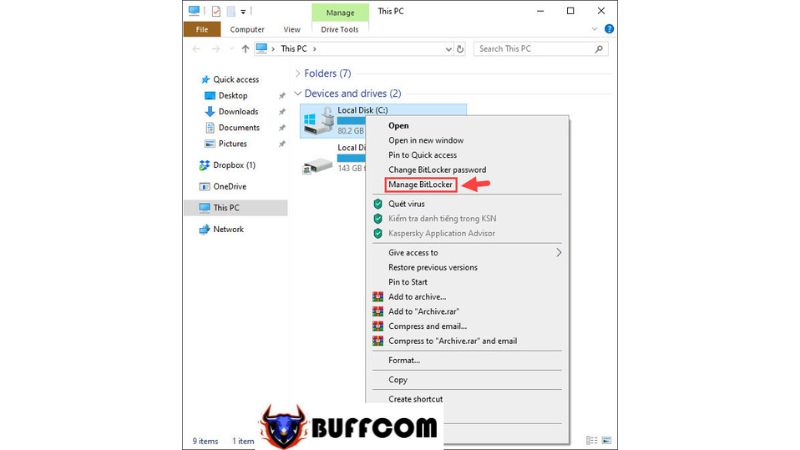
Step 1: After enabling BitLocker, the drive on your computer will have a lock icon. To disable BitLocker, right-click on the BitLocker drive and select Manage BitLocker.
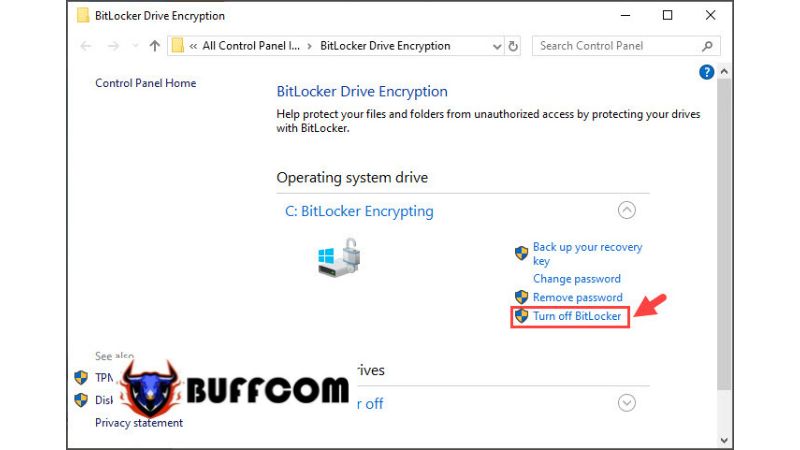
 Step 2: Choose Turn off BitLocker.
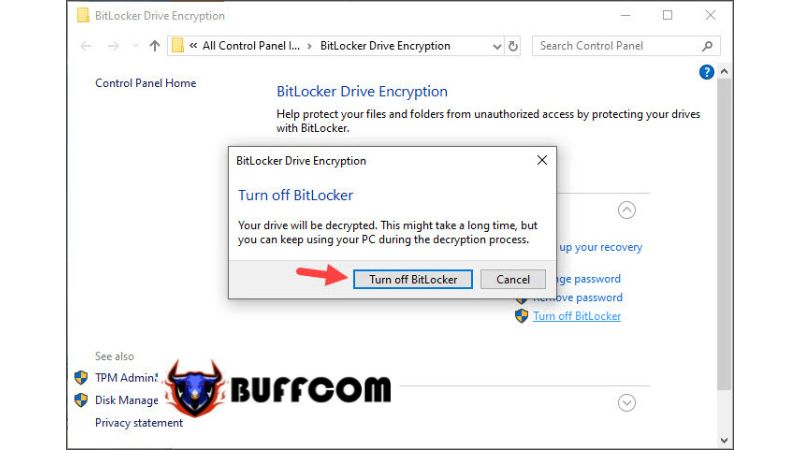
 Step 3: In the dialog box that appears, select Turn off BitLocker again. Continue selecting Turn off BitLocker.
The BitLocker icon on the taskbar will then display “Decryption in progress,” indicating that the BitLocker decryption process is taking place.
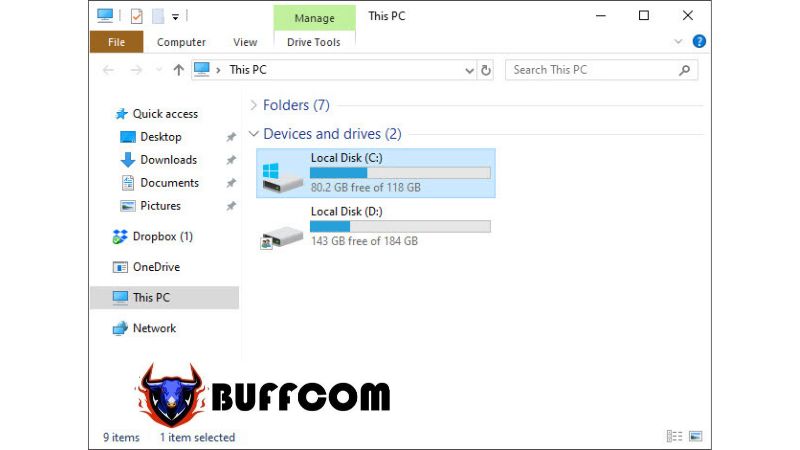
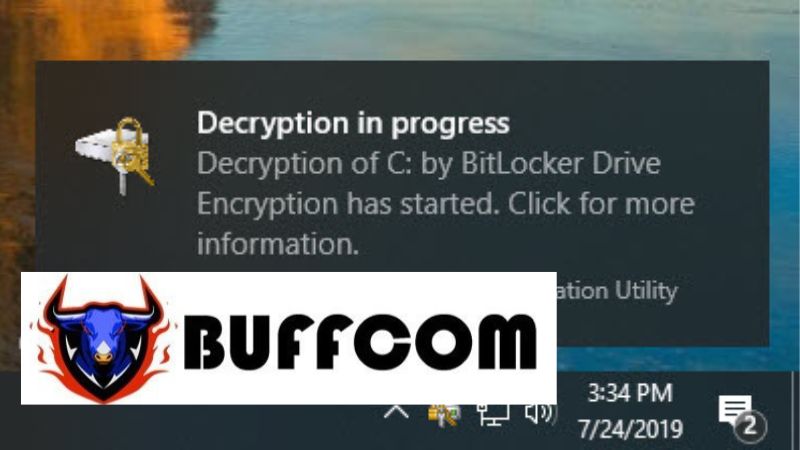 Step 4: To check if BitLocker has been successfully disabled, go to Computer/This PC and check if the lock icon on the drive has disappeared. Then, restart your computer, and if there are no more BitLocker password prompts, it means the process was successful.
 With the detailed instructions in this article, we hope you can successfully enable and disable BitLocker without encountering any difficulties. If you are interested in genuine Windows product keys, please contact Buffcom.net!


