Guide To Automatically Enable Numlock On Startup In Windows 10

If you’re an office worker and frequently use the numeric keypad on the right side of the keyboard, having to press the Numlock key every time you want to use it can be time-consuming. Therefore, it’s best to set up automatic Numlock activation on computer startup. If you don’t know how to do it, follow the steps below.
Guide to automatically enable Numlock on startup in Windows 10
Step 1: Press the Windows key + R combination to open Run.
Next, type “regedit” and press Enter to access the Registry Editor tool.
 Step 2: Now, in the Registry Editor interface.
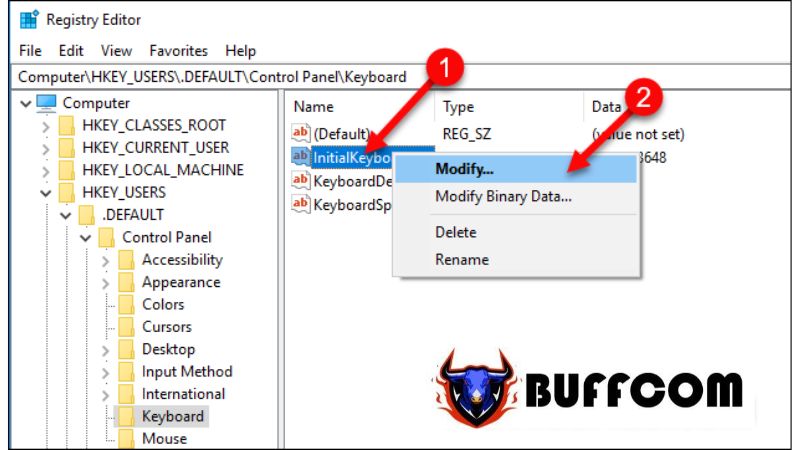
Navigate to the following path:
HKEY_USERS
DEFAULT
Control Panel
Keyboard
Step 3: In the right-hand window, we are interested in the key named “InitialKeyboardIndicators.” The corresponding values and their effects are as follows:
- 0 – Turns off all three keys: Num Lock, Caps Lock, and Scroll Lock
- 1 – Turns on Caps Lock
- 2 – Turns on Num Lock
- 3 – Turns on Caps Lock and Num Lock
- 4 – Turns on Scroll Lock
- 5 – Turns on Caps Lock and Scroll Lock
- 6 – Turns on Num Lock and Scroll Lock
- 7 – Turns off all three keys
Right-click on InitialKeyboardIndicators and select Modify.
 Next, enter a value of 2 in the Value data field and click OK to ensure that Numlock is always enabled when Windows starts.
Now, restart your computer and check the results.
It’s quite simple, isn’t it? With this guide to automatically enable Numlock on startup in Windows 10, you can set up your computer to avoid the need to press the Numlock key each time you want to use it. If you’re interested in obtaining a genuine Windows key, you can contact Buffcom.net for assistance!


