Quick Fixes for Printing Issues in Word Documents
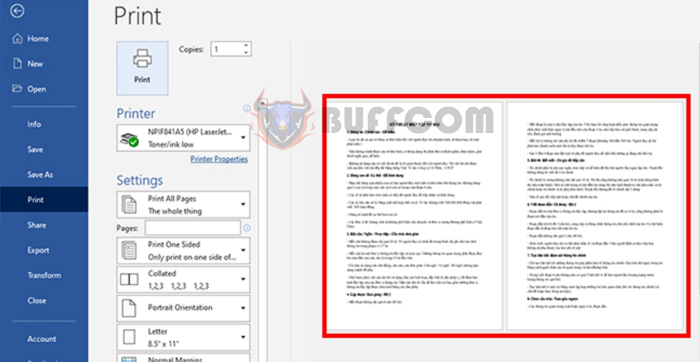
Quick Fixes for Printing Issues in Word Documents: There are various reasons why Word might encounter printing errors. It could be due to the printer not receiving print commands, the printer receiving commands but not printing, issues with printing text, or skipping text on pages. In this article, Buffcom.net will guide you through resolving basic printing problems in Word.
1. Basic Printer Checks
If you send a print command but the printer doesn’t initiate printing, first check basic printer-related issues as follows:
- Ensure the USB cable connecting the computer to the printer is properly connected. If it’s a wireless printer, make sure this feature is enabled.
- Verify the stability of your Internet connection (wireless or wired).
- Ensure the printer is plugged in and powered on.
- Check for paper jams in the printer.
- Make sure the printer is compatible with your computer. Search online or visit the printer manufacturer’s website for additional information.
2. Convert the Document to PDF and Print
PDF format is more stable, so the simplest solution is to convert your document to PDF. Then, open the document with a different PDF reader and print. To convert the document to
PDF, follow these steps:
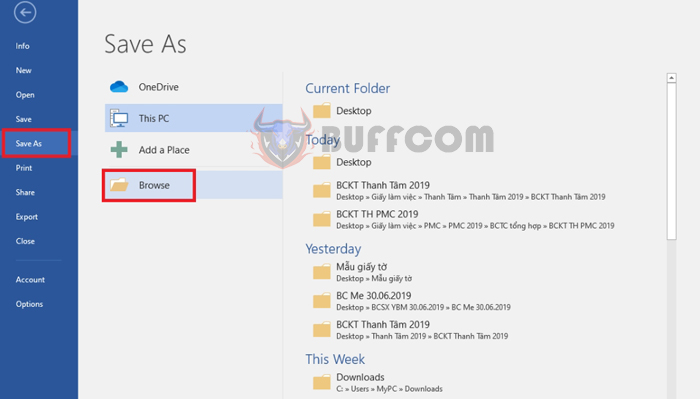
Step 1: Open the Word file you want to convert to PDF. Then, go to the File tab => Save As => Browse.
Quick Fixes for Printing Issues in Word Documents
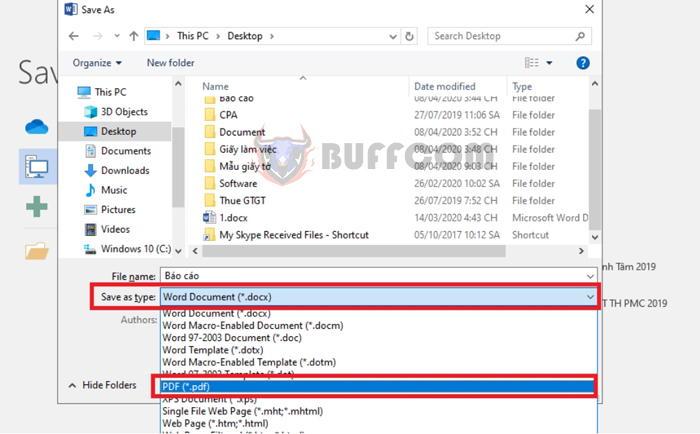
Step 2: The Save As window will appear. Choose the location to save the file and provide a name for the file. Then, click on the drop-down menu for “Save as type.” Scroll down and select PDF (*.pdf). After completing the settings, click Save to convert your Word file to PDF.
Afterward, open the PDF file using PDF reader software like Foxit Reader, Adobe Acrobat, and print as usual.
 3. Use Microsoft’s Printer Troubleshooter
First, download Microsoft’s Printer Troubleshooter tool using the following link: http://aka.ms/diag_printer10
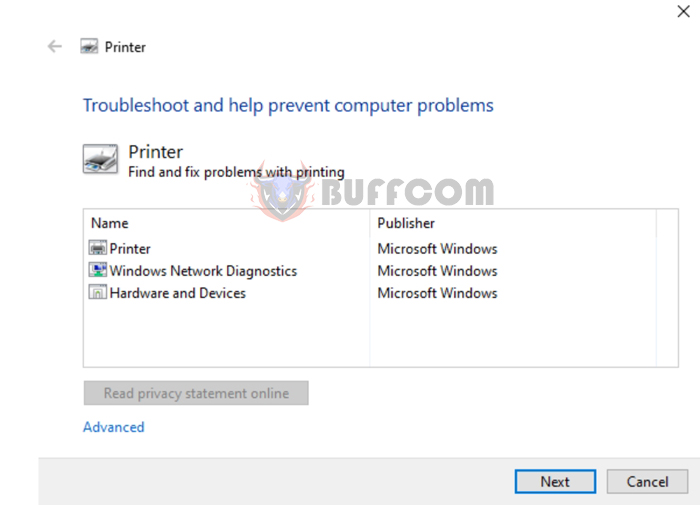
After successful download, run the Printer Troubleshooter tool. Then, click Next.
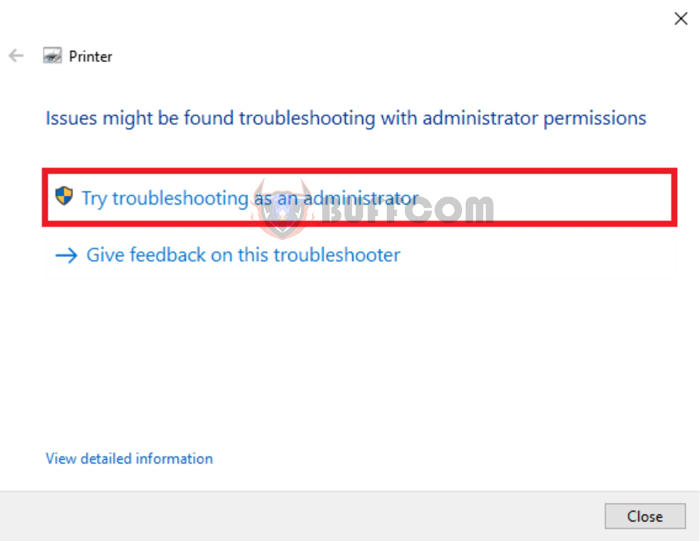
 At this point, the tool might require admin access. Select “Try troubleshooting as an administrator.”
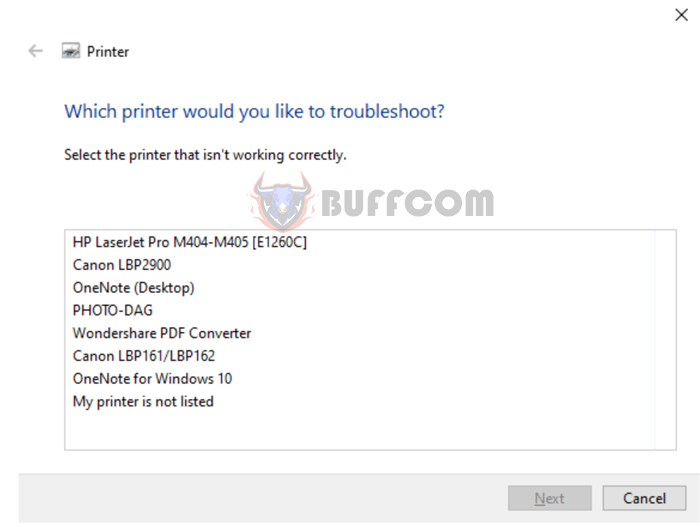
 Next, the tool will display the printers you’ve previously connected. Choose your current printer and click Next. Wait for the tool to perform repairs. Once completed, open your Word file and attempt printing to see if the issue is resolved.
 4. Update Printer Driver to the Latest Version
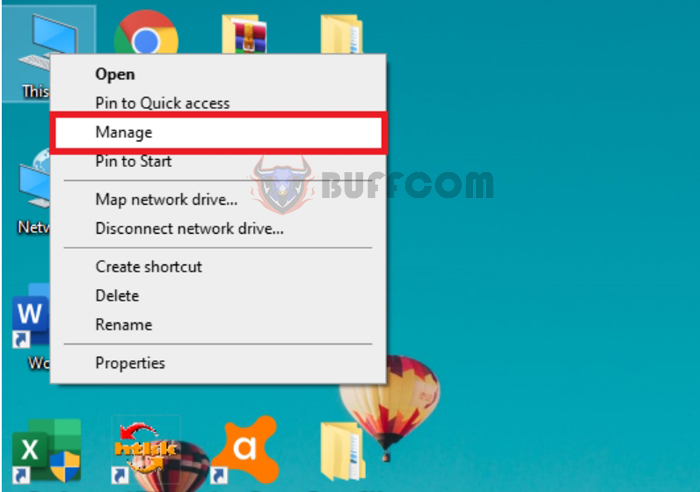
Outdated drivers often cause printing problems. Ensure you update the driver to the latest version. Right-click on the This PC icon on your desktop. From the drop-down menu, select Manage.
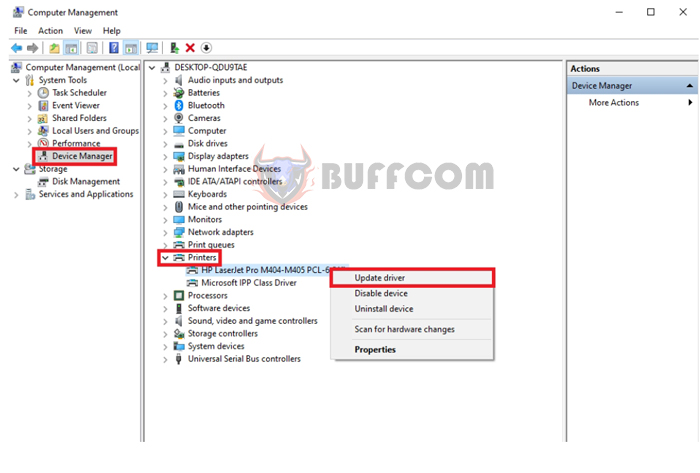
In the Computer Management window, select Device Manager => Printers => right-click on any printer driver and choose Update driver. Windows will automatically update your printer driver to the latest version.
 5. Remove and Reinstall the Printer
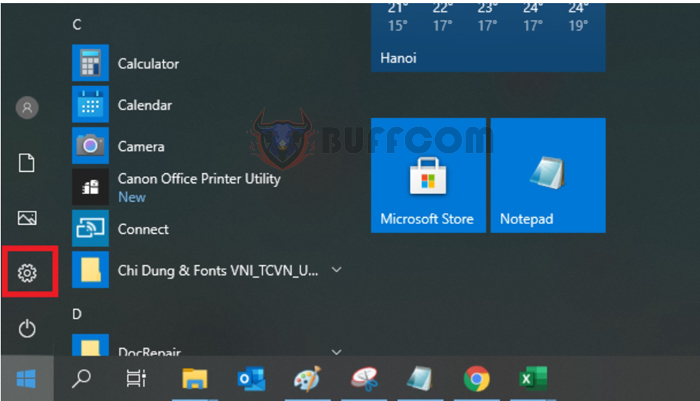
Click on the Windows icon, then select Settings.
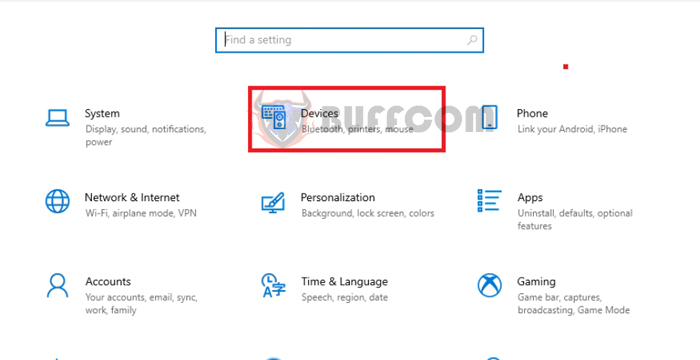
The Settings window will appear. Choose Devices (Bluetooth, printers, mouse).
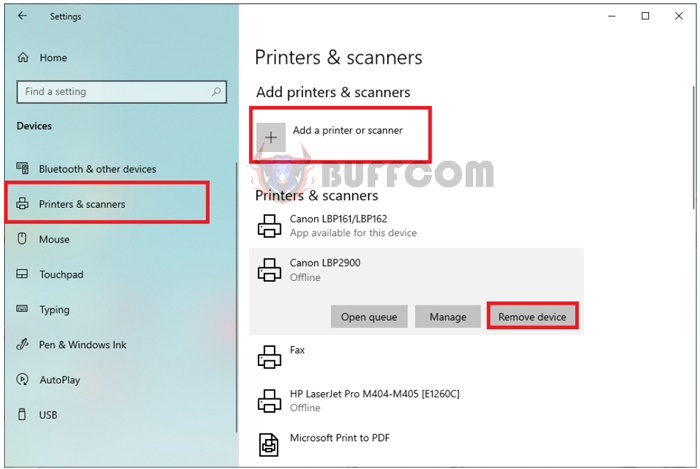
 Next, select Printers & scanners. Click on your current printer, then choose Remove device to uninstall the printer.
After removal, click on Add a printer or scanner to reinstall the printer.
