Creating And Managing Virtual Environments With Windows

Creating a Python Virtual Environment on Windows 10/11
To establish a Python virtual environment on Windows, follow these steps outlined below
How Do I Enable WSL?
Enabling WSL (Windows Subsystem for Linux):

Virtual Environments With Windows
Begin by searching for “Turn Windows features on or off” in the Start menu or search bar.
Click on the Windows Control Panel.
Open the Windows features pop-up menu.
Scroll down in the list to locate the Windows Subsystem for Linux option, then check the checkbox to enable it.
Reboot your device.Note:
For WSL, you need to download a specified version of Linux as indicated here. If you’re on Windows (without WSL), just install Python 3 from the official Python website, and the venv module is already included in that Windows installation.
Install Linux
Various Linux distributions are compatible with WSL and can be found and installed through the Microsoft Store. We suggest beginning with the Ubuntu 20.04 distribution due to its currency, robust support community, and comprehensive documentation.
Navigate to the Microsoft app store, find Ubuntu 20.04, and click on “Get.”
In PowerShell, execute the following command.
Install Linux
Now, enter “Ubuntu” in your Start menu and launch it.
You will then be prompted to establish a username and password since this is your initial interaction with the operating system.
Following that, you will be automatically logged in as the default user.
To finalize the setup, perform an update on the new operating system. Windows doesn’t handle upgrades for this OS, so it’s essential to keep Ubuntu current by manually executing the update and upgrade commands. You can achieve this by running the following command.
sudo apt update && sudo apt upgrade
If, for any reason, you cannot access the Microsoft Store app, you have the option to manually download and install a Linux distribution.
To install the downloaded distribution, go to the directory where the newly downloaded Linux distributions are located. Once in that directory, execute the following command in PowerShell (replace “app_name.aspx” with the actual name of the distribution file).
Add-AppxPackage .\app_name.appx
Next, we’ll add the path to the distro into your Windows environment PATH using Powershell (e.g. C:\Users\Admin\Ubuntu).
$userenv = [System.Environment]::GetEnvironmentVariable(“Path”, “User”)
[System.Environment]::SetEnvironmentVariable(“PATH”, $userenv + “;C:\Users\Admin\Ubuntu”, “User”)Now, we can start the distro by typing in ubuntu.exe. Next, we should initialize the new instance.
Launch a Distro
To complete the setup of your recently installed distribution, initiate a new instance by clicking the Launch button in the Microsoft Store or by opening the distribution’s .exe file from the Start menu.
If you are working with a Windows Server, you can commence the launch by executing the distribution launcher’s executable file (Ubuntu.exe) from the installation directory of the distribution.
In the final phase of the installation, the distribution’s files will be decompressed and stored locally on your PC. This process may take a few minutes but is a one-time requirement. Subsequent initializations should occur in less than a second.
Create Your Python Virtual Environment
To set up a virtual environment on Windows, follow these four fundamental steps:
- Install Python.
- Install Pip.
- Install VirtualEnv.
- Install VirtualEnvWrapper-win.
Note:
Keep in mind that these commands should be executed within the WSL Ubuntu environment. Furthermore, you might need to use the sudo command if you’re not operating as the root user.

Virtual Environments With Windows
Step 1: Install Python
For Windows, a Python installer is available. This installer automatically downloads the necessary software during the installation process.
Alternatively, Python redistributable files are available, containing the Windows builds. This option facilitates the inclusion of Python in another software bundle.
If you have installed Ubuntu, Python3 is pre-installed. To confirm this, use the following command.
which python3
The output shows the directory path where Python3 is installed.
Step 2: Install PIP
While Python3 typically includes pip by default, some users may encounter the following error.
pip command not found
If you encounter this issue, you can resolve it by using the following method to install pip on Windows.
curl https://bootstrap.pypa.io/get-pip.py -o get-pip.py
Download get-pip.py, and save the file. For this tutorial, the file is saved to the Desktop.
Start a command prompt as an administrator, navigate to your Desktop, and run the get-pip.py script. After that, pip should work system-wide.
cd Desktop
python3 get-pip.py
Here is the equivalent command using standard Python instead of Python 3.
cd Desktop
Python get-pip.py
Step 3: Install Virtualenv
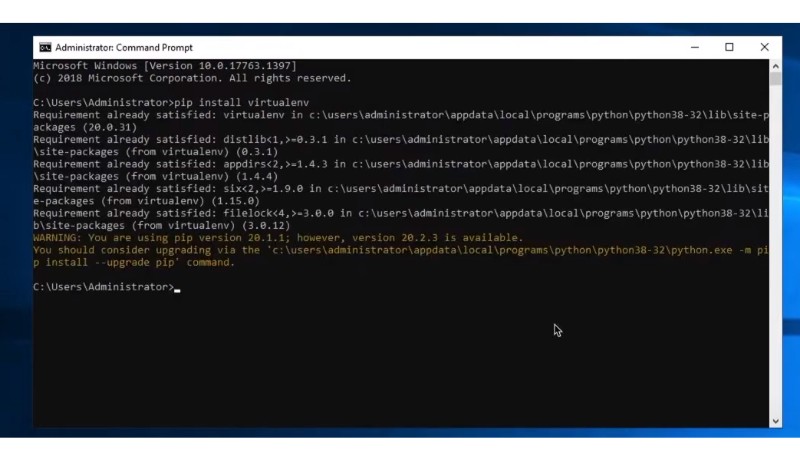
Enter the following command in your Windows command shell prompt to install Virtualenv.
pip install virtualenv
Start Virtualenv
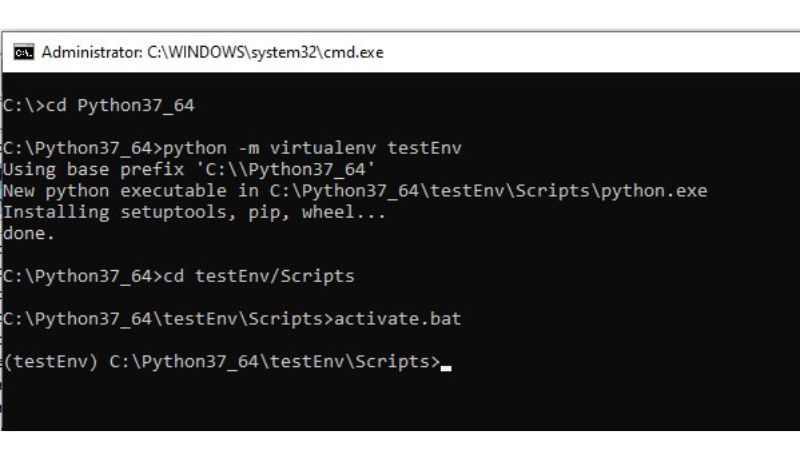
To initiate Virtualenv, navigate to your project location in your Windows command prompt. In this tutorial, the project name and location are assumed to be “my_project.”
cd my_project
Once inside the project directory, run this command.
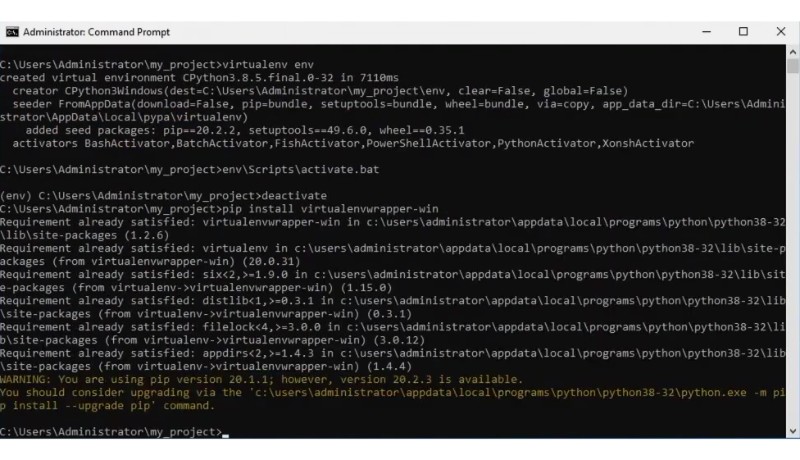
virtualenv env
Activate Virtualenv
On Windows, venv generates a batch file named activate.bat, found in the following directory.
\venv\Scripts\activate.bat
To activate the Python virtual environment on Windows, execute the script from the mentioned directory. The username will correspond to the user logged into the environment.
C:\Users\’Username’\venv\Scripts\activate.bat
Step 4: Install virtualenvwrapper-win
There are two primary recommended methods for installing the virtualenvwrapper-win script.
Install virtualenvwrapper-win With pip
You can install it using pip.
pip install virtualenvwrapper-win
Install virtualenvwrapper-win From Source
Alternatively, you can install it from the source.
git clone git://github.com/davidmarble/virtualenvwrapper-win.git
Finally, change directories to the virtualenvwrapper-win directory and run the following.
python setup.py install
Your Python venv is set up and ready to use.


