Managing Resources in Windows Server 2016
To establish quotas on Windows Server 2016, File Server Resource Manager (FSRM) becomes your go-to tool. This utility streamlines the management and organization of data residing on file servers.
Managing Resources in Windows Server 2016
Within the File Server Resource Manager tool, there are five pivotal features:
File Classification Infrastructure: This empowers you to systematically arrange files and enforce specific policies.
File Management Tasks: It facilitates the implementation of conditional policies or tasks for file management.
Quota Management: This feature is instrumental in curtailing available space within shared folders.
File Screening Management: Users can be restricted in terms of the file types they’re allowed to store. For instance, setting up a file screen could bar users from creating MP3 files on the file server.
Storage Reports: With this capability, comprehensive reports are generated, shedding light on disk utilization trends and data organization. This insight aids in detecting any unauthorized activities.
The focus of this article lies in understanding and utilizing the quota management feature within FSRM.
Setting Up File Server Resource Manager: Managing Resources in Windows Server 2016
Prior to utilizing the quota management feature, installing the File Server Resource Manager tool is imperative. Follow these steps for a swift setup using the GUI server manager:
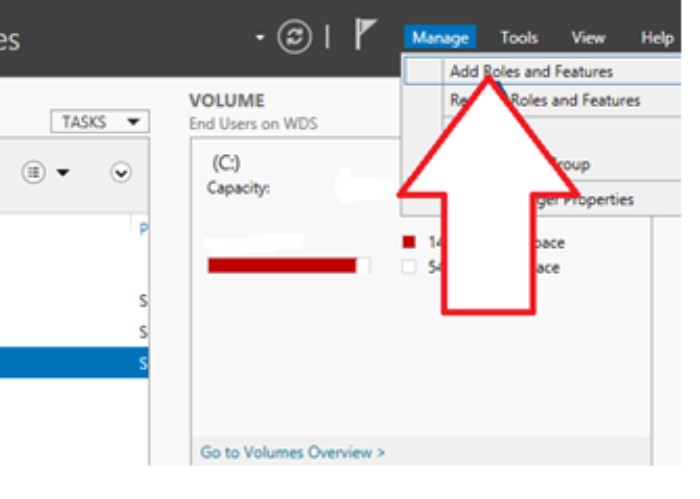
- Log in to Windows Server 2016. Access the Server Manager’s dashboard, then click on “Manage” and proceed to “Add Roles and Features”.
- On the “Before You Begin” screen, click “Next”.

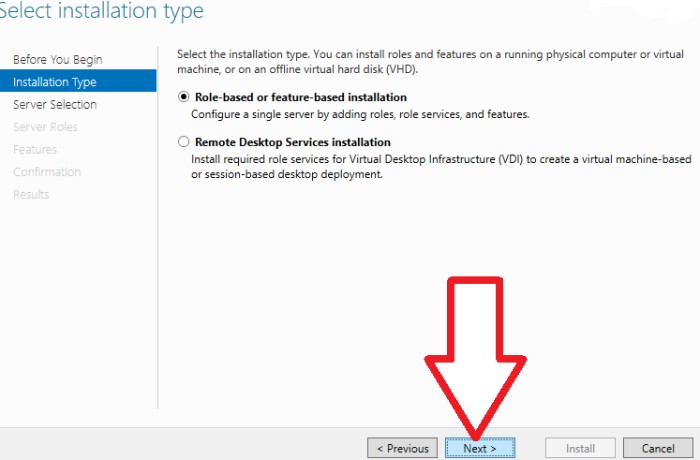
- Opt for “Role-based or feature-based installation” and click “Next”.
- Select your destination server and proceed by clicking “Next”.
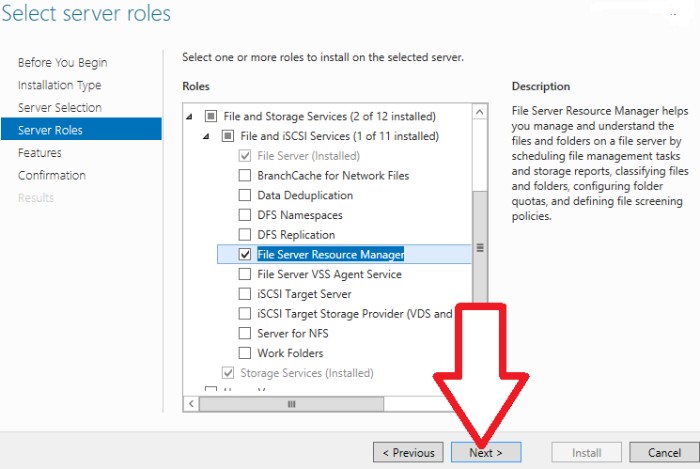
- Within the “Select Server roles” dashboard, expand “File and Storage Services” followed by “File and iSCSI Services”. Choose “File Server Resource Manager” and click “Next”.
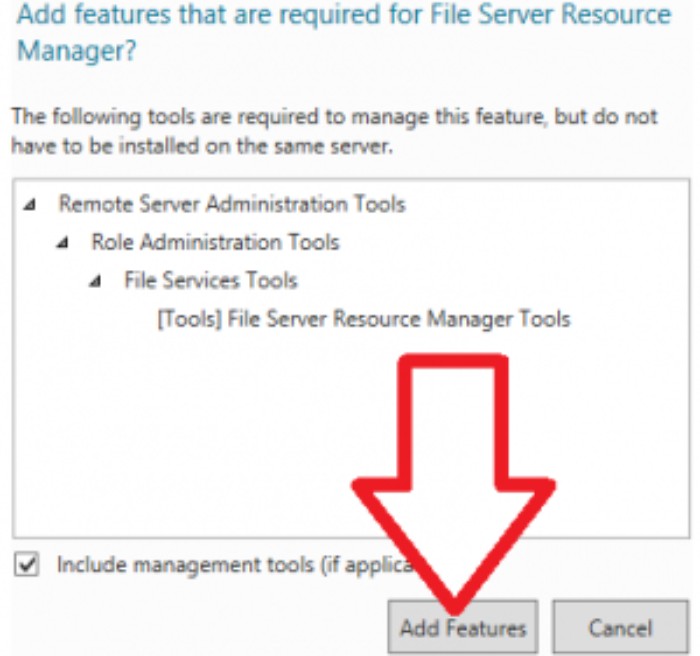
- In the ensuing window, click the “Add Features” button to include the necessary features. Then, click “Next”.
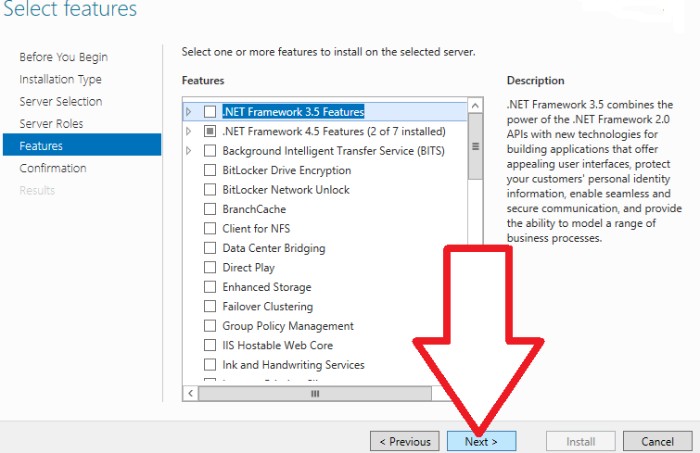
- If no extra features are needed, maintain the default settings and proceed by clicking “Next”.
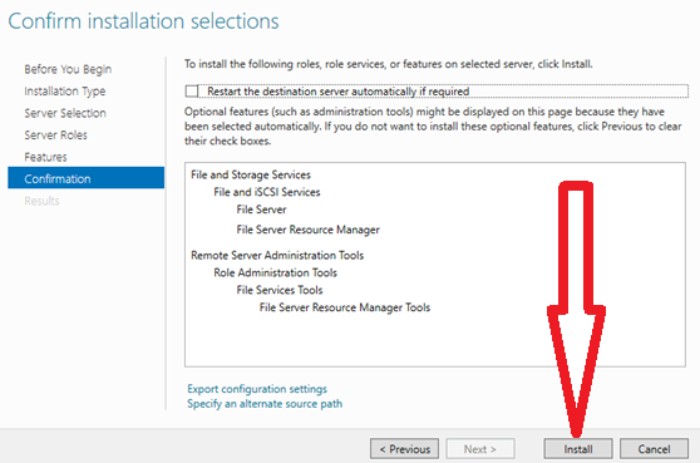
- Confirm the installation selections and commence the process by clicking “Install”.
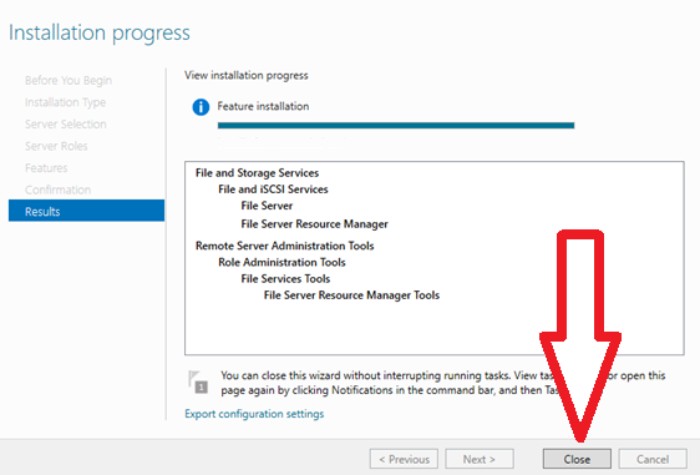
- Once the installation wraps up, click the “Close” button.
Access the File Server Resource Manager via the administrative interface to begin creating quotas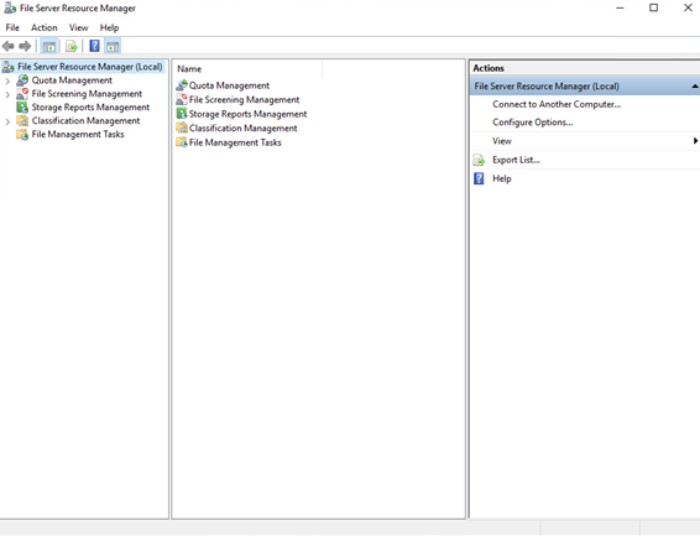 In conclusion, harnessing the power of File Server Resource Manager in Windows Server 2016, particularly its quota management feature, empowers seamless data organization and effective space restriction within shared folders. By following the outlined installation steps, you can efficiently leverage FSRM to govern and maintain your server’s file resources, ensuring optimal performance and security.

